There’s something deeply satisfying about a garden path that feels like it grew there naturally. River rock pathways deliver exactly that – a timeless aesthetic that transforms functional walkways into artistic features.
A well-designed river rock pathway provides excellent drainage, eliminating those frustrating puddles that form after every rain. Unlike concrete that cracks or wooden walkways that rot, river rock is remarkably low-maintenance and eco-friendly.
In this guide, you’ll discover everything you need to create your own stunning river rock pathway, from choosing the right style and materials to installation instructions, design tips that help you decide between DIY and professional installation.
What is a river rock pathway?
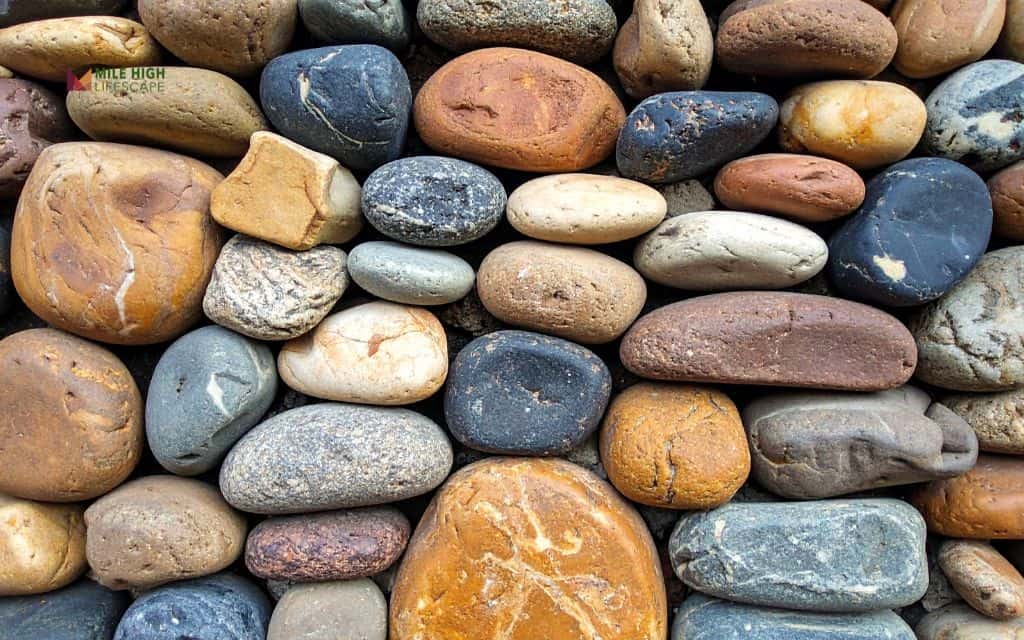
A river rock pathway uses smooth, rounded stones – shaped by water over thousands of years – as the primary walking surface or decorative element.
These naturally tumbled rocks create a softer, more organic appearance than angular crushed stone, making them ideal for gardens where aesthetics matter as much as function.
Most effective river rock pathways aren’t just loose stones scattered on dirt. They typically incorporate several key components for stability and longevity:
- Base layer: A compacted gravel or crushed stone foundation that prevents sinking and promotes drainage
- Edging materials: Metal, stone, or plastic borders that contain the rocks and maintain clean lines
- Landscape fabric: Optional barrier that reduces weed growth beneath the pathway
- Stepping stones: Sometimes integrated with river rock to create a more stable walking surface
This layered approach transforms a simple river stone pathway into a durable feature that can last decades with minimal maintenance.
Benefits of choosing a river rock path
Excellent drainage
One of the most practical advantages of a river rock pathway is its superior drainage capability.
Unlike solid surfaces that channel water into specific areas, river rock allows rainwater to permeate directly into the soil beneath.
For gardens in areas with heavy rainfall or clay soil that drains slowly, this benefit alone makes river rock an ideal choice. The spaces between stones create countless pathways for water to reach the ground, naturally managing stormwater right where it falls.
Natural beauty
River rock pathways bring an organic, timeless aesthetic that complements rather than competes with your plantings.
The smooth, rounded shapes and varied natural colors create visual interest without overwhelming the garden. This natural beauty intensifies over time as the rocks settle and patina develops, unlike manufactured materials that show wear and age less gracefully.
The irregular surface catches light differently throughout the day, adding a subtle dimension to your landscape.
Low maintenance
Once properly installed, river rock paths require remarkably little upkeep. There’s no mowing like grass paths demand, no sealing like pavers need, and no crack repair that plagues concrete walkways.
Unlike organic materials such as wood chips or bark mulch, river rock doesn’t decompose, eliminating the need for regular replenishment. This low-maintenance characteristic appeals to busy homeowners who want beautiful gardens without constant weekend projects.
Flexible and repairable
Life happens – tree roots shift, settling occurs, or you simply change your mind about the path’s route. River rock pathways offer unmatched flexibility for adjustments.
Need to widen the path? Add more rocks. Want to redirect it around a new tree? Scoop up the rocks, regrade, and reinstall. Individual sections can be easily refreshed or repaired without replacing the entire pathway.
This adaptability means your investment continues serving your evolving garden needs rather than becoming a permanent limitation.
Choose your river rock pathway style
Before you dig in, understanding the different design approaches helps you visualize which river rock pathway style best suits your garden’s character and your practical needs.
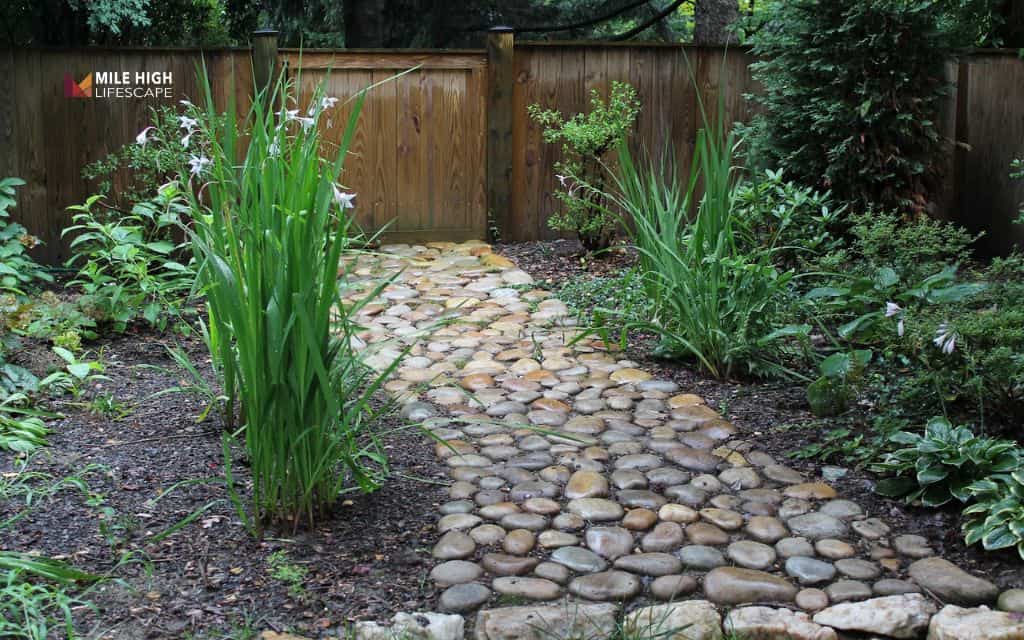
Loose river rock walkway
This is the most casual, budget-friendly approach where river rock flows freely within defined edges. The loose stones create an organic, cottage-garden feel that invites barefoot wandering. This style works beautifully for low-traffic garden areas where function matters less than aesthetics – think paths meandering through perennial beds or connecting quiet seating areas.
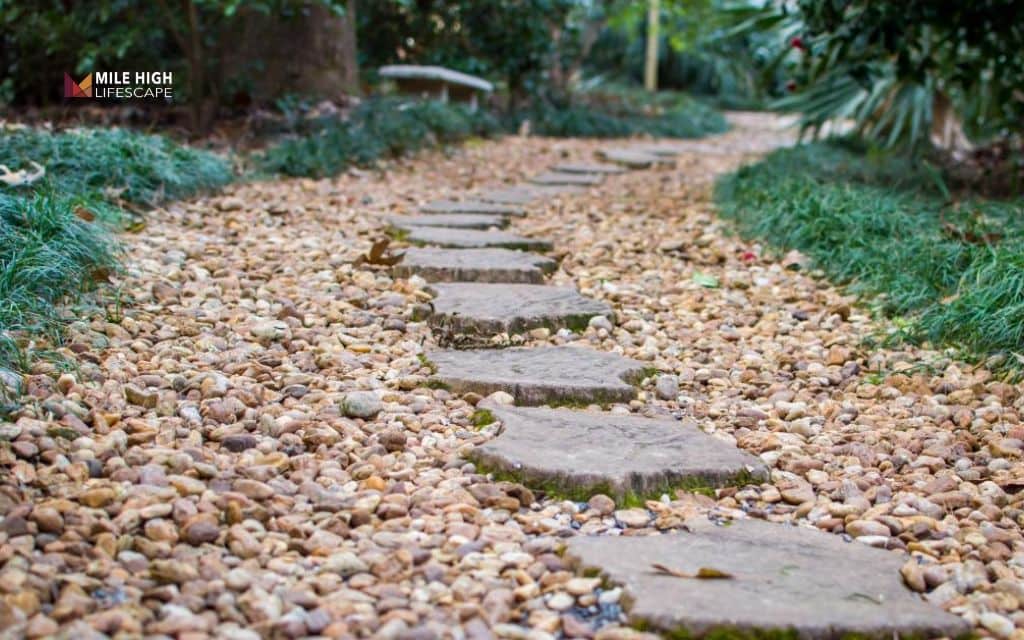
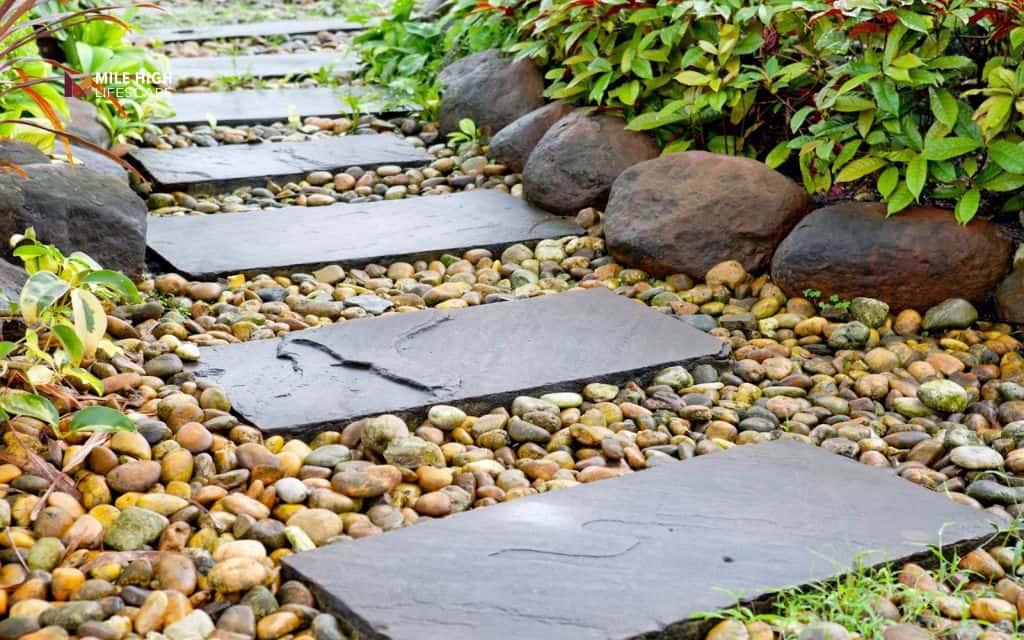
River rock with stepping stones
For higher-traffic areas that need stable footing, combining river rock with strategically placed stepping stones offers the best of both worlds. The stepping stones – typically flat flagstone, concrete pavers, or large slate pieces – provide solid footing, while river rock fills the gaps and creates visual softness.
This approach works especially well for primary garden routes or paths that elderly family members or young children will use regularly.
River stone pathway with defined edges
When you want structure and formality, a river stone pathway with crisp, defined edges delivers clean lines that work beautifully in front yards or alongside contemporary homes. Metal edging, stone borders, or even brick restraints create precise boundaries that give loose river rock a tailored appearance.
Mixed rock garden path
For gardeners who love texture and contrast, mixing river rock with other materials creates dynamic visual interest. Combine smooth river stones with angular crushed granite, or alternate bands of different-colored rocks. Some designers integrate larger river boulders as accent pieces or mix river rock with decomposed granite for varied texture.
This rock pathway approach works particularly well in rock gardens where different stone types echo the diversity of alpine landscapes. The key is maintaining enough contrast between materials so each remains distinct rather than blending into visual chaos.
Narrow rock sidewalk path
Side yards, utility areas, and tight spaces between structures often become problem zones – too narrow for mowing, too shaded for grass, but still needing access. A narrow rock sidewalk solves these challenges. Even a 18-24 inch rock path improves drainage dramatically while creating a clean, purposeful route through otherwise awkward spaces.
How to build a DIY river rock pathway (step-by-step)
Creating your own diy river rock walkway is more straightforward than many homeowners expect. With proper planning and patient execution, even beginners can achieve professional-looking results.
Step 1: Plan the layout
Begin by walking your garden and envisioning where the path naturally wants to flow. River rock paths look most organic when they follow the land’s contours rather than fighting against them. Gentle curves feel more natural than rigid straight lines, though both have their place depending on your garden’s style.
For width, plan for a minimum of 24 inches for a single-person path, but 36-42 inches works better for comfortable passage and allows two people to walk side-by-side. Narrower paths work fine for less-traveled garden routes, while main thoroughfares benefit from generous width.
Step 2: Excavate the area
Once your layout feels right, begin removing the top layer of grass, weeds, and roots. For most river rock pathways, you’ll excavate 4-6 inches total depth.
This seems shallow, but remember, you’re not building a driveway. You need enough depth for a compacted base layer (2-4 inches) plus your river rock surface layer (2-3 inches).
Remove all vegetation and roots thoroughly. Even small root pieces can regenerate and push through your finished path. A flat-edged shovel makes clean cuts along the edges, while a garden mattock helps break through tough sod or compacted soil.
Step 3: Add a stable base
This step makes the difference between a river rock path that lasts decades and one that becomes a muddy, sunken disappointment within a year. A compacted crushed stone base provides a stable foundation that prevents sinking and maintains an even surface.
Pour 2-4 inches of ¾-inch crushed stone (also called crushed gravel or road base) into your excavated path. Rake it level, then compact thoroughly using a hand tamper for small paths or a plate compactor for larger projects. The goal is a firm, stable surface that doesn’t shift when you walk on it.
Many DIYers debate using landscape fabric beneath the base.
The pros: it reduces weed growth and prevents river rock from gradually working down into soil. The cons: it can impede drainage in heavy clay soils and isn’t necessary if you maintain adequate rock depth.
For most situations, landscape fabric between the base layer and river rock works well, but it’s optional based on your specific conditions.
Step 4: Install edging
Without edging, river rock gradually migrates into surrounding beds, lawns, or bare soil. Quality edging maintains the path’s shape and prevents this spreading.
- Metal edging offers the most invisible look when properly installed. Flexible metal strips bend easily for curves and sit nearly flush with the ground. They’re durable and long-lasting, though slightly more expensive than alternatives.
- Stone borders create a more substantial, visible edge that becomes a design element itself. Fieldstone, flagstone, or cut pavers stacked along pathway edges add rustic charm and work beautifully in cottage or traditional gardens.
- Brick or paver restraints provide clean lines ideal for formal gardens. Set on edge or laid flat, bricks create crisp boundaries that complement traditional or contemporary landscapes.
Install your chosen edging securely, ensuring it sits slightly higher than your finished river rock surface. This prevents stones from spilling over while keeping the barrier subtle enough not to dominate visually.
Step 5: Add river rock
Finally, adding your river rock. Pour stones over the prepared, edged pathway and spread them evenly using a garden rake. Aim for 2-3 inches of depth for the river rock layer. This depth allows comfortable walking while providing enough coverage to suppress weeds and look substantial.
Choosing the right rock size dramatically affects both appearance and comfort. For most river rock pathways, stones between ½ inch and 1½ inches work best.
Smaller rocks can shift too easily underfoot and may wash away in heavy rain. Larger stones feel unstable and make walking uncomfortable, though they work as accents or in very low-traffic areas.
Design tips to make your rock pathway look intentional
The difference between a river rock pathway that looks professionally designed and one that seems randomly placed often comes down to thoughtful design details.
Embrace curves for natural appeal. Straight paths have their place in formal gardens, but gentle curves create the organic, flowing feel that makes river rock pathways so appealing. Curves also slow the eye and the journey, encouraging people to notice surrounding plantings rather than rushing from point A to point B.
Add low plants along edges. Soften the transition between pathway and garden bed by encouraging low-growing plants to spill slightly over the rocks. Creeping thyme, sedum, alyssum, or prostrate rosemary all work beautifully, adding fragrance and texture while making the path feel integrated rather than imposed.
Mix textures thoughtfully. Pair smooth river rock with contrasting elements—larger boulders placed strategically along the path as visual anchors, ornamental grasses that sway above the stones, or mulched beds that provide color and textural variety. This layering of textures creates depth and visual richness.
Create focal points. Guide the eye along your river rock pathway ideas by placing focal points at curves or destination areas. A special container planting, distinctive boulder, piece of garden art, or specimen plant gives walkers something to move toward and makes the path feel purposeful.
Consider lighting. Low-voltage path lights among river rocks create magical evening ambiance while improving safety. Solar options eliminate wiring hassles and align with the eco-friendly nature of rock pathways.
DIY or hire a pro?
Most homeowners can successfully tackle river rock pathway installation as a DIY project, but certain situations call for professional expertise.
DIY is great if
- Your path is relatively short: Projects under 50 feet are manageable weekend undertakings that don’t require heavy equipment or overwhelming material quantities.
- The ground is reasonably level: Gentle slopes are fine, but if you’re working on flat or nearly flat terrain, excavation and base preparation stay straightforward.
- No drainage issues exist: If your yard drains normally and you don’t have standing water problems, a basic river rock walkway won’t require complex drainage solutions.
- You enjoy hands-on projects: The work isn’t technically difficult, but it is physically demanding. If you appreciate getting outside and working with your hands, the satisfaction of a DIY river rock path makes the effort worthwhile.
Consider hiring a pro if:
- Heavy grading is needed: Significant slope changes or extensive earth moving benefit from professional equipment and expertise.
- Drainage problems exist: If water pools in your yard or you have identified drainage issues, professionals can integrate French drains, proper pitch, or other solutions into the pathway construction.
- The project is large-scale: Paths exceeding 100 feet or complex designs with multiple routes often justify professional installation. The time savings and guaranteed results offset labor costs.
- Physical limitations apply: Excavation, hauling heavy stone, and compacting base material require physical capability.
Professional installation typically costs $15-30 per square foot depending on materials, site conditions, and regional labor rates. Many landscaping companies, including specialized rock landscape services like Mile High Lifescape in the Denver area, offer design consultation even if you plan to DIY, helping you avoid costly mistakes while tackling installation yourself.
Conclusion
A thoughtfully designed river rock pathway solves practical problems while elevating your garden’s aesthetic appeal.
It transforms muddy routes into stable, attractive walkways. It manages stormwater naturally while requiring minimal maintenance. It increases your property’s visual appeal and value without the recurring costs of more complicated hardscape materials.
With proper base preparation, quality edging, and thoughtful design details, your rock path will serve your garden for decades. The investment of time and materials pays dividends in daily enjoyment, reduced yard maintenance, and the satisfaction of walking paths that feel like a natural extension of the landscape rather than an imposed feature.
Whether you tackle installation as a DIY weekend project or partner with professional landscapers, the result is the same – a functional, beautiful pathway that makes your garden more accessible and enjoyable.
Frequently asked questions (FAQs)
What size river rock is best for a pathway?
For most river rock pathways, stones between ½ inch and 1½ inches are ideal. Smaller rocks shift easily and can wash away, while larger stones feel unstable underfoot. This size range provides the best balance of comfort, stability, and long-term performance.
Do I need a base under a river rock pathway?
Yes, a compacted crushed stone base is essential for pathway durability. Most successful installations include 2-4 inches of compacted base material beneath the river rock layer. Without this foundation, rocks gradually sink into soil, creating uneven surfaces that collect water.
How do I keep weeds from growing in a river rock path?
Install landscape fabric beneath the river rock layer to block weed growth from below. Maintain a rock depth of at least 2-3 inches and remove any surface weeds promptly while they’re small. Regular quick inspections keep your pathway looking clean with minimal effort.
Are river rock pathways comfortable to walk on?
River rock paths are comfortable for light garden use, especially with properly sized stones (½ to 1½ inches). For high-traffic areas or better stability, combine stepping stones with river rock to create a solid walking surface. The smooth, rounded stones are gentler underfoot than angular crushed stone.
How much does it cost to build a river rock pathway?
DIY river rock pathways typically cost $3-8 per square foot for materials, including base, fabric, edging, and rock. Professional installation ranges from $15-30 per square foot depending on site complexity and regional labor rates. Bulk material purchases significantly reduce costs compared to bagged products from home improvement stores.