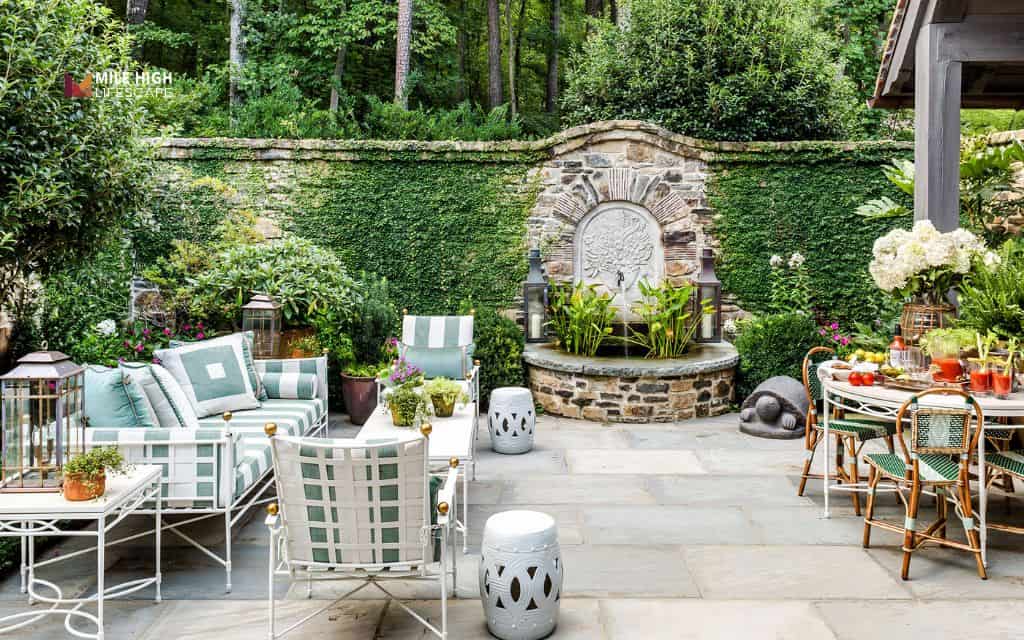
If you’ve been dreaming of a charming outdoor sitting area that feels like it grew straight from the earth, building a flagstone patio might be exactly the project you’ve been looking for.
Unlike poured concrete slabs or uniform pavers, flagstone brings an organic, one-of-a-kind character to any backyard – each stone slightly different in shape, tone, and texture, creating something that feels truly yours.
For garden lovers especially, flagstone is a perfect match. The natural gaps between stones invite low-growing groundcovers like creeping thyme or Irish moss to soften the edges, while the earthy surface complements garden borders rather than competing with them.
Whether you’re creating a cozy reading nook tucked between garden beds or a shaded dining area off the back door, this guide will walk you through the full DIY flagstone patio process from planning to the final joint fill.
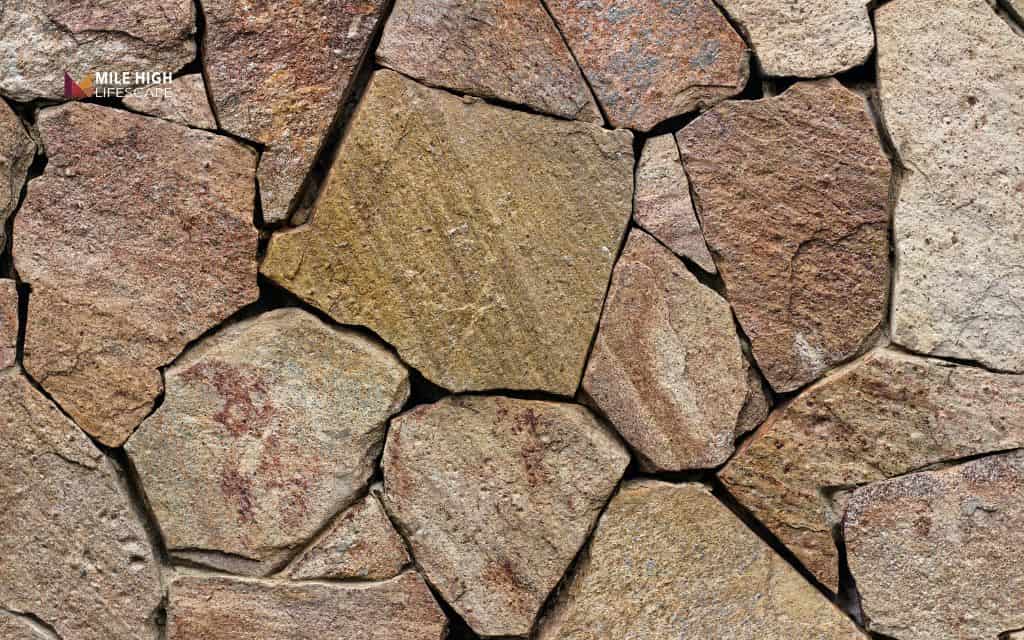
What is flagstone?
Flagstone is a broad term for flat, naturally occurring sedimentary rock that splits into relatively thin, smooth slabs. It’s quarried rather than manufactured, which means no two pieces are perfectly identical.
That natural variation is exactly what makes flagstone patio installation look so beautiful and why it requires a bit more patience to lay than a simple grid of uniform pavers.
Common flagstone types include:
- Sandstone: warm tones of tan, rust, and gold; widely available and easy to cut
- Limestone: lighter grays and creams; durable but can be slippery when wet if untextured
- Bluestone: a dense, blue-gray stone popular in the Northeast; known for durability and a clean, refined look
Before you start: Planning your flagstone patio
Good planning is what separates a flagstone patio that lasts 20 years from one that heaves, shifts, and floods. Spend time here and the actual installation becomes much smoother.
Step 1: Choose the right location
Walk your yard after a heavy rain and watch where water naturally flows. The ideal spot for your patio has good natural drainage, meaning water moves away from the area rather than pooling.
Avoid low spots or areas where the ground stays soggy for days after rain – moisture trapped beneath flagstone is the primary cause of sinking and frost heave.
Also consider:
- Tree roots: Large roots can lift flagstone over time. Stay at least 10 feet from mature trees when possible, and avoid setting stone directly over visible surface roots.
- Sun and shade patterns: A south or west-facing patio can get extremely hot in summer afternoons. Consider how much shade the space receives and whether you’ll want a pergola or umbrella for comfort.
- Proximity to the house: Patios adjacent to the foundation must always slope b from the structure. A minimum slope of ¼ inch per foot is required by most building codes and is simply good practice for protecting your foundation.
Step 2: Decide patio size & layout
Once you’ve chosen your location, it’s time to figure out how much space you actually need. Measure based on how you plan to use the patio:
- Small seating nook (2 chairs + side table): approximately 8×10 feet
- Dining area (table for 4 – 6): approximately 12×16 feet
- Entertaining patio with lounge furniture: 16×20 feet or larger
A common mistake in DIY flagstone patio planning is underestimating the space needed once furniture is in place. As a general rule, allow at least 3 feet of clearance around all furniture so movement feels comfortable and the space doesn’t feel cramped.
Sketch your layout on paper before you dig. Mark the patio footprint with landscape stakes and string to visualize the shape in the actual yard. Irregular, freeform outlines suit flagstone beautifully and are often easier to achieve than perfect rectangles. Step back, live with the outline for a day, and adjust before any excavation begins.
Step 3: Choose your installation method
There are 2 main approaches to installing flagstone patio surfaces, and understanding the difference before you buy materials is critical.
Option A: Dry-Laid (Recommended for DIY)
Dry-laid flagstone installation means the stones rest on a compacted crushed stone base and a sand leveling layer, with no mortar binding them together. This method:
- Allows water to drain freely through the joints, preventing frost heave
- Individual stones can be lifted and reset anytime
- Does not require masonry skills or specialized tools
- Accommodates natural ground movement in climates with freeze-thaw cycles
Option B: Mortared
Mortared flagstone is set in a bed of mortar over a concrete slab, with mortar also filling the joints. This creates a more polished, permanent surface but it comes with significant trade-offs for DIYers:
- Requires a poured concrete base (adds cost and complexity)
- Mortar joints can crack if the slab shifts even slightly
- Repairs require cutting out old mortar and re-setting stones
- Not ideal for areas with significant freeze-thaw activity unless the slab and base are engineered correctly
Unless you have masonry experience and a professionally poured slab, stick with dry-laid for this project.

Tools & materials checklist
Before you begin how to install flagstone patio work, gather everything on this list. Having all tools on-site before you start prevents mid-project delays.
Tools:
- Shovel (flat spade for edging, round point for bulk digging)
- 4-foot level and a shorter torpedo level
- Plate compactor (highly recommended over manual tamping for larger patios)
- Rubber mallet for setting stones without chipping
- Hand tamper for smaller areas or tight corners
- Landscape stakes and string for marking layout and checking grade
- Wheelbarrow for moving base materials and stone
- Safety glasses and gloves
Materials:
- Crushed stone base: 4–6 inches compacted depth (¾-inch crushed limestone or road base gravel)
- Coarse sand leveling layer: approximately 1 inch depth
- Flagstone: calculate square footage of patio + 10–15% overage for cuts and breakage
- Joint fill material: sand, decomposed granite, or polymeric sand (see Step 6 for details)
- Steel or aluminum landscape edging (optional but recommended to retain base material and define patio edges cleanly)
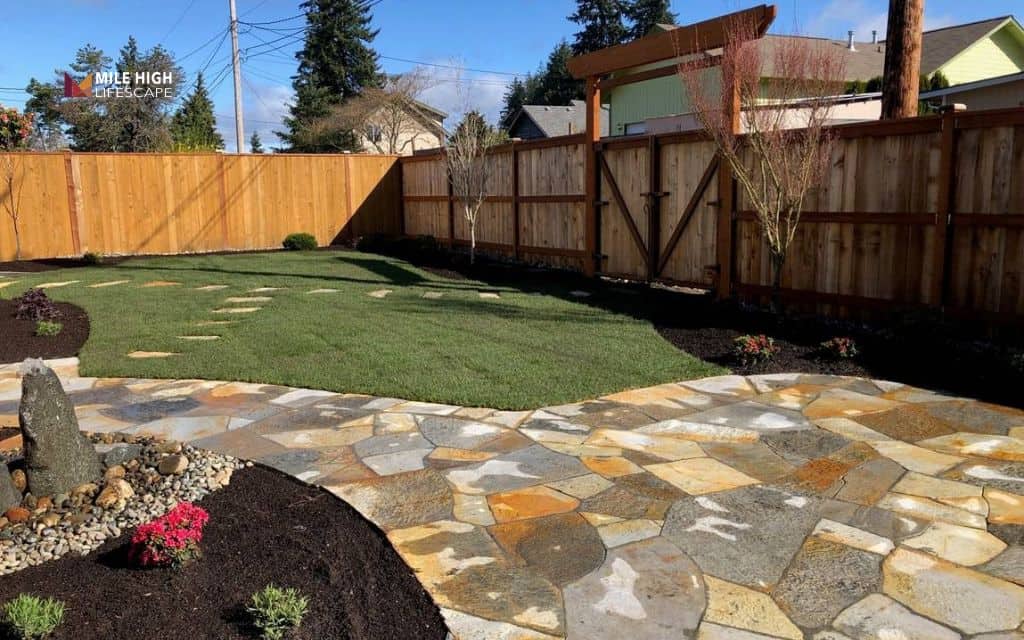
How to build a flagstone patio
This is the core of your flagstone patio installation process. Work through each step carefully – rushing the base preparation is the most common reason DIY flagstone patios fail.
Step 1: Mark & excavate
Using your landscape stakes and string, mark the full perimeter of the patio. For irregular shapes, use a garden hose to lay out the outline and mark it with spray paint or sand before stringing.
Once the perimeter is marked, begin excavating. For a dry-laid flagstone patio, you’ll need to dig 6 – 8 inches deep below the finished surface grade. This depth accommodates:
- 4–6 inches of compacted crushed stone base
- 1 inch of leveling sand
- 1.5–2 inches of flagstone thickness
Use a flat spade to cut clean edges along the perimeter string. Dig slightly deeper than needed – it’s easier to add material back than to remove more once the base is in.
Remove all organic material, roots, and soft soil from the excavated area. If you encounter very loose or silty soil, compact the subgrade before adding base material.
Step 2: Add & compact the base
The crushed stone base is the foundation of a long-lasting flagstone patio. Skipping or shortcutting this step is the single most common reason flagstone patio projects fail.
Add crushed stone in 2-inch layers, compacting each layer with the plate compactor before adding the next. Never dump the full 4 – 6 inches at once and compact only the top – the lower layers won’t compact properly and will settle unevenly under weight.
Compact each layer until the surface is firm and no longer shifts underfoot. Run the plate compactor in overlapping passes, working in two perpendicular directions for thorough coverage.
Compaction Test: After compacting each layer, walk firmly across the entire surface. Your feet should leave no impression or shift in the stone. If the base still feels soft or spongy, compact again.
Step 3: Add the leveling layer
Once your compacted base is solid and at the correct depth, spread a 1-inch layer of coarse sand over the entire area. This sand layer serves as the final leveling medium. It allows small height adjustments as you set each stone.
Use a long screed board (a straight 2×4 works well) to drag the sand smooth. Set screed guides (conduit pipes work great) at the correct height and drag the board across them to create a perfectly even surface.
Maintain a consistent slope in the sand bed. The finished patio surface should slope ¼ inch per foot away from your house or any adjacent structure. This slope is subtle enough to be imperceptible underfoot, but significant enough to direct water away from the foundation after rain.
Stop & check slope: Use a level and tape measure to verify slope across the sand bed before laying a single stone. Correcting slope issues after stones are set is far more work than addressing them at this stage.
Step 4: Lay the flagstone
Begin at a corner or edge and work inward. For each stone, lay it dry on the sand bed and step back to evaluate the fit, joint spacing, and visual balance before committing.
Aim for joints between ¾ inch and 2 inches wide – enough to allow for groundcover planting or joint fill, but not so wide that the surface feels unstable underfoot.
As you work across the patio, rotate and flip stones to find the best fit with neighbors. Flagstone edges are irregular, so part of the process is finding pieces whose edges complement each other naturally. Occasionally you’ll need to trim a stone – a cold chisel and hammer work for rough cuts, while a circular saw with a masonry blade allows cleaner lines.
After setting every 4–5 stones, kneel down and visually scan across the surface at eye level. Stones with edges that stick up noticeably above neighbors are trip hazards. Address them immediately by adjusting the sand beneath.
Step 5: Adjust & set the stones
Once stones are positioned, it’s time to set them properly into the sand bed.
Use a rubber mallet to gently tap each stone into the sand, listening for a solid sound that indicates full contact with the base. A hollow-sounding stone is only touching at the edges or corners and will rock or crack under weight.
Check each stone with a level both across its own surface and in relation to adjacent stones. Stones should be flush or nearly flush with their neighbors. Variations of more than ¼ inch between adjacent stones can create tripping hazards.
To raise a stone slightly, lift it and add a small amount of sand beneath the low corner. To lower it, remove sand. Make these adjustments gradually – a little sand goes a long way.
Re-check slope throughout this process to make sure the overall patio grade is maintained as stones are set. It’s easy to lose track of slope when focusing on individual stone leveling.
Step 6: Fill the joints
The final step is choosing and applying your joint fill material. This choice affects the patio’s appearance, drainage, weed resistance, and long-term maintenance.
Option 1: Sand
Plain coarse sand swept into the joints creates a very natural look that complements garden-style patios beautifully. It’s inexpensive, easy to apply, and allows water to drain freely.
The trade-off is that sand washes out over time and requires occasional refreshing. Weeds can establish in sand joints, though regular sweeping and hand-pulling keeps them manageable.
Option 2: Decomposed granite (DG)
Decomposed granite swept into joints offers greater stability than plain sand while still maintaining a natural, earthy appearance.
It packs more firmly, reducing how often joints need refilling. DG also allows good drainage and complements the warm tones of most flagstone types.
Option 3: Polymeric sand
Polymeric sand contains fine particles that bind together when activated with water, creating a semi-firm joint that resists both washout and weed germination. It’s the most durable joint fill option and requires the least ongoing maintenance.
Once set, it also deters ants from nesting in joints. The finished look is slightly more formal than plain sand or DG. Follow the manufacturer’s instructions carefully – incorrect application (especially moisture during installation) can cause hazing on the stone surface.
How much does it cost to build a flagstone patio?
Understanding the cost of flagstone patio installation before you start helps you plan your budget realistically and decide where to invest versus save.
Key cost variables include:
- Stone type and thickness: Bluestone tends to cost more than sandstone; thicker stone is more expensive but more durable
- Stone finish: Natural cleft (rough-split) is typically more affordable than sawn-edge or thermal-finished stone
- Patio size: Larger patios obviously require more material; costs generally improve slightly per square foot at larger volumes
- Tool rental: A plate compactor rental typically runs $60 – $100 per day, a worthwhile investment for any patio over 80 square feet
- Delivery charges: Stone and gravel are heavy; local delivery from a stone yard or landscape supplier is usually necessary and adds to the total
Maintenance tips for a long-lasting flagstone patio
One of the best things about a properly installed dry-laid flagstone patio is how little ongoing maintenance it requires. Keep these simple practices in mind:
- Sweep regularly. Leaf debris and organic material trapped in joints accelerates weed germination and can slowly degrade joint fill. A quick weekly sweep during fall keeps joints clean.
- Refill joints annually or as needed. Sand and DG joints will slowly lose material to rain and wind. A bag of joint fill swept in each spring keeps joints topped up and stones stable.
- Reset shifted stones promptly. In climates with freeze-thaw cycles like Denver’s, occasional stone movement is normal. When you notice a stone that has shifted or tilted, reset it as soon as possible – ignoring it allows the base beneath to erode further and makes the repair more involved.
- Control weeds early. A few minutes of hand-weeding when plants are small prevents root systems from establishing in joints and potentially lifting stones. Polymeric sand significantly reduces this task if weeds are a major concern.
- Inspect drainage patterns seasonally. After major storms or spring snowmelt, confirm that water is still draining away from your house and not pooling on or around the patio. Gradual settling can sometimes alter drainage patterns over years.
Should you DIY or hire a pro?
Setting flagstone patio work is genuinely DIY-friendly for motivated homeowners – but that doesn’t mean professional installation is never the better choice. Here’s how to decide:
DIY is a strong choice when:
- Your patio is under 200 square feet
- The site is relatively flat with existing good drainage
- You’re comfortable with physical labor including digging and operating a plate compactor
- You enjoy hands-on projects and are willing to take the time to do base prep correctly
- You want to reduce cost and have flexibility in the project timeline
Hiring a professional makes more sense when:
- Your patio is large (300+ square feet) or has a complex, multi-level layout
- Your site has significant grade changes requiring professional earthwork
- You have drainage concerns adjacent to the foundation that need engineered solutions
- You want the work done quickly with warranty-backed results
- You’re combining flagstone with other hardscape elements like retaining walls, outdoor kitchens, or irrigation
The Mile High Lifescape team specializes in landscape rock installation, especially flagstone rock, throughout the Denver metro area. If you’re unsure whether your project is in DIY territory or needs professional support, we’re happy to walk the site with you and give an honest assessment.
Conclusion
Building a flagstone patio is one of the most rewarding outdoor projects a garden lover can take on. It requires patience, physical effort, and attention to base preparation – but none of it demands specialized masonry skills or expensive equipment beyond a rented plate compactor.
When you:
- Excavate and compact a solid crushed stone base to prevent settling and frost heave
- Plan and verify your drainage slope before a single flagstone goes down
- Lay stones thoughtfully, fitting them together with consistent joint spacing
- Choose the right joint fill for your aesthetic and maintenance preferences
…you’ll end up with a patio that’s structurally sound, beautifully natural, and completely personal. One that invites groundcovers to creep between joints, blends seamlessly into garden borders, and holds up through Denver’s demanding freeze-thaw seasons.
Ready to get started? Reach out to the Mile High Lifescape team for a consultation or use this guide to begin planning your dream garden retreat today.
Frequently asked questions (FAQs)
How deep should the base be when building a flagstone patio?
For a dry-laid flagstone patio, excavate 6 – 8 inches total: 4 – 6 inches of compacted crushed stone base plus 1 inch of leveling sand. In freeze-thaw climates, aim for the deeper end to prevent frost heave and settling.
Can you lay a flagstone patio directly on soil?
No, setting flagstone directly on soil leads to sinking, uneven surfaces, and drainage problems within just a few years. A properly compacted crushed stone base is the most critical step in any lasting flagstone installation.
What is the best material to fill joints in a flagstone patio?
Sand offers a natural look with easy maintenance, decomposed granite provides added stability and a rustic feel, and polymeric sand delivers the best weed resistance with the most durable joint. Choose based on your maintenance preference and the aesthetic you want to achieve.
How much does it cost to build a DIY flagstone patio?
Costs vary by stone type, patio size, and tool rentals with stone selection having the biggest impact on your total budget. A DIY flagstone patio is significantly more affordable than hiring a contractor for the same project.
Is a dry-laid or mortared flagstone patio better?
For most DIYers, dry-laid is the better choice because it allows natural drainage, handles freeze-thaw movement, and is easy to repair. Mortared patios require a poured concrete slab and masonry skills, making them far less practical for a do-it-yourself project.
