Understanding your soil’s health is the key to growing strong, vibrant grass, and that’s why learning how to test soil for lawn is so important. Soil testing reveals essential details about pH levels, nutrient composition, and soil structure, helping you make informed decisions about fertilization, watering, and overall lawn care strategies.
By knowing what your soil needs, you can improve nutrient absorption, prevent common lawn problems, and create the ideal conditions for healthy grass growth.
In this guide, we’ll walk you through the step-by-step process of how to test soil for lawn, ensuring you get the best results for your yard. And for homeowners in Denver seeking expert assistance, Mile High Lifescape is a trusted name in tree and lawn care, offering professional services to help you achieve the perfect lawn. Ready to dig in? Let’s get started!
What is a soil test?
A soil test helps you understand what nutrients your lawn needs to grow healthy and strong. It checks for both big nutrients like nitrogen and small ones that help plants grow. The test also looks at the pH level of the soil to make sure it’s balanced for your grass.
To do the test, you simply collect a small sample of your soil in a container or bag. Then, send it to a specialist who can analyze it and suggest how to improve your soil. Knowing how to test soil for lawn helps you give your grass exactly what it needs to thrive!

Why Soil Testing Is Important for Lawn Health
Soil testing is a key part of taking care of your lawn. It gives you important information about how healthy your soil is and what it needs to thrive. While it might seem like a small thing, knowing how to test soil for lawn can really make a big difference in how well your grass grows.
Finding Nutrient Imbalances
When you test your soil, you’ll learn if your lawn has too little or too much of important nutrients like nitrogen, phosphorus, and potassium. This helps you give your lawn exactly what it needs, without wasting fertilizer. It also helps you avoid harming the environment with too much fertilizer.
Understanding Soil pH
The pH level of your soil shows if it’s too acidic or too alkaline. If the pH is off, your plants can’t absorb the nutrients they need, which can stop them from growing properly. A soil test helps you know if you need to add lime or sulfur to fix the pH and make your soil perfect for growing.
Fixing Problems Before They Happen
If your grass is yellow, not growing well, or you have weeds, it might be because your soil is out of balance. By testing your soil regularly, you can find out what’s wrong before it becomes a bigger issue. This lets you fix problems early and keep your lawn healthy.
Saving Money with Smart Fertilizing
Instead of throwing fertilizers and soil treatments at your lawn without knowing what it actually needs, soil testing helps you spend money wisely. You’ll only use the right amount of nutrients, saving you time, money, and effort in the long run.
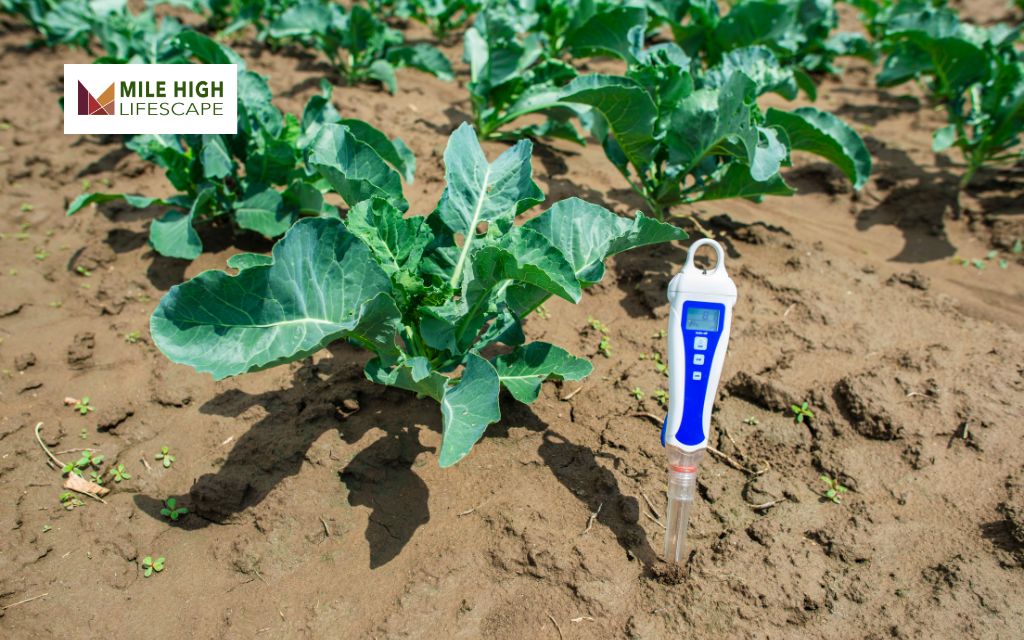
When to Test Your Lawn’s Soil
Warm Season Grass
The best time to test your soil depends on where you live and the type of grass you have. For warm-season grasses like zoysia and bermuda, it’s ideal to test your soil between March 15th and April 30th.
Cool Season Grass
If you have cool-season grass like Kentucky bluegrass, the best time to test your soil is during August or September.
New Lawns
Before you put down new sod, seed, or plugs, it’s a good idea to test your soil. This will help you understand the soil’s condition and let you make any changes before planting. By testing first, you can check nutrient levels, soil pH, and other factors. This way, you can fix any problems and create the best possible environment for your new lawn to grow strong and healthy.
How often should I test my soil?
- You should test your soil every 1 to 3 years to keep your lawn and garden healthy.
- If you notice problems like grass or plants not growing well, it’s a good idea to test your soil more often.
- If you’ve had heavy storms or lots of rain, it’s a good idea to test because flooding can change the salt levels in the soil.
- After long dry spells, testing helps you see if the lack of rain has affected the nutrients in the soil.
- If you’ve done any big changes like construction or landscaping, it’s helpful to test the soil to understand how those changes might have impacted it.
Methods for Testing Soil for Lawn
Understanding how to test soil for lawn is a key step in creating a beautiful, healthy yard. Testing your soil helps you understand if it needs more nutrients, if the pH balance is off, or if there are issues with soil texture.
With this information, you can make the right adjustments to help your grass grow strong and vibrant. Here are a few ways to test your soil effectively:
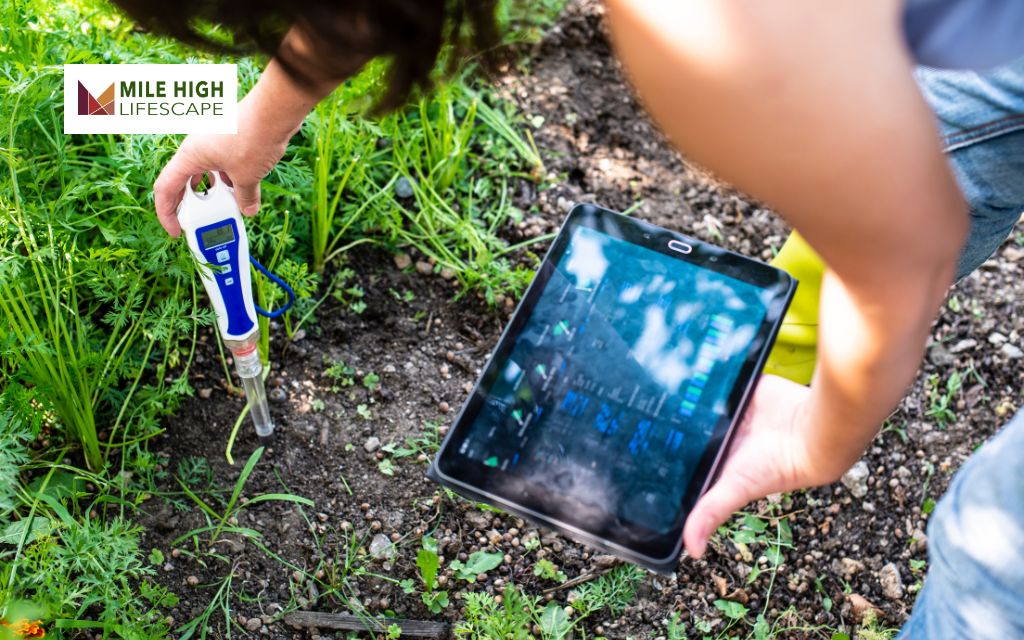
Using a Home Soil Test Kit (Quick & Easy)
A home soil test kit is a quick and easy way to check your soil’s health. It helps you figure out your soil’s pH, as well as the amount of important nutrients like nitrogen, phosphorus, and potassium.
Steps to use a soil test kit:
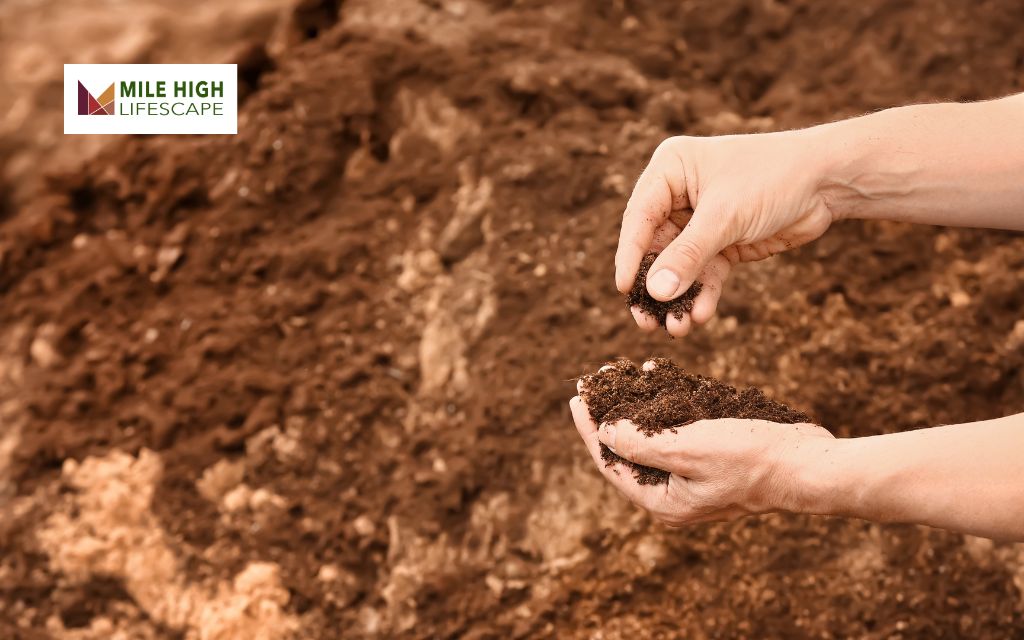
- Collect Samples: Use a small shovel or trowel to take a few soil samples from different spots in your lawn. Go about 3–4 inches deep.
- Mix and Dry: Put the samples in a clean container and let them dry.
- Test: Follow the instructions in the kit. Usually, this involves putting soil in a test chamber and adding the solution.
- Compare Results: Use the color chart in the kit to see what the results mean. This will help you know what changes your soil needs.
Home test kits are fast and easy, but they may not be as detailed as lab testing.
Sending Soil Samples to a Lab (Most Accurate)
For the most accurate results, you can send your soil samples to a professional lab. This gives you a full picture of your soil’s nutrients, pH, and other important factors.
Steps for lab testing:
- Collect Samples: Take soil from different areas of your yard (avoid spots with lots of fertilizer).
- Mix and Package: Combine your samples in a clean container, let them dry, and then put a small amount in a sealed bag.
- Send to the Lab: Find your local agricultural extension office or a soil testing lab. You can usually mail in your samples.
- Analyze Results: Once you get your results, follow the advice on what fertilizers or soil adjustments you need.
Lab testing provides the most detailed and accurate recommendations for your soil’s needs.
DIY Soil Testing (Budget-Friendly)
If you want a cheap way to test your soil, you can try these easy DIY methods using things you probably already have at home.
Baking Soda and Vinegar Test (pH):
- Take two soil samples and put them in separate containers.
- Pour vinegar into one sample. If it bubbles, your soil is alkaline.
- Add water and baking soda to the second sample. If it fizzes, the soil is acidic.
- If there’s no reaction, your soil is probably neutral, which is good for most lawns.
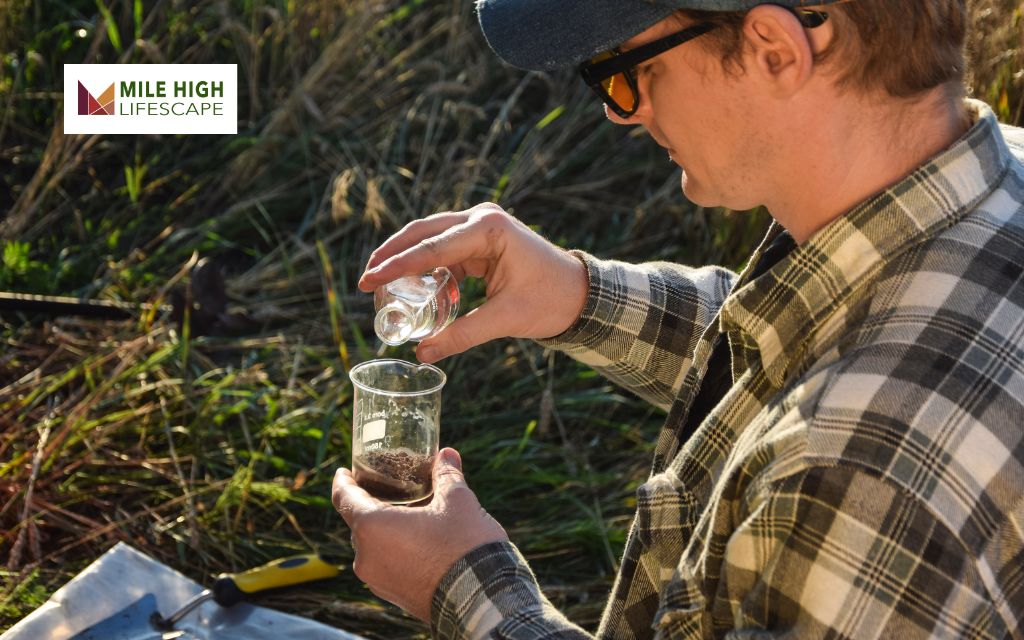
Soil Texture Test (Using a Jar and Water):
- Fill a jar halfway with soil and add water.
- Shake the jar well and let it sit overnight.
- Look at the layers: sand will settle first, then silt in the middle, and clay will settle on top.
These DIY tests are a good starting point but should be used with a more detailed kit or lab test for more accurate results.
Testing your soil helps you know exactly what it needs to be healthy and thriving. The better you understand your soil, the easier it will be to keep your lawn looking great!
Step-by-Step Guide: How to Test Soil for Lawn
Testing your soil is a key step in understanding how healthy your lawn is and what it needs to grow well. Whether you use a DIY test kit or send your samples to a lab, proper testing helps you get accurate results. Here’s how to test your lawn’s soil:
Step 1: Choose Your Testing Method
First, decide whether you want to use a DIY test kit or send your samples to a professional lab. DIY kits are easy to find in garden stores and give you basic information like the pH levels and nutrient content of your soil. If you need more detailed results, a professional lab can provide a thorough analysis.
Step 2: Pick the Right Areas for Sampling
Next, select areas of your lawn that represent the overall soil quality. It’s important to take samples from different parts of your yard to get a good idea of your lawn’s health.
Consider factors like soil texture, how water drains, and any past fertilizer use. Use a clean shovel or tool to dig about 4-6 inches into the soil for your samples. Combine several small samples from each area into one larger sample.
Step 3: Prepare Your Soil Samples
Clean your samples by removing any rocks, sticks, or plant material. If the soil is too wet, let it dry out a bit so it’s not soggy. Put your cleaned samples into plastic bags or boxes and label them so you know where each sample came from.
Step 4: Follow the Test Kit Instructions
If you’re using a DIY kit, carefully follow the instructions that come with it. These kits usually have simple steps for testing things like pH and major nutrients using color-changing solutions. Make sure to use the kit properly and follow the steps to get the best results.
Understanding Soil Test Results
Interpreting your soil test results is an important part of caring for your lawn. It helps you understand what your soil needs to be healthy and support your plants. Here’s how to make sense of your soil test results:
Check Nutrient Levels
Your soil test will show the levels of important nutrients like nitrogen (N), phosphorus (P), potassium (K), calcium (Ca), magnesium (Mg), and smaller nutrients like iron (Fe), zinc (Zn), and manganese (Mn). Compare these results to the ideal levels for your soil and the plants in your yard to see if they are too low, too high, or just right.
Understand pH Levels
The pH level tells you if your soil is too acidic, neutral, or alkaline. If your soil is too acidic or too alkaline, plants may not be able to absorb nutrients properly. The soil test will show you the pH of your soil, so you can adjust it if needed. Most lawns prefer a pH close to 7, which is neutral.
Look for Soil Imbalances or Deficiencies
Sometimes, a soil test will show that your soil is missing key nutrients, which can cause problems like weak grass or poor plant growth. For example, low nitrogen can cause yellowing leaves, and low phosphorus can hurt root growth. If your test shows deficiencies, you can fix them with the right fertilizer or soil amendments.
Follow Recommended Actions
Your soil test results will often include advice on what to do next. This could be adding specific fertilizers, adjusting the pH, or using other soil amendments. Be sure to follow these suggestions carefully and apply them at the right time to get the best results.
Keep Monitoring Your Soil
Soil testing is something you should do regularly, not just once. Testing your soil before each growing season helps you track how it’s changing and allows you to make adjustments as needed. Keep a record of your test results and the actions you take, so you can improve your lawn year after year.
How To Test Soil For Lawn: Common Mistakes
Only Using One Soil Sample
A big mistake people make is thinking that one soil sample can tell you everything about the whole yard. Soil can be different in different spots, even in the same area, so using just one sample might give you the wrong idea. This could cause problems later, like extra costs or delays when working on your lawn or garden.
Testing Soil Without a Plan
Another mistake is testing the soil before you know exactly what you want to do with your lawn or garden. If you haven’t figured out your design yet, the soil test results might not be helpful for your specific needs. For example, certain properties of the soil only matter depending on what you plan to plant or build.
Not Getting Expert Help
Soil testing might seem easy, but it’s best to get help from a professional to make sure you’re doing it right. Some people try to save money by doing the tests themselves or choosing the cheapest option, but this can lead to wrong or incomplete results. Fixing these mistakes later can cost more money.
Ignoring the Changing Seasons
Soil can change depending on the season, so it’s important to think about how the soil might behave at different times of the year. For example, soil that is hard and dry in the summer might get wet and unstable in the rainy season. It’s best to test your soil at different times to get a full picture.
Forgetting to Test for Special Soil Conditions
Some soils, like those with a lot of clay or expansive soils, need special testing. If you don’t check for these conditions, you might run into big issues, like cracks or shifts in your lawn or garden structure. Always test for these special conditions to prevent problems later on.
FAQs About How To Test Soil For Lawn
What’s the best way to test soil for grass?
To test your soil for lawn health, collect soil samples from different areas of your yard, digging 4 to 6 inches deep. Mix these samples together and remove any rocks or debris. Let the soil dry, then send it to a trusted lab for an accurate test. A lab test gives you a detailed report on your soil’s nutrients and pH, which helps you care for your grass better.
How deep should you test soil for lawn?
When taking soil samples for testing, aim for a depth of 4 to 6 inches. This is where the grass roots grow and will give you the most accurate reading.
What should the pH of the soil be for a lawn?
Grass grows best in soil with a pH between 6.5 and 7.0. This slightly acidic to neutral range helps the grass absorb nutrients easily, keeping your lawn healthy and strong.
Are DIY soil test kits accurate?
DIY soil test kits can be convenient and give you a quick look at your soil, but they might not always be very accurate. They can provide some general information, but sometimes they miss important details. If you want to get the best results for your lawn, it’s better to send your soil to a professional lab for a more precise analysis.
Conclusion
Understanding how to test soil for lawn health is a simple but powerful way to grow strong, vibrant grass. A soil test reveals what your lawn needs, helping you apply the right nutrients and avoid common lawn problems. By testing regularly, you can improve soil quality, save money on unnecessary treatments, and achieve a lush, green lawn. Need expert help? Mile High Lifescape offers professional soil testing and lawn care services to keep your yard in top shape year-round.

