When you pull that dust-covered lawn mower from storage, it’s silently begging for help or planning to break down mid-season out of spite. Did you know that 80% of spring lawn mower failures could be prevented with basic maintenance?
Mile High Lifescape experts have seen countless “healthy” lawns devastated by poorly maintained equipment that tears grass instead of cutting it cleanly. That’s why we give you our 12 steps in spring lawn mower maintenance so you can keep your lawn mower in best shape. Let’s dig in!
Step 1: Inspect the Mower for Winter Damage
Winter storage often reveals problems previously unnoticed. Before starting any maintenance, examine your mower for structural damage. Look for cracks in the housing, rust formation, and loose fasteners. Pay special attention to control cables, drive belts, and safety shields that might have deteriorated.
Check rubber components for signs of drying or cracking – these typically deteriorate first during prolonged storage. Tighten any loose hardware and replace damaged components before proceeding. This initial inspection prevents minor issues from escalating into major mechanical failures when mowing season begins.
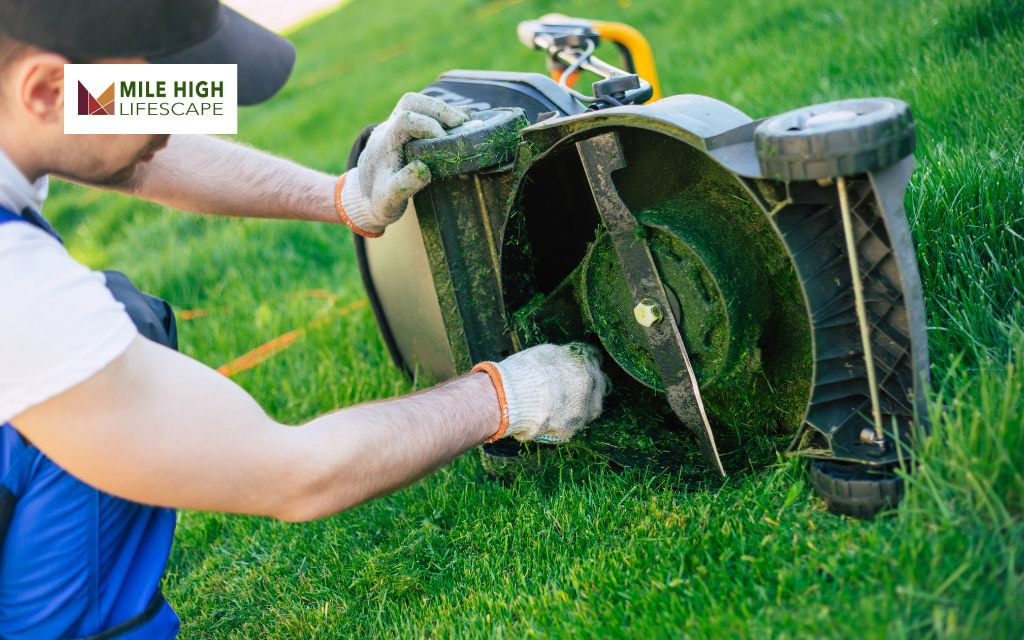
Step 2: Clean the Deck and Blades
Grass clippings trapped beneath the deck create a breeding ground for moisture-related damage. These clippings hold moisture against metal surfaces, accelerating rust formation and potentially harboring lawn diseases that can spread when you resume mowing. This is just one reason why a thorough spring lawn clean up is essential to kick off the season right.
For proper cleaning:
- Disconnect the spark plug for safety
- Tilt the mower on its side (keeping the air filter facing upward)
- Scrape accumulated debris using a putty knife or wire brush
- Wash the underside with water and mild detergent
- Dry thoroughly to prevent new rust formation
This maintenance step improves cutting performance and extends the life of your deck.
Step 3: Change the Engine Oil
Engine oil breaks down over time, losing its protective properties. Fresh oil prevents premature wear, overheating, and starting problems.
Check your current oil condition – dark, gritty oil indicates immediate replacement need. For oil changes:
- Run the engine for five minutes to warm the oil
- Turn off the engine and disconnect the spark plug
- Position a container under the drain plug
- Remove the plug or tip the mower to drain (follow manufacturer guidelines)
- Refill with recommended SAE 30 or synthetic oil for small engines
Most manufacturers recommend changing oil annually or every 25-50 operating hours. Spring provides the perfect opportunity for this essential maintenance.
To align this task with other seasonal upkeep, follow to the best lawn care schedule for a year-round plan to keep your lawn in shape.
Step 4: Replace or Clean the Air Filter
A clogged air filter restricts airflow to the engine, reducing power and increasing fuel consumption. Two common filter types require different maintenance approaches:
For foam filters:
- Remove and wash in warm water with mild detergent
- Squeeze out excess water and allow to dry completely
- Apply a small amount of clean engine oil, distributing it evenly
- Wipe away excess oil before reinstallation
For paper filters:
- Replace annually or when visibly dirty
- Tap gently to remove loose debris (never wash paper filters)
- Install the new filter with the pleated side facing outward
Clear airflow improves combustion efficiency, making your mower easier to start and more responsive during operation.
Step 5: Check and Replace Spark Plug
The spark plug initiates combustion within your engine. Signs indicating replacement include difficulty starting, rough running, or increased fuel consumption.
Examine the plug for:
- Dark, sooty deposits
- Cracked porcelain
- Corroded electrodes
- Oil contamination
To replace:
- Remove the spark plug wire
- Unscrew the old plug using a socket wrench
- Gap the new plug according to manufacturer specifications (typically 0.030″)
- Install hand-tight, then finish with a quarter turn using the wrench
Most manufacturers recommend replacing spark plugs annually, regardless of appearance, to maintain peak starting performance.

Step 6: Inspect Fuel System and Replace Old Gas
Stale fuel creates starting problems through gum and varnish deposits in the carburetor. Fuel left in the tank over winter degrades significantly, causing hard starts and poor engine performance.
To refresh the fuel system:
- Drain old gasoline into an approved container
- Check fuel lines for cracks or hardening
- Replace the fuel filter if your mower includes one
- Fill with fresh, high-quality gasoline
- Add fuel stabilizer to prevent future degradation
For mowers with particularly stubborn starting issues, cleaning the carburetor with carburetor cleaner removes accumulated deposits that prevent proper fuel atomization.
Step 7: Sharpen or Replace the Mower Blades
Dull blades tear grass rather than cutting cleanly, stressing your lawn and creating entry points for disease. Examine your blade for signs of wear, such as rounded cutting edges or visible nicks.
For sharpening:
- Remove the blade (disconnect spark plug first)
- Secure in a vise
- File at the original angle using a metal file
- Maintain the existing blade angle (typically 30 degrees)
- Check balance using a blade balancer or nail in the wall
- Reinstall to the manufacturer’s torque specifications
Replace blades showing significant wear, bending, or cracking. Balanced, sharp blades reduce engine strain and deliver cleaner cuts.
Step 8: Lubricate Moving Parts
Proper lubrication reduces friction and prevents premature wear. Focus on components that move during operation:
- Wheel bearings
- Height adjustment mechanisms
- Control cables
- Pivot points
- Self-propel mechanisms
Apply lightweight machine oil or silicone spray to these areas, wiping away excess. Avoid over-lubrication, which attracts dirt and debris. This simple maintenance step prevents binding and ensures smooth operation throughout the season.
Step 9: Test Battery and Electrical Connections
For electric-start mowers, battery health determines starting reliability. Test the battery with a multimeter – it should read at least 12.6 volts when fully charged.
Examine the battery terminals for:
- White or greenish corrosion
- Loose connections
- Damaged cables
Clean corroded terminals using a solution of baking soda and water, then rinse and dry thoroughly. Tighten connections and apply terminal protectant to prevent future corrosion. Replace batteries older than three years or those failing to maintain proper voltage.

Step 10: Adjust Tire Pressure
Uneven tire pressure causes uneven cutting height across your lawn. Check pressure in all tires using an accurate gauge and adjust to the manufacturer’s recommendations.
Proper inflation:
- Ensures level cutting
- Reduces mower vibration
- Improves traction for self-propelled models
- Prevents premature tire wear
Mark the recommended pressure on your maintenance calendar for regular checks throughout the season, as tire pressure naturally decreases over time.
Step 11: Test and Adjust Cutting Height
Spring lawns benefit from slightly higher cutting heights that encourage root development. Set your mower deck to 2.5-3 inches for most Colorado grass varieties.
Test the height adjustment mechanism for:
- Smooth operation
- Secure locking at each position
- Even adjustment on both sides
Lubricate height adjusters if they feel stiff or resist movement. Maintaining consistent cutting height promotes lawn health and reduces scalping on uneven terrain.
To optimize your mowing, find out the best time to mow your lawn in spring for healthy growth and a polished look.
Step 12: Run a Test Start
Before declaring your mower ready for the season, conduct a test run:
- Place the mower on a level surface
- Check oil and fuel levels
- Engage appropriate controls (choke, primer)
- Start the engine
- Listen for unusual noises
- Check for smooth acceleration
- Test all controls
- Observe exhaust color (should be minimal and nearly clear)
Address any problems discovered during this test before putting the mower into regular service.
Conclusion
Proper spring lawn mower maintenance prevents mid-season breakdowns and extends equipment life. By following these 12 steps, you’ll ensure your mower performs reliably throughout the growing season. Beyond mower maintenance, following key spring lawn care steps can further ensure your lawn thrives this season.
For those who prefer to focus on enjoying their yard rather than maintaining equipment, Mile High Lifescape offers comprehensive spring lawn care services, including mower maintenance and professional cutting services.
Contact us at (303) 877-9091 for a free consultation on how we can help maintain your lawn and equipment this season. Our experienced team provides the expertise your lawn deserves. Call now!
Frequently Asked Questions (FAQs)
How often should I change my lawn mower oil?
Change your lawn mower oil at the start of each mowing season or after every 25-50 operating hours, whichever comes first. For heavy use, consider mid-season changes as well.
What type of fuel should I use in my lawn mower?
Use fresh unleaded gasoline with an octane rating of 87 or higher and no more than 10% ethanol content. Add fuel stabilizer when filling your tank to prevent fuel degradation, especially if stored for more than 30 days.
Why won’t my lawn mower start in spring?
Common issues include stale fuel, fouled spark plugs, clogged air filters, or dead batteries. Check these components first. Also examine the fuel lines for cracks and ensure your oil level is correct. Clean the carburetor if the engine runs roughly.
How do I know if my lawn mower blade needs sharpening?
Your blade needs sharpening when grass tips appear torn rather than cleanly cut, when your lawn develops a brownish tint after mowing, when you notice increased vibration, or when you must make multiple passes to cut effectively. Sharpen blades at least once per season.
Can I use last season’s fuel in my mower?
No. Gasoline begins degrading after 30 days, forming gummy deposits that clog fuel systems and prevent proper starting. Always drain old fuel and replace it with fresh gasoline at the start of each season to avoid carburetor problems and engine damage.

