How to winterize sprinkler system? To winterize a sprinkler system, you need to shut off the water supply, drain pipes completely, and protect above-ground components from freeze damage. 

When temperatures plummet below freezing, water trapped in pipes expands, causing devastating pipe bursts and system failures. Property owners who skip winterization face thousands in repair costs come spring.

Understanding proper winterization protects your investment and ensures reliable irrigation when growing season returns. That’s why we provide this guide that covers the complete winterization process, optimal timing for Denver’s climate, and common mistakes to avoid.

Key Takeaways:

  • Winterize in early-mid October before Denver’s first frost to prevent costly freeze damage.
  • How do I winterize a sprinkler system​? Follow the complete process: shut off water supply → drain all pipes → use air compressor blow-out (60 PSI max) → insulate above-ground components. Each step is crucial for preventing freeze damage.
  • Don’t exceed pressure limits, overlook hidden zones, skip insulation, or delay too late.
How to Winterize the Sprinkler System Step by Step

How to Winterize Sprinkler System Step by Step

Step 1: Shut Off and Drain the System

Start by locating your main water supply valve and turning it completely off. This valve sits near your water meter or where the irrigation line branches from your main water service. Open all manual drain valves and backflow isolation valves to allow gravity drainage of standing water.

Next, open any above-ground valves throughout the system. These valves help drain visible water from elevated components like backflow preventers and main distribution lines.

Allow the system to drain for several minutes before proceeding to the next step.

Step 2: Air Compressor Blow-Out Method

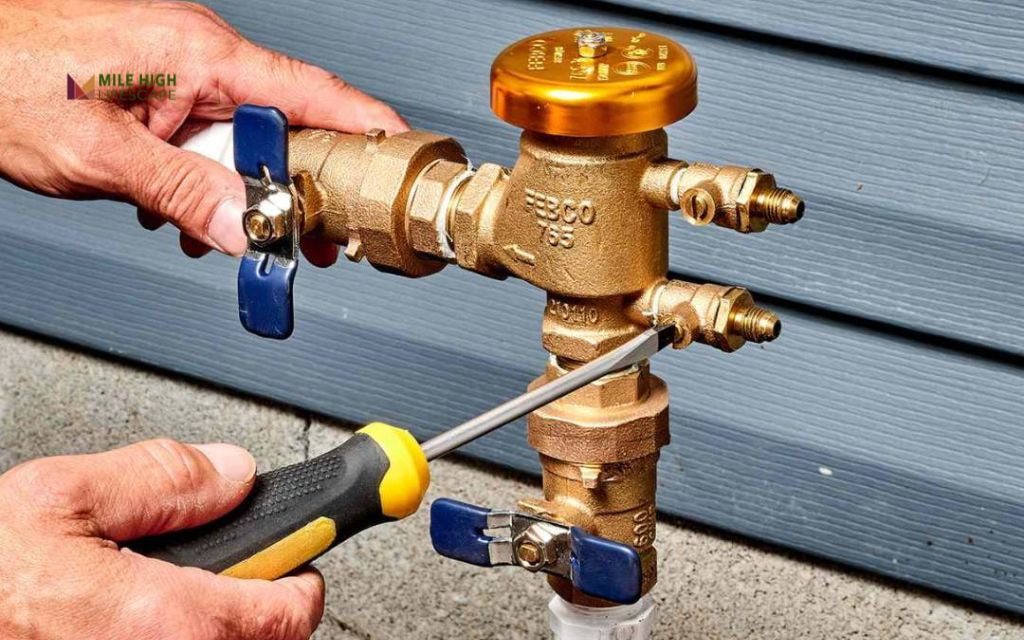
The air compressor method removes water that gravity cannot reach. Connect your compressor to the system’s blow-out port, typically located near the backflow preventer. Set the pressure to 60 PSI maximum to prevent valve damage during the process.

Begin with the zone furthest from the compressor connection point. Activate each zone for approximately two minutes or until only air flows from the sprinkler heads. Work systematically through each zone, ensuring complete water evacuation.

Never exceed recommended pressure limits, as excessive force damages valve components.

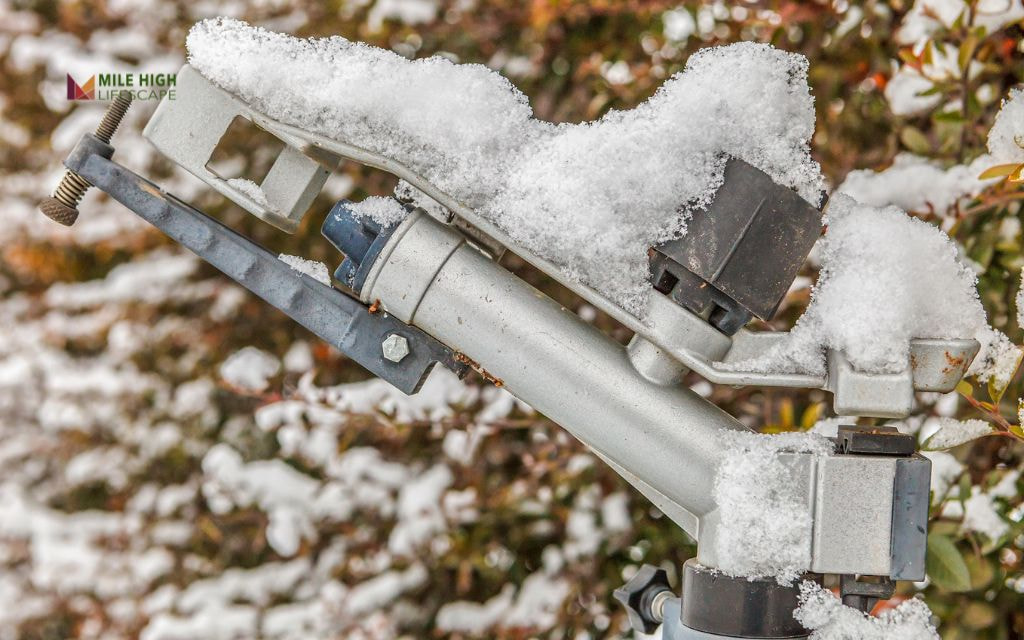
Step 3: Insulate Above-Ground Components

Above-ground elements require protection from Denver’s temperature swings. Wrap backflow preventers, isolation valves, and exposed piping with foam covers or insulation tape. These components remain vulnerable even after water removal due to residual moisture and metal expansion.

Secure insulation materials properly to prevent wind displacement during winter storms. Consider using waterproof covers for additional protection against snow and ice accumulation on sensitive valve assemblies.

Step 4: Final System Check

Confirm all valves remain in the closed position and pressure relief valves stay open. Inspect the entire system for standing water in low-lying areas or drainage issues. Document the winterization completion date and attach a “winterized” tag to remind others of the system’s status.

Store any removable components like timers or controllers in heated indoor spaces. This final verification prevents spring startup complications and ensures proper system dormancy throughout winter months.

Why Is It So Important to Winterize Your Sprinkler System?

Prevents Pipe Damage

Denver’s freeze-prone climate creates forces exceeding 40,000 pounds per square inch when water expands during freezing. These extreme pressures burst pipes and destroy valve assemblies throughout your irrigation system.

Pipe failures often occur in hidden underground locations, making detection difficult and repairs expensive. A single burst main line can require extensive excavation and cost thousands to repair properly.

Why Is It So Important to Winterize Your Sprinkler System?

Protects Against Water Contamination

Unprotected systems risk serious contamination through backflow when pipes crack below ground. Contaminated water can enter your home’s potable water supply, creating health hazards.

Proper winterization prevents these cross-contamination risks by eliminating water pathways that freeze damage creates. This protection ensures your family’s drinking water remains safe throughout winter months.

Extends System Longevity and Efficiency

Winterized systems maintain sprinkler systems efficiency and reliability season after season, reducing premature replacement costs significantly. Components protected from freeze-thaw cycles last decades longer than neglected systems.

Saves Thousands in Repair Costs

The cost of professional winterization proves minimal compared to spring repair expenses. Emergency repairs during peak season can cost five to ten times more than preventive winterization services. Burst pipes, damaged valves, and controller replacements quickly accumulate into major expenses.

Ensures Spring Startup Reliability

Properly winterized systems start reliably when growing season returns without costly delays or complications. Unprotected systems often require extensive repairs before operation, delaying lawn care and landscape maintenance. This reliability allows homeowners to maintain beautiful landscapes from the first warm days of spring.

When Is the Best Time to Winterize Your Sprinkler System?

The best time to winterize your sprinkler system in Denver is early to mid-October, before the first hard frost typically arrives.

This timing provides a safety buffer against Denver’s unpredictable weather patterns while maximizing your irrigation season. Professional scheduling during this window ensures availability and prevents the seasonal rush that occurs closer to winter.

What Are Mistakes When Winterizing the Lawn Irrigation System?

  • Pressure above 60 PSI can rupture valve diaphragms, crack sprinkler bodies, and damage electronic components. Always verify pressure settings before beginning the blow-out process.
  • rip irrigation lines, separate valve boxes, and remote zones often escape notice during winterization. Create a comprehensive zone map to ensure complete coverage of all system areas.
  • Many focus solely on water removal while neglecting physical protection for exposed pipes and valves. Denver’s wind chill effects can damage unprotected components even after proper drainage.
  • Sudden cold fronts can arrive days ahead of forecasted dates in Denver’s unpredictable climate. Procrastination often results in emergency winterization under adverse weather conditions.
  • Trapped air pressure after blow-out creates unnecessary wear on seals and diaphragms throughout winter. Always release system pressure after completing the winterization process.
  • Micro-irrigation and drip zones require separate attention due to smaller lines that freeze quickly. These systems need flushing and complete drainage to prevent emitter damage.
  • Leaving drain valves closed or manual valves in wrong positions prevents proper water evacuation. Double-check all valve positions during final system inspection.

Prepping Other Irrigation Tools for Winter

Hoses and Connections

Drain all garden hoses completely and store them in heated spaces or insulated areas. Coil hoses properly to prevent kinking and cracking from repeated freeze-thaw cycles. Disconnect hoses from spigots and drain any remaining water from connection points.

Remove and store quick-connect fittings, spray nozzles, and timers indoors. These components contain small water chambers that expand when frozen, causing permanent damage. Clean all attachments before storage to prevent corrosion during winter months.

Prepping Other Irrigation Tools for Winter

Drip Irrigation Systems

Flush drip systems thoroughly to remove sediment and mineral buildup that can freeze and clog emitters. Disconnect timer units and bring them indoors for protection. Insulate any exposed tubing that cannot be drained completely.

Remove and clean pressure-compensating emitters if your system includes them. These precision components are particularly vulnerable to freeze damage and expensive to replace. Store cleaned emitters in labeled containers for easy spring reinstallation.

Water Timers and Controllers

Electronic timers require indoor storage to prevent circuit damage from moisture and freezing. Remove batteries before storage to prevent corrosion from battery leakage during extended storage periods. Clean battery compartments and connection points before storing.

Document timer programming settings before removal. Take photos of complex programming or write down zone schedules to simplify spring startup procedures. Store programming documentation with the timer unit for easy reference.

Fertilizer Injectors and Chemical Systems

Clean fertilizer injectors thoroughly to remove all chemical residues before storage. Rinse systems with clean water multiple times to prevent crystallization that can damage pump mechanisms. Store injector units in dry, frost-free areas away from extreme temperature fluctuations.

Drain and clean any chemical storage tanks completely. Remove all liquids and rinse tanks with clean water to prevent freeze damage and chemical contamination. Store tanks in heated areas or wrap with insulation if outdoor storage is necessary.

Conclusion

Proper sprinkler winterization combines precise timing with methodical execution to protect Denver irrigation systems from costly freeze damage.

How to winterize a sprinkler system requires shutting off water supply, complete drainage, air compressor blow-out, and insulation of above-ground components. Success depends on starting early, following proper procedures, and avoiding common mistakes like excessive pressure or incomplete drainage.

Contact Mile High Lifescape today for a free winterization quote.

Our expert team serves Denver, Littleton, Lakewood, Westminster, Boulder, Golden, Longmont, Loveland, and Colorado Springs. Protect your irrigation investment with professional service you can trust.

Frequently Asked Questions (FAQs)

What should I do if the system freezes?

Stop using the system immediately until temperatures rise above freezing. Inspect for visible damage once warmed, then test each zone carefully. Contact professionals if you find leaks or pressure loss.

Can smart sprinkler systems winterize themselves?

No. Smart controllers can shut off schedules automatically but cannot drain pipes, blow out water, or insulate components. Manual winterization is still required regardless of controller technology.

Can I winterize my sprinkler system myself?

Yes, with proper equipment and knowledge. You need an air compressor with 60 PSI capability and understanding of your system layout. Complex systems benefit from professional service for complete protection.

How do you shut down a sprinkler system for winter?

Turn off the main water supply, open all drain valves, use compressed air to blow out each zone, then insulate above-ground components. Ensure all valves stay closed with pressure relief valves open.

How to winterize a sprinkler system without an air compressor?

Use manual drainage through gravity by opening all drain valves and petcocks throughout the system. Remove drain plugs from low points and pump housings. This method works for simple systems but may not remove all water.

Rate this post

 What does yard cleanup include? Yard cleanup encompasses removing debris and leaves, mowing and edging lawns, pruning trees and shrubs, controlling weeds, refreshing mulch, and cleaning hardscapes like patios and walkways.

In Denver, comprehensive yard cleanup also includes seasonal services such as gutter cleaning, aeration, and irrigation system checks to prepare your property for Colorado’s challenging climate conditions.

Understanding the complete scope of yard cleanup helps Denver homeowners maintain healthy landscapes while protecting their property investment.

This guide covers every component of professional yard cleanup, timing considerations for our region, and practical advice for making informed maintenance decisions.

What does yard cleanup include?

What is a yard cleanup?

Professional yard cleanup addresses both softscape elements – plants, beds, and grass – and hardscape features like walkways, patios, and retaining walls. This comprehensive approach ensures every aspect of your outdoor space receives proper attention.

Neglected landscapes create multiple problems: debris accumulation invites destructive pests, creates fire hazards, and causes water drainage issues during spring snowmelt. Poor maintenance reduces property appeal and can lower home values in competitive markets.

What does yard cleanup include?

Task 1: Debris and leaf removal

Professional crews remove all fallen leaves, sticks, acorns, pine needles, and storm debris from lawns, garden beds, and walkways. This process requires systematic raking, bagging, and disposal to ensure complete property clearing.

Decaying organic matter traps moisture against grass roots and suffocates healthy growth, leading to mold development and dead patches. These problems intensify after Denver’s spring snowmelt when soggy conditions persist for weeks.

Schedule late-fall leaf removal before early snowfall to prevent soggy buildup under the snowpack. This timing protects grass health and simplifies spring cleanup efforts.

Task 1: Debris and leaf removal

Task 2: Lawn mowing, edging, and trimming

Proper lawn care during cleanup includes cutting grass to optimal height plus creating clean edges along walkways and trimming around obstacles like fences and trees.

Regular mowing maintains healthy root systems, prevents weed establishment, and enhances overall property appearance. Professional equipment creates precise results that homeowner tools often cannot match.

Adjust cutting height based on seasonal conditions. Summer drought requires higher cuts for root protection, while early spring growth may need shorter cuts to encourage development. Never mow wet grass during snowmelt periods.

Task 2: Lawn mowing, edging, and trimming

Task 3: Weed control

Comprehensive weed management involves removing invasive plants by hand, applying pre-emergent treatments, and clearing deteriorated mulch and plant debris from beds. This multi-step approach prevents future weed problems while improving soil health.

Weeds compete aggressively with ornamental plants and grass for limited nutrients and water. During warm spring periods, invasive species spread rapidly if not controlled early.

Apply landscape fabric or quality bark mulch to suppress weed growth and retain soil moisture in our arid climate. These materials reduce maintenance needs while improving garden appearance.

Task 3: Weed control

Task 4: Hardscape cleaning and maintenance

Professional hardscape care includes sweeping, pressure washing patios and walkways, releveling displaced stones, and sealing cracks before weather damage worsens. This maintenance prevents safety hazards and extends surface life.

Denver’s freeze-thaw cycles create persistent threats to concrete, stone, and brick surfaces. Small cracks expand during temperature fluctuations, leading to expensive replacement needs.

Schedule pressure washing in early spring and seal stonework before fall freezes for maximum durability. These preventive measures protect investments and maintain property safety.

Task 4: Hardscape cleaning and maintenance

Task 5: Tree and shrub pruning

Strategic pruning removes dead, diseased, or overgrown branches while shaping shrubs for balanced growth patterns. Professional techniques promote healthy regrowth and prevent structural damage from falling limbs.

Proper pruning timing prevents pest infestations and disease spread while maximizing plant vigor. Poor pruning practices can severely damage or kill valuable landscape plants.

Complete major pruning in late winter or early spring – after the last hard frost but before new growth begins. This timing minimizes stress and maximizes recovery potential.

Task 5: Tree and shrub pruning

What are the benefits of keeping your yard clean?

Health and safety protection

Regular yard cleanup provides essential health benefits for Denver families. Clean properties significantly reduce allergens that trigger asthma and respiratory problems, particularly during high pollen seasons common in Colorado’s Front Range.

Professional debris removal eliminates breeding grounds for harmful pests like ticks, mosquitos, and rodents that carry diseases.

Safety improvements include preventing slip-and-fall accidents from accumulated leaves, branches, and debris. Clean walkways and driveways reduce injury risks during Denver’s icy winter months when visibility and traction become critical safety factors.

Property value enhancement

Well-maintained landscapes directly impact property values in Denver’s competitive real estate market. Clean yards boost curb appeal and create positive first impressions that influence buyer decisions and neighborhood property standards.

Professional maintenance can increase home values by 5-15% according to local real estate professionals. This return on investment often exceeds cleanup costs while providing immediate enjoyment benefits for current homeowners.

Environmental benefits

Clean landscapes promote healthier soil conditions through proper organic matter management and moisture retention. Strategic debris removal allows beneficial microorganisms to thrive while preventing harmful fungal growth that damages plant root systems.

Proper yard maintenance reduces water waste through improved soil structure and mulch application. Denver’s water conservation efforts benefit when properties maintain efficient irrigation and healthy plant growth patterns.

Mental well-being and lifestyle improvement

Organized outdoor spaces promote relaxation and stress reduction for busy families. Clean yards expand usable living areas, creating opportunities for outdoor entertaining, gardening, and family activities throughout Colorado’s beautiful seasons.

Property pride extends throughout neighborhoods when homeowners maintain high standards. This community effect strengthens property values while creating more desirable living environments for everyone.

When is the best time for yard cleanup?

  • Spring Cleanup (March-April): Remove winter debris, complete aeration projects, and prune after final frost threats pass.
  • Summer Maintenance (May-August) Focus on regular mowing schedules, aggressive weed control, and irrigation system monitoring.
  • Fall Preparation (October-November) Complete leaf removal, apply winter mulch, clean gutters, and prepare irrigation systems for freezing.
  • Winter Planning (December-February) Conduct property inspections, plan next year’s improvements, and schedule spring services early.

Denver’s elevation and unpredictable weather patterns require flexible scheduling. Professional services adapt timing based on actual conditions rather than calendar dates alone.

When is the best time for yard cleanup?

Should you do yard cleanup yourself or hire a pro?

When DIY makes sense

DIY cleanup works well for homeowners with adequate time, physical capability, and basic landscaping knowledge. Regular maintenance between professional services can provide cost savings while maintaining property appearance.

Small properties with minimal trees and simple landscapes may benefit from homeowner care during mild weather periods. Basic tasks like leaf raking and light pruning can provide personal satisfaction for gardening enthusiasts.

When professional service provides better value

Complex properties with mature trees, extensive hardscaping, or challenging terrain require professional expertise and equipment. Denver’s unpredictable weather patterns and altitude considerations make local knowledge invaluable for timing and technique decisions.

Busy professionals, elderly homeowners, or those with physical limitations benefit significantly from professional services that eliminate safety risks while ensuring quality results. The time savings alone often justifies professional service costs for active Denver families.

Let our professional yard cleanup service help you

For nearly two decades, Mile High Lifescape has been proudly serving the Denver Metro area as the go-to landscape company.

With a reputation for excellence, we offer a comprehensive range of friendly and professional landscaping and lawn care services. Call us to get free estimates at (303) 877-9091

Count on us to transform your outdoor space into a beautiful oasis today!

Conclusion

Comprehensive yard cleanup protects your property investment while creating beautiful outdoor spaces for family enjoyment. Understanding cleanup components helps you make informed decisions about maintenance approaches that fit your lifestyle and budget.

Start planning seasonal cleanup now to avoid rushed decisions and ensure proper timing for Denver’s climate challenges. Proactive maintenance prevents problems while maintaining property values in our competitive market.

Contact Mile High Lifescape today for your free cleanup estimate. Our experienced team provides personalized solutions that transform your outdoor space while fitting your specific needs and timeline.

Frequently Asked Questions (FAQs)

What’s the best time to prune trees in Denver?

Complete major tree pruning between late February and early April, after hard frost threats pass but before active growth begins. This timing minimizes stress while maximizing recovery potential for Colorado’s challenging climate.

How much does yard cleanup cost in the Denver metro area?

Professional cleanup services typically range from $300-800 for comprehensive seasonal work, depending on property size and scope. Regular maintenance contracts often provide better value than one-time services.

How often should I schedule yard cleanup in Denver?

Most Denver properties benefit from professional cleanup three times yearly – spring preparation, fall cleanup, and winter preparation. Additional summer maintenance may be needed for larger properties or challenging conditions.

What is the purpose of cleaning the yard?

Yard cleaning maintains property health, safety, and value while preventing expensive repairs. Regular cleanup protects landscapes from pest damage, disease, and weather-related problems common in Denver’s challenging environment.

4.8/5 - (129 votes)

How much does yard cleanup cost? The 2025 average price ranges from $200 to $600, depending on yard size, season, and work complexity.

Whether you’re clearing spring debris or preparing for Colorado’s harsh winter, understanding costs helps you budget effectively. This comprehensive guide reveals pricing details, cost factors, and smart strategies for Denver’s unique climate challenges.

Key takeaways:

  • Fall costs 30-50% more than spring: Heavy leaf volume and winter prep make fall cleanup significantly pricier. Book early for better rates.
  • Size determines base price: Small yards: $100-300 | Medium: $200-500 | Large: $400-800+. Know your square footage to predict costs.
  • Regular care saves money: Seasonal maintenance prevents overgrowth premium rates. Regular clients get loyalty discounts and avoid emergency fees.
  • DIY hidden costs add up: $50-200 DIY becomes expensive with disposal fees ($50-150/load), tools, and time investment for larger properties.
  • Local Denver expertise matters: Colorado’s unique climate and regulations require specialized knowledge. Choose experienced local providers for best value.

How much does yard cleanup cost in Denver?

When homeowners ask “how much does yard cleanup cost,” the answer depends on several factors unique to Denver’s climate.

Yard cleanup costs have increased in 2025 due to rising labor rates, inflation, and growing demand for seasonal maintenance services. Colorado’s intense weather patterns make professional yard care more valuable than ever.

By property size

  • Small yards (under 2,000 sq ft): $100–$300
  • Medium yards (2,000–5,000 sq ft): $200–$500
  • Large yards (5,000–10,000+ sq ft): $400–$800+

Small properties typically require basic debris removal and lawn mowing. Medium yards involve detailed work including shrub pruning, mulching, and gutter cleaning. Large properties demand extensive services like tree pruning, aeration, and fertilization.

Seasonal pricing variations

  • Spring cleanup: $125–$300 (lighter debris loads)
  • Fall cleanup: $200–$450+ (heavy leaf volume, winter preparation)

Fall yard cleanup costs more due to Colorado’s abundant deciduous trees and winter preparation requirements. Spring services focus on damage assessment and growth preparation.

Additional service costs

  • Gutter cleaning: $100–$200
  • Debris hauling and dump fees: $50–$150 per load
  • Tree or shrub pruning: $75–$250 (varies by size and quantity)
  • Mulching beds: $100–$300 (materials plus labor)
  • Lawn fertilization or aeration: $75–$200 per treatment
  • Hourly labor for overgrowth: $50–$100 per hour

Denver’s disposal fees and labor rates drive these additional costs. Local contractors charge $50–$100 per hour per worker, reflecting the area’s competitive market.

How much does yard cleanup cost in Denver?

What factors affect how much does yard cleanup cost?

Understanding how much is fall yard cleanup​ requires examining multiple variables that affect final pricing in the Denver Metro area.

  • Property size and layout complexity: Larger yards require more crew members and extended work hours. Properties with slopes, multiple levels, or intricate landscaping increase labor time significantly. Limited truck access or tight spaces add complexity that drives up costs.
  • Debris volume and yard condition: Neglected yards with overgrowth command premium rates. Dense vegetation, fallen branches, and accumulated debris require specialized equipment and extra disposal trips. Regular maintenance keeps costs predictable and lower.
  • Service scope and customization: Basic cleanup includes debris removal and lawn mowing. Comprehensive services add pruning, mulching, gutter cleaning, and irrigation checks. Custom requests like flower bed preparation or hardscape cleaning increase total investment.
  • Maintenance frequency impact: Regular clients receive discounted rates compared to one-time deep cleaning services. Seasonal contracts often provide better value than emergency cleanup calls. Consistent care prevents costly overgrowth situations.
  • Local market conditions: Denver’s labor rates reflect the region’s economic growth and demand for quality services. Disposal fees vary by location and debris type. Mountain proximity affects weather patterns, creating unique seasonal challenges that influence pricing.

Professional yard cleanup service versus diy cost

Many property owners wonder how much does yard cleanup cost when comparing professional services to DIY approaches. Each option offers distinct advantages and cost structures.

AspectProfessional ServiceDIY Approach
Initial Cost$200–$600 depending on yard size and services$50–$200 for tool rentals and purchases
Equipment IncludedProfessional-grade tools, trucks, specialized machineryBasic equipment: rakes, leaf blowers, pruning shears
LaborExperienced crew handles all workYour time and physical effort required
DisposalDebris hauling and disposal included in serviceAdditional $50–$150 per load for dump fees
Time Investment2–8 hours depending on property size (you can focus on other activities)Full day or weekend commitment for larger properties
Quality ResultsProfessional expertise ensures proper techniques and thorough cleanupResults vary based on experience and available time
Additional ServicesOften includes pruning, fertilization, irrigation checksLimited to basic cleanup tasks
Best ForBusy homeowners, large properties, complex landscaping, overgrown yardsSmall maintained yards, budget-conscious homeowners, hands-on enthusiasts
Hidden CostsTransparent pricing with detailed estimatesTool storage, maintenance, potential injury costs, disposal fees
Seasonal FlexibilityAvailable year-round with proper schedulingWeather-dependent, limited by personal availability
Long-term ValueProfessional maintenance prevents costly problemsRequires ongoing tool investment and skill development

Professional Services deliver convenience, expertise, and guaranteed results through experienced teams using specialized equipment. The investment covers complete service from start to finish, including proper disposal and additional treatments.

DIY work well for small, maintained yards but become challenging with large properties or extensive debris. While initial costs appear lower, hidden expenses like disposal fees, tool maintenance, and time investment can increase total expenses significantly.

Tips to save on yard cleanup

Knowing how much for yard cleanup​ helps homeowners plan budgets and find savings opportunities throughout the year.

  • Maintain regular seasonal schedules: Consistent maintenance prevents overgrowth that requires premium cleanup rates. Spring and fall services keep yards manageable year-round. Regular clients often receive loyalty discounts and priority scheduling.
  • Bundle services for better value: Combine yard cleanup with lawn care, pruning, or fertilization services. Package deals typically cost less than individual service calls. Annual contracts provide predictable pricing and comprehensive care.
  • Prepare your property beforehand: Clear walkways and move outdoor furniture before crews arrive. Remove personal items from work areas. Good preparation reduces labor time and overall costs.
  • Compare detailed estimates: Request itemized quotes from multiple providers. Compare included services, not just total prices. Understand what additional charges might apply for your specific property needs.
Tips to save on yard cleanup

How do you choose the right yard cleanup service?

When researching how much a yard cleanup cost, remember that quality matters as much as price. The right provider delivers lasting value through expertise and reliable service.

  • Local expertise and experience Denver’s unique climate requires specialized knowledge of regional plants, soil conditions, and weather patterns. Companies with decades of local experience understand seasonal timing and appropriate techniques for Colorado’s environment.
  • Service range and flexibility Look for providers offering comprehensive landscaping services beyond basic cleanup. Companies that handle lawn care, irrigation, and hardscaping provide ongoing value. Flexible scheduling accommodates busy homeowner lifestyles.
  • Transparent pricing and communication Quality providers offer detailed estimates with clear service descriptions. They explain additional charges upfront and maintain open communication throughout projects. Professional companies carry proper insurance and licensing.
  • Reputation and customer feedback Research local reviews and ask for references from recent clients. Established companies have track records of reliable service and customer satisfaction. Word-of-mouth recommendations often identify the best local providers.

Your best landscaping & yard cleanup services in Denver

Mile High Lifescape brings over 20 years of Denver Metro area experience to every yard cleanup project. Our skilled team provides personalized service that enhances curb appeal while fitting your lifestyle and budget. We offer transparent pricing, comprehensive services, and reliable results that exceed expectations.

Conclusion

Understanding how much does yard cleanup cost helps you make informed decisions about property maintenance. Denver’s climate demands proactive seasonal care to prevent costly problems and maintain beautiful outdoor spaces.

Professional services provide expertise, efficiency, and peace of mind. Regular maintenance schedules keep costs predictable while ensuring your property looks its best year-round. Start planning now to avoid rush season pricing and secure preferred service dates.

Ready to transform your outdoor space? Contact Mile High Lifescape for a free estimate tailored to your property’s specific needs and your budget requirements.

Frequently asked questions (FAQs)

Is gutter cleaning necessary during yard cleanup?

Yes, especially in Denver where falling leaves and debris can clog gutters quickly. Clean gutters prevent water damage and ice dam formation during winter months.

How often should I schedule yard cleanup services?

Most Denver properties benefit from spring and fall cleanup services. Properties with many trees may need additional mid-season maintenance to manage debris accumulation.

What does yard cleanup include in my area?

Denver yard cleanup typically includes debris removal, leaf collection, basic pruning, lawn mowing, and edge trimming. Additional services like gutter cleaning or mulching cost extra.

How much do most yard service companies charge per hour?

Denver area companies charge $50–$100 per hour per worker. Most jobs are quoted as flat rates based on property size and service scope rather than hourly rates.

How long does yard cleanup usually take?

Small properties require 2–4 hours, medium yards need 4–6 hours, and large properties can take 6–8+ hours depending on debris volume and service scope.

4.8/5 - (295 votes)

When autumn leaves settle on your concrete surfaces and winter moisture sets in, those beautiful fall colors transform into unsightly brown stains that penetrate deep into your concrete.

To start the process of how to remove leaf stains from concrete, sweep away any loose debris from the surface. Then, prepare a mixture of water and dish soap or a bleach-based detergent, apply it to the stained concrete, and scrub vigorously using a stiff-bristle brush.

This guide gives you a clear, safe guide – specifically for Denver homes. You’ll learn how to remove leaf stains from concrete effectively, which products work best at our altitude, and how to prevent future damage through proper maintenance and sealing.

Key takeaway:

  1. Clean leaf stains within 24-48 hours before Denver’s UV and freeze-thaw cycles set them permanently.
  2. Use detergent for light stains, baking soda/vinegar for medium, and pressure washing for heavy stains.
  3. Never mix cleaning chemicals and always test hydrogen peroxide in hidden areas first.
  4. Sweep leaves immediately and seal concrete every 1-2 years to prevent future staining.
  5. Call professionals for deep-set stains or when DIY methods fail after multiple attempts.

How Do You Prepare Before Cleaning?

Risk Assessment: Light vs Stubborn Stains

Light stains appear as faint brown discoloration that recent leaf contact created. These respond well to basic cleaning methods.

Stubborn stains show deep brown or black marks that multiple seasons of leaf accumulation caused. These require aggressive treatment or professional intervention.

Safety Essentials

Wear protective gloves, eye protection, and dust masks when handling cleaning chemicals.

Never mix different cleaning chemicals together, especially bleach with vinegar or ammonia, as this creates toxic gases.

Denver’s dry air increases chemical vapor concentration, making respiratory protection crucial. Work in well-ventilated areas and keep pets and children away from cleaning zones.

Climate Considerations

Clean concrete when temperatures range between 50-75°F for optimal chemical effectiveness. Denver’s temperature fluctuations mean early morning or late afternoon provide ideal conditions. 

Avoid cleaning during windy conditions that scatter debris and chemicals. Check weather forecasts to ensure 24-48 hours of dry conditions after cleaning.

How Do You Prepare Before Cleaning?

Essential Tools and Materials

Cleaning Tools

  • Stiff-bristle brush for scrubbing stained surfaces
  • Garden hose with adjustable spray nozzle
  • Pressure washer rated for 1,200+ PSI minimum
  • Plastic scraper for removing surface debris without scratching

Basic Cleaning Solutions

  • pH-neutral detergent for gentle stain removal
  • Baking soda for creating alkaline cleaning paste
  • White vinegar for natural organic matter breakdown
  • 3% hydrogen peroxide for oxidizing organic stains

Advanced Cleaning Products

  • Commercial concrete cleaner as backup for resistant stains
  • Oxygen bleach for pressure washer application
  • Simple Green Pro HD or Zep Commercial products for heavy-duty cleaning

Safety Equipment

  • Protective gloves to prevent skin contact with chemicals
  • Eye protection against chemical splashes
  • Dust masks for respiratory protection in Denver’s dry air

Additional Supplies

  • Plastic spray bottles for applying vinegar solutions
  • Measuring cups for proper solution ratios
  • Clean rags or towels for spot cleaning and drying

How to Remove Leaf Stains from Concrete?

For Light Stains

Wet the stained area thoroughly with your garden hose. Mix two tablespoons of pH-neutral detergent with one gallon of warm water.

Apply the solution generously over the stain and let it sit for 10 minutes. Scrub vigorously with your stiff-bristle brush using circular motions. Rinse thoroughly with clean water, ensuring no soap residue remains.

For Medium Stains

Baking Soda Paste: Combine three parts baking soda with one part water to create a thick paste. Spread evenly over the stain and let sit for 15-30 minutes. Scrub with your brush and rinse completely. This method neutralizes acidic stains effectively.

Vinegar Solution: Mix equal parts white vinegar and water in a spray bottle. Spray the stain generously and let sit for 10-15 minutes. Scrub thoroughly and rinse with clean water. Vinegar breaks down organic matter naturally.

Hydrogen Peroxide Treatment: Apply 3% hydrogen peroxide directly to the stain. Test a small, inconspicuous area first as hydrogen peroxide can permanently lighten or discolor some concrete surfaces. Let sit for 15 minutes, scrub, and rinse thoroughly. This method works particularly well on organic stains.

For Heavy and Dyed Stains

Use a pressure washer with 1,500-2,000 PSI and a 25-degree nozzle for concrete safety. Maintain 6-12 inches distance from the surface to prevent damage. Start with water alone, then add oxygen bleach or specialized concrete cleaner to the detergent tank.

Commercial Cleaners for Stubborn Cases

When DIY methods fail, commercial concrete cleaners offer stronger formulations. Choose products specifically designed for leaf stains and organic matter. Follow manufacturer instructions precisely, as Denver’s dry climate can concentrate chemical effects.

Always perform patch tests in hidden areas. Popular brands include Simple Green Pro HD and Zep Commercial products.

How to Remove Leaf Stains from Concrete

How Do You Troubleshoot Common Issues?

Learning how to remove leaf stains from concrete includes understanding common problems that arise during cleaning and their effective solutions.

ProblemCauseSolution
Stain Won’t LiftDeep penetration or wrong methodTry pressure washer or hydrogen peroxide treatment
White Film After DryingSoap or chemical residueRinse again with clean water or diluted vinegar wash
Surface DiscolorationChemical too harsh or over-exposureBuff surface and neutralize with baking soda solution
Uneven ResultsInconsistent pressure or scrubbingRepeat process lightly over entire area
Returning StainsSub-surface penetrationDeep clean and seal concrete after drying

What Tips Can Help You Clean More Effectively?

  • Use warm water: Warm water activates cleaning compounds more effectively than cold water. The heat helps break down organic matter and improves chemical penetration into concrete pores.
  • Allow proper soaking time: Let cleaning solutions sit for 15-30 minutes before scrubbing. This extended contact time allows chemicals to penetrate deeper into concrete and break down stubborn stains at the molecular level.
  • Apply Circular Scrubbing Technique: Scrub in circular motions rather than straight lines to increase contact surface area with stains. This technique provides more thorough coverage and prevents streaking patterns on the concrete surface.
  • Work in Manageable Sections: Divide large areas into smaller sections to prevent cleaning solutions from drying before rinsing.
  • Implement Double Rinse Method: Rinse twice for optimal results – first to remove loosened grime and stains, second to eliminate any chemical residue that could attract future dirt. Thorough rinsing prevents white film formation and extends cleaning effectiveness.
  • Allow Natural Drying Process: Let surfaces dry naturally without forced air or heat. Denver’s low humidity speeds natural drying while preserving concrete integrity and preventing thermal shock that could damage the surface.
  • Avoid Immediate Traffic: Keep foot traffic off treated surfaces for 24 hours to prevent recontamination and allow complete drying. This waiting period ensures maximum cleaning effectiveness and prevents new stains from forming on the clean surface.

How Can You Prevent Future Leaf Stains?

Sealing Benefits

Concrete sealing creates a stain-resistant barrier that prevents leaf tannins from penetrating surface pores. Choose acrylic epoxy sealers designed for Denver’s climate extremes. These products resist UV damage and freeze-thaw cycles that plague our region.

Optimal Sealing Timing

Apply sealers after deep cleaning in late spring or early summer when temperatures remain consistently above 50°F for 48 hours. Denver’s intense UV requires resealing every 1-2 years to maintain protection. Fall application provides winter protection but requires precise timing before temperature drops.

Maintenance Strategies

Sweep leaves immediately after they fall, especially during Denver’s sudden autumn storms. Hose down concrete surfaces weekly during leaf season to prevent stain development. Remove snow and ice promptly in winter, as freeze-thaw cycles drive stains deeper into concrete.

Install proper drainage around concrete surfaces to prevent water pooling that accelerates stain formation. Trim overhanging branches to reduce leaf accumulation and improve air circulation around concrete areas.

How Can You Prevent Future Leaf Stains

Conclusion

How to remove leaf stains from concrete requires systematic preparation, appropriate methods for stain severity, and consistent maintenance. Start with assessment and safety preparation, apply the cleaning method that matches your stain intensity, and finish with proper sealing for long-term protection.

Understanding this technique effectively helps protect your investment and maintains your property’s appearance year-round. Act before winter sets in to prevent stains from becoming permanent fixtures on your concrete surfaces.

For nearly two decades, Mile High Lifescape has been proudly serving the Denver Metro area as the go-to landscape company. With a reputation for excellence, we offer a comprehensive range of friendly and professional landscaping and lawn care services, also yard cleanup service.

Give us a call at (303) 877-9091 and get your free estimate today!

Frequently Asked Questions (FAQs)

What takes leaf stains off concrete?

Dish soap and water handle light stains, while baking soda paste, vinegar solutions, or hydrogen peroxide remove medium stains. Heavy stains require pressure washing with commercial concrete cleaners.

Is it possible to remove stains from concrete?

Yes, most leaf stains can be removed with proper methods and persistence. Fresh stains respond to basic cleaning, while old stains may require multiple treatments or professional intervention.

Will mineral spirits remove stains from concrete? 

Mineral spirits work on oil-based stains but prove less effective on organic leaf stains. Use vinegar or hydrogen peroxide for better results on tannin-based discoloration.

Will snow melt chemicals damage concrete?

Salt-based deicers can damage concrete through freeze-thaw expansion. Use calcium magnesium acetate products designed for concrete safety, and rinse surfaces when temperatures allow.

How long after cleaning can I seal?

Wait 24-48 hours after cleaning before applying sealer. Concrete must be completely dry for proper sealer adhesion and effectiveness.

Can I clean when it’s below freezing?

Avoid cleaning below 32°F as water freezes in concrete pores, potentially causing cracking. Wait for temperatures above 50°F for 24-48 hours before and after cleaning.

4.8/5 - (233 votes)

How much does leaf removal cost? Across the United States, homeowners pay between $100 to $400 for standard leaf removal. In Denver, professional leaf removal services typically range from $50 to $600, depending on your property size and specific needs. 

Leaf removal becomes critical during fall and spring seasons. Colorado’s harsh winters demand proper yard preparation, while spring cleanup ensures healthy lawn growth. Accumulated leaves block sunlight, trap moisture, and create breeding grounds for pests and diseases that damage grass and landscaping.

This comprehensive guide delivers cost transparency and practical budget strategies for Denver metro residents considering professional leaf removal services. You’ll understand exactly what to expect when hiring qualified landscaping professionals.

Key Takeaways:

  1. Denver leaf removal costs $50-100 for small yards and $400-600+ for extra-large properties.
  2. Downtown locations cost more while suburban areas offer better rates, with possible $25-75 travel fees for outlying areas.
  3. Pricing increases with more trees, comprehensive services, and during peak fall season demand.
  4. Save 10-20% by booking early, bundling services, and pre-raking leaves before professionals arrive.
  5. Professional removal protects lawn health, prevents pests, and ensures proper seasonal yard preparation.
How Much does Leaf Removal Cost?​

How Much Does Leaf Removal Cost in Denver?

What is The Average Cost of Leaf Removal?

Professional leaf removal pricing in Denver follows clear yard size categories:

  • Small yards under 1,000 square feet require $50 to $100 for complete leaf removal. These compact properties typically take 1-2 hours with basic equipment and minimal disposal needs.
  • Medium yards spanning 1,000 to 5,000 square feet cost between $100 and $250. Most suburban Denver homes fall into this category, requiring specialized equipment and multiple team members for efficient completion.
  • Large yards covering 5,000 to 10,000 square feet range from $250 to $400. These properties often feature mature trees, complex landscaping, and require commercial-grade equipment for thorough cleanup.
  • Extra-large yards exceeding 10,000 square feet command $400 to $600 or more. These expansive properties demand full crews, specialized machinery, and extended working hours for complete leaf removal.
Yard Size CategorySquare FootagePrice RangeTypical DurationEquipment Required
Small YardsUnder 1,000 sq ft$50 – $1001-2 hoursBasic blowers, hand rakes
Medium Yards1,000 – 5,000 sq ft$100 – $2502-4 hoursCommercial blowers, 2-3 crew members
Large Yards5,000 – 10,000 sq ft$250 – $4004-6 hoursTruck-mounted equipment, full crew
Extra-Large YardsOver 10,000 sq ft$400 – $600+6+ hours or multi-dayCommercial machinery, specialized equipment

Cost Variations By Location

  • Downtown Denver commands premium pricing due to restricted parking, limited equipment access, and higher operational costs. Properties in city center locations typically pay the upper range of standard pricing scales.
  • Suburban neighborhoods throughout Lakewood, Westminster, and Littleton offer more reasonable rates. Easier equipment access and reduced operational complexity allow companies to provide competitive pricing for larger properties.
  • Denver metro outskirts including Golden, Longmont, and Loveland may incur additional travel fees. Companies often charge $25 to $75 extra for properties beyond standard service areas, though some local providers offer competitive rates.

Cost by Service

  • Basic raking and blowing represents the most common leaf removal approach. This straightforward service costs $50 to $200 depending on yard complexity and leaf volume. Teams use professional-grade blowers and rakes to gather leaves efficiently.
  • Bagging and hauling services include complete disposal management. Pricing ranges from $100 to $300 based on leaf volume and disposal distance. This comprehensive approach eliminates homeowner disposal responsibilities entirely.
  • Full garden cleanup encompasses flower beds, pathways, and hardscaped areas. These detailed services range from $150 to $400 for large properties, providing complete outdoor space preparation for winter or spring.
How Much Does Leaf Removal Cost in Denver?

Service Frequency Options

  • One-time leaf removal commands premium pricing as an on-demand service. Late-season cleanups often cost more due to increased leaf accumulation and challenging weather conditions.
  • Seasonal recurring services provide the best value through discounted rates. Regular visits throughout fall typically cost $100 to $200 per service, ensuring consistent yard maintenance.
  • Bi-annual services before and after peak leaf seasons average $150 to $300 per visit. This approach maintains optimal yard conditions while preventing excessive accumulation that increases removal difficulty.

What Factors Affecting the Cost of Leaf Removal?

Yard Size Impact

Property dimensions directly determine labor requirements and equipment needs. Larger yards demand more time, additional crew members, and specialized machinery for efficient completion. Professional crews calculate pricing based on square footage, accessibility, and terrain complexity.

Tree Density Considerations

Properties with numerous mature trees generate significantly more leaves, requiring extensive cleanup efforts. Dense tree coverage increases collection time and disposal volume, directly impacting final costs. Companies assess tree quantity and species when providing accurate estimates.

Service Scope Variations

Leaf removal encompasses various service levels from basic collection to comprehensive property cleanup. Simple raking and blowing require minimal equipment, while complete bagging and hauling demand trucks, disposal fees, and extended labor hours.

Geographic Location Factors

Denver metro neighborhoods present unique challenges affecting pricing structures. Urban properties face parking restrictions and equipment limitations, while suburban locations offer easier access but may require longer travel times for service teams.

Seasonal Demand Fluctuations

Peak fall seasons create high demand for leaf removal services, often resulting in premium pricing. Early winter and spring cleanup periods may offer reduced rates due to lower competition and more flexible scheduling options.

Additional Service Integration

Companies often bundle leaf removal with complementary services like gutter cleaning, mulching, or tree trimming. These integrated approaches can reduce overall costs while providing comprehensive property maintenance solutions.

What Factors Affecting the Cost of Leaf Removal?

What are Additional Costs to Consider?

Extra Service Charges

  • Leaf hauling and disposal adds $50 to $100 per truckload depending on disposal facility distance. Some companies include basic disposal in standard pricing, while others charge separately for this essential service component.
  • Disposal facility fees vary based on location and waste management requirements. Companies may pass these costs directly to customers or incorporate them into service pricing structures.
  • Extended area cleaning including walkways, patios, and gutters increases total project costs. These detailed services require additional time and specialized equipment beyond standard yard cleanup procedures.

Available Discounts

  • Seasonal promotions often provide 10-20% savings for early booking during off-peak periods. Companies use these incentives to balance seasonal demand and maintain consistent revenue streams.
  • Service bundling discounts reduce costs when combining leaf removal with other landscaping services. Package deals for lawn care, gutter cleaning, or snow removal can provide substantial overall savings.
  • Recurring service agreements offer reduced per-visit pricing through seasonal contracts. These arrangements benefit both customers and service providers through guaranteed business relationships.

How to Save on Leaf Removal Costs?

DIY Preparation Strategies

  • Pre-service leaf management significantly reduces professional service time and costs. Homeowners can rake leaves into organized piles, making collection faster and more efficient for professional crews.
  • Composting implementation eliminates disposal costs while creating valuable soil amendment. Many Denver residents successfully compost leaves for garden use, reducing waste and professional hauling expenses.
  • Strategic timing for preparation work maximizes cost savings. Completing preliminary cleanup before professional arrival ensures crews focus on difficult areas and final completion tasks.

Early Booking Advantages

  • Off-season scheduling provides access to discounted rates and priority service slots. Companies appreciate guaranteed business during slower periods and often reward early customers with reduced pricing.
  • Advance contract negotiations allow for better pricing discussions and service customization. Early planning gives both parties flexibility in scheduling and service scope definition.

Service Bundling Benefits

  • Comprehensive maintenance packages combine multiple services for reduced overall costs. Leaf removal paired with lawn care, snow removal, or landscaping projects often provides better value than individual service purchases.
  • Neighborhood group bookings can reduce costs through shared service calls. Coordinating with neighbors for simultaneous service can lower per-property costs through operational efficiency.

Local Provider Selection

  • Regional company advantages include better pricing and personalized service compared to national chains. Local providers understand Denver’s specific needs and often provide more competitive rates for area residents.
  • Established relationship benefits develop through consistent local provider use. Long-term customers often receive priority scheduling, discount pricing, and superior service quality through ongoing business relationships.
How to Save on Leaf Removal Costs?

Conclusion

Leaf removal costs in Denver reflect property size, service complexity, and seasonal demand factors. Professional services typically range from $50 for small properties to $600 for extensive estates, with most homeowners paying $100 to $250 for standard yard cleanup.

Smart homeowners research multiple providers, compare service offerings, and consider seasonal booking strategies for optimal value. Professional leaf removal ensures proper disposal, saves valuable time, and prepares yards for healthy seasonal transitions.

Quality leaf removal protects lawn health, prevents pest problems, and maintains property aesthetics throughout Denver’s changing seasons. Investment in professional services delivers long-term benefits that extend far beyond simple leaf collection.

Let Us Help Your Yard

For nearly two decades, Mile High Lifescape has been proudly serving the Denver Metro area as the go-to landscape company. With a reputation for excellence, we offer a comprehensive range of friendly and professional landscaping and lawn care services.

Our comprehensive fall yard cleanup services address all aspects of seasonal property preparation, from thorough leaf removal to complete landscape winterization. Count on us to transform your outdoor space into a beautiful oasis that exceeds your expectations.

Contact Mile High Lifescape today at (303) 877-9091 for your free and customized estimate!

Frequently Asked Questions (FAQs)

Is leaf removal necessary every year?

Yes, annual leaf removal prevents lawn suffocation, disease development, and pest infestations. Thick leaf layers block sunlight and trap moisture, creating conditions that damage grass and landscaping throughout Denver’s harsh winters.

Can I save money by removing the leaves myself?

DIY leaf removal saves $50-$400 annually but requires significant time, proper equipment, and disposal arrangements. Most Denver homeowners find professional services cost-effective when considering equipment rental, disposal fees, and time investment.

How can I prepare my yard for a more affordable leaf removal service?

Clear outdoor furniture, rake leaves into organized piles, and ensure gate access for equipment. Remove obstacles like toys or decorations, and communicate specific problem areas to crews during scheduling.

When should I schedule leaf removal for the best price in Denver?

Book services in early September or late November through February for best rates. Peak October-November demand drives premium pricing, while off-season scheduling offers 10-20% discounts and priority booking.

Are there any eco-friendly leaf removal options available?

Yes, many companies offer composting, mulching, and natural disposal methods. Leaves can be processed into soil amendment or mulch rather than landfill disposal, supporting sustainable landscaping practices.

Is leaf removal worth it?

Professional leaf removal protects lawn health, saves 4-8 hours of weekend work, and ensures proper disposal. The investment prevents costly lawn restoration and maintains property value throughout Denver’s challenging seasonal transitions.

4.8/5 - (234 votes)

In Denver’s unique landscape, successful gardens serve dual purposes: enhancing curb appeal while conserving precious water resources. The Mile-High City presents specific challenges that demand thoughtful design choices.

This comprehensive guide delivers practical front yard flower bed ideas that thrive in Colorado’s demanding environment. You’ll discover design strategies that maximize visual impact while minimizing water consumption.

The following sections explore layout concepts, plant pairings, and installation techniques specifically tailored for Denver homeowners seeking sustainable landscape solutions.

23+ Front Yard Flower Bed Ideas for Every Home Style

23+ Front Yard Flower Bed Ideas for Every Home Style

Curved Flower Bed Along Sidewalk with Colorful Perennials

Curved borders create natural flow that guides visitors toward your entrance while maximizing planting space. This design works exceptionally well with drought-resistant perennials like purple coneflower, blanket flower, and ornamental grasses.

The gentle arc softens harsh architectural lines and provides excellent opportunities for seasonal color rotation. Native Colorado plants establish quickly in these beds, requiring minimal supplemental watering once established.

Curved Flower Bed Along Sidewalk with Colorful Perennials

Border Flower Bed with Rocks and Low Grasses

Rock-edged borders offer clean definition while reflecting Denver’s natural mountain aesthetic. Combine decorative stones with native bunch grasses such as buffalo grass or blue grama for texture contrast.

This front flower bed idea reduces maintenance requirements while providing year-round structure. The rock mulch conserves soil moisture and prevents weed growth, making it ideal for busy homeowners seeking low-maintenance solutions.

Border Flower Bed with Rocks and Low Grasses

Classic Tulip and Daffodil Spring Bulb Bed

Spring bulb gardens deliver spectacular early-season color when Colorado landscapes emerge from winter dormancy. Plant tulips and daffodils in dense clusters for maximum visual impact.

These bulbs naturalize over time, expanding your display without additional investment. The key lies in selecting late-blooming varieties that avoid Denver’s unpredictable late spring freezes.

Classic Tulip and Daffodil Spring Bulb Bed

Hostas and Coral Bells for Shaded Porch Edges

North-facing porch areas and building shadows create microclimates perfect for shade-loving perennials. Hostas provide bold foliage texture while coral bells add delicate flower spikes in burgundy, pink, or white.

These front yard flower bed ideas work particularly well in older Denver neighborhoods with mature tree canopies. Combine different hosta leaf patterns and coral bell varieties for dynamic seasonal interest.

Hostas and Coral Bells for Shaded Porch Edges

Evergreen-Centered Flower Bed with Color Accents

Anchor your design with dwarf evergreen shrubs that provide year-round structure and winter interest. Surround these focal points with seasonal perennials and annuals for continuous color. 

Dwarf spruce, juniper, or pine varieties thrive in Denver’s climate while requiring minimal water once established. This approach creates sophisticated front lawn flower bed ideas that maintain appeal through Colorado’s long winter months.

Evergreen-Centered Flower Bed with Color Accents

Raised Stone Flower Beds for Slope Control

Natural flagstone or manufactured retaining blocks provide durable structure that complements Colorado’s mountainous setting. These raised designs improve drainage for plants while creating opportunities for cascading growth habits. Fill terraced levels with plants of varying heights to maximize visual interest and biodiversity.

Raised Stone Flower Beds for Slope Control

Brick-Edged Flower Beds with Geometric Layouts

Formal geometric patterns suit traditional home styles while providing clear boundaries for plant growth. Brick edging offers permanence and classic appeal that increases property value. Create squares, rectangles, or diamond patterns that echo your home’s architectural features.

These structured front yard flower bed ideas work particularly well with symmetrical plantings of lavender, catmint, or other Mediterranean herbs adapted to Denver’s climate.

Brick-Edged Flower Beds with Geometric Layouts

Rock and Mulch Combo Beds with Xeric Blooms

Combine decorative gravel with organic mulch to create water-wise garden beds perfect for Denver’s arid conditions. Plant drought-tolerant flowers like penstemon, blanket flower, and desert marigold throughout the design. The mixed mulching approach provides visual texture while conserving soil moisture and suppressing weeds.

Rock and Mulch Combo Beds with Xeric Blooms

Retaining Wall Flower Beds with Cascading Florals

Transform necessary retaining walls into stunning garden features by incorporating planting pockets and cascading plant selections. Choose trailing varieties like creeping phlox, snow-in-summer, or native wild bergamot that spill over stone edges.

These installations solve drainage issues while creating vertical growing space in compact front yards. The combination of hardscape and softscape elements delivers maximum impact in limited space.

Retaining Wall Flower Beds with Cascading Florals

Gravel-Based Flower Beds for HOA-Friendly Appeal

Many Denver HOAs favor neat, controlled landscapes that maintain property values and neighborhood aesthetics. Gravel-based beds filled with architectural plants like yucca, ornamental grasses, and compact shrubs satisfy these requirements.

Choose decorative aggregate in earth tones that complement your home’s exterior colors. This approach provides front yard flower bed ideas that remain attractive year-round with minimal maintenance requirements.

Gravel-Based Flower Beds for HOA-Friendly Appeal

Fall-Forward Color Bed: Mums, Rudbeckia, Asters

Design beds that peak during Colorado’s spectacular autumn season when mountain aspens turn golden. Combine hardy mums in bronze and burgundy with native asters and black-eyed Susan varieties. These fall-focused front garden flower bed ideas capitalize on Denver’s extended autumn weather and provide nectar sources for migrating pollinators.

Fall-Forward Color Bed: Mums, Rudbeckia, Asters

Summer Burst: Zinnias, Salvia, Ornamental Grasses

Create high-impact summer displays using heat-tolerant annuals and perennials that thrive in Denver’s intense summer sun. Zinnias provide continuous blooms in vibrant colors while ornamental grasses add movement and texture.

Salvia varieties offer vertical spikes that attract beneficial insects while requiring minimal water. This combination delivers house front yard flower bed ideas perfect for entertaining seasons.

Summer Burst: Zinnias, Salvia, Ornamental Grasses

Red-White-Blue Combo Around Flagpole

Patriotic color schemes work around flagpoles or near entry features, using plants that maintain their colors throughout the growing season. Red bee balm, white shasta daisies, and blue salvia create stunning displays that honor American traditions.

Choose varieties native to Colorado when possible to ensure long-term success and reduced maintenance requirements. These designs offer meaningful front yard flower bed ideas for military families or patriotic homeowners.

Red-White-Blue Combo Around Flagpole

White Flowers + Silver Foliage for Modern Curb Appeal

Combine white-flowered natives like Colorado columbine with silver-leaved artemisia and lamb’s ear. This palette remains elegant through changing seasons while providing excellent drought tolerance. The subtle color scheme allows architectural features to take center stage while providing refined natural beauty.

White Flowers + Silver Foliage for Modern Curb Appeal

Monochrome Wildflower Bed with Native Purple Blooms

Purple-themed gardens using Colorado natives create stunning displays that support local ecosystems. Combine purple coneflower, wild bergamot, and lupine for varying heights and bloom times.

These ideas attract beneficial insects while requiring minimal supplemental watering. The monochromatic approach creates visual unity while celebrating Colorado’s natural heritage.

Monochrome Wildflower Bed with Native Purple Blooms

Butterfly Bed with Milkweed, Echinacea, Goldenrod

Support monarch butterfly migration routes while creating spectacular late-summer displays. Plant native milkweed varieties alongside purple coneflower and goldenrod for continuous nectar sources.

These front yard flower beds ideas provide essential habitat while delivering changing seasonal interest. The combination attracts diverse beneficial insects that improve garden health and biodiversity.

Butterfly Bed with Milkweed, Echinacea, Goldenrod

Drought-Tolerant Combo: Yarrow, Blanketflower, Blue Flax

Combine proven drought-resistant natives that thrive without supplemental irrigation once established. Yarrow provides flat-topped flowers in white or yellow, while blanket flowers offer daisy-like blooms in warm colors. Blue flax adds a delicate texture with sky-blue flowers that open each morning.

This combination represents excellent ideas for front flower beds that succeed in Denver’s challenging growing conditions.

Drought-Tolerant Combo: Yarrow, Blanketflower, Blue Flax

Xeriscape Floral Blend Using Colorado Native Wildflowers

Create diverse wildflower meadows using seed mixes specifically developed for Colorado’s Front Range region. These plantings establish slowly but provide long-term beauty with minimal maintenance once mature. Include species like Indian paintbrush, wild lupine, and penstemon for varied colors and heights. This approach offers sustainable front yard fall flower bed ideas that evolve naturally over time.

Xeriscape Floral Blend Using Colorado Native Wildflowers

Round Flower Bed Centered on a Tree

Transform existing shade trees into garden focal points by creating circular planting beds around their base. Choose shade-tolerant perennials that complement the tree’s root system without competing aggressively.

This design strategy works well with mature cottonwoods or honey locusts common in Denver neighborhoods. The circular shape creates natural gathering spaces while maximizing limited growing area.

Round Flower Bed Centered on a Tree

Corner Triangle Flower Bed with Tall Back Border

Utilize awkward corner spaces by creating triangular beds that maximize planting area while maintaining clean sight lines. Place taller plants along the back edges, graduating to shorter varieties near pathways. Triangle designs work well at driveway corners or where property lines meet.

Corner Triangle Flower Bed with Tall Back Border

Flower Bed with Layered Height: Tall Back, Low Edging

Design beds using graduated heights that create depth perception and showcase individual plant characteristics. Place ornamental grasses or tall perennials in back positions, medium-height flowers in center areas, and low groundcovers along edges.

This layering technique maximizes visual impact while ensuring all plants receive appropriate light exposure. The structured approach suits both formal and naturalistic garden styles.

Flower Bed with Layered Height: Tall Back, Low Edging

Circle or Semicircle Entry Flower Bed with Focal Shrub

Create welcoming entry gardens using curved beds that guide visitors toward your front door. Anchor designs with attractive shrubs like serviceberry or ninebark that provide year-round structure. Surround focal plants with seasonal perennials that complement the shrub’s natural growth pattern. These front yard flower bed ideas create natural traffic flow while enhancing property curb appeal.

Circle or Semicircle Entry Flower Bed with Focal Shrub

Planter Box Borders for Mixed Perennials

Combine permanent plantings with moveable containers that allow seasonal flexibility. Install raised planter boxes along bed edges to accommodate annual flowers or vegetables that require different care.

This approach provides opportunities for experimenting with new varieties without committing entire beds. The containers also offer solutions for renters or homeowners planning future landscape changes.

Planter Box Borders for Mixed Perennials

Solar Lighting and Pathway Stones Between Flower Groups

Enhance evening garden appeal by incorporating solar lighting systems that highlight key plantings and provide safe pathway illumination. Position lights to uplight specimen plants or downlight pathway areas between planted sections.Choose fixtures that complement your home’s architectural style for cohesive landscape design.

Solar Lighting and Pathway Stones Between Flower Groups

Pots Embedded in Mulch Bed for Seasonal Color Swap

Plant spring bulbs, summer annuals, or fall mums in containers that nest invisibly within permanent plantings. This technique provides maximum flexibility for color changes without disturbing established perennial root systems. The embedded approach maintains clean design lines while offering creative possibilities.

Pots Embedded in Mulch Bed for Seasonal Color Swap

Essentials for Designing Front Yard Flower Beds in Colorado

Soil & Elevation Considerations

Incorporate compost, aged manure, and coarse sand to improve drainage and nutrient availability. The high elevation creates unique challenges including intense UV radiation, rapid temperature fluctuations, and reduced atmospheric pressure that affects plant growth.

Test soil pH levels, as Colorado soils tend toward alkaline conditions that influence plant selection and fertilizer choices.

Sun vs Shade Positioning

North-facing areas and covered porch locations create cooler microclimates suitable for plants requiring protection from afternoon sun. Observe your garden throughout the day to identify varying light conditions and select plants accordingly. East-facing beds provide morning sun with afternoon shade, ideal for many Colorado natives.

Native & Adaptive Plant Selection

Native plants support local wildlife including beneficial insects, birds, and small mammals that contribute to healthy ecosystem balance.

These species demonstrate superior drought tolerance, cold hardiness, and disease resistance compared to non-native alternatives. Choosing regionally appropriate plants reduces long-term maintenance costs while supporting environmental sustainability.

Irrigation & Mulching

Install drip irrigation systems that deliver water directly to plant root zones while minimizing evaporation losses. Mulch beds with organic materials like shredded bark or compost to retain soil moisture and moderate temperature extremes.

Apply mulch layers 2-3 inches deep, maintaining space around plant stems to prevent pest and disease problems. Consider gravel mulches for xeric plantings that prefer excellent drainage and minimal organic matter.

Choosing Plants for Curb Appeal and Climate Compatibility

Full-Sun Options

Full-sun locations require plants capable of thriving in Denver’s sunlight and temperature extremes:

  • Penstemon species provide tubular flowers in various colors while demonstrating exceptional drought tolerance.
  • Russian sage offers silvery foliage and purple flower spikes that persist through autumn. 
  • Sedum varieties provide succulent texture and late-season blooms attractive to pollinators.
  • Black-eyed Susan delivers bright yellow flowers from summer through frost.

Partial Shade Varieties

Areas receiving morning sun and afternoon shade support plants requiring protection from intense heat. Colorado columbine, the state flower, thrives in partial shade with adequate moisture:

  • Hosta varieties provide bold foliage texture in blue, green, or variegated patterns.
  • Hardy geranium species offer extended blooming periods and attractive fall foliage colors.

These selections work well under tree canopies or beside building structures.

Accent Shrubs

Structural shrubs provide year-round framework that anchors flower bed designs. Dwarf lilac varieties offer spring fragrance and compact growth habits suitable for residential landscapes. 

Boxwood species maintain evergreen foliage and respond well to pruning for formal shapes. Spirea cultivars provide seasonal flowers and colorful autumn foliage while tolerating various soil conditions.

Choose shrubs based on mature size to avoid future pruning conflicts.

Groundcovers for Edging

Low-growing plants create defined bed edges while suppressing weed growth and conserving soil moisture. Creeping thyme forms dense mats that release fragrance when walked upon while producing tiny flowers attractive to beneficial insects.

Lamb’s ear provides a silvery foliage texture that contrasts beautifully with green-leaved companions. These selections tolerate foot traffic and spread naturally to fill available space.

Conclusion

Successful front yard flower bed ideas combine aesthetic appeal with practical sustainability suited to Denver’s unique growing conditions. The key lies in embracing Colorado’s natural beauty rather than fighting against climate limitations.

Start with small experimental areas to test plant combinations and design concepts before committing to large installations. Phased development allows you to learn your specific microclimate conditions while spreading costs over multiple seasons.

Each garden bed teaches valuable lessons about plant performance and design preferences.

Are you finding professional flower bed services in the local area?

Mile High Lifescape has been proudly serving the Denver Metro area as the go-to landscape company. With a reputation for excellence, we offer a comprehensive range of friendly and professional landscaping and lawn care services.

Contact Mile High Lifescape at (303) 877-9091 for front yard flower bed ideas or installation support.

Frequently Asked Questions (FAQs)

What are the best flowers for full sun in the front yards?

Penstemon, blanket flower, black-eyed Susan, and purple coneflower demonstrate exceptional heat and drought tolerance. Ornamental grasses like blue grama and buffalo grass add texture while maintaining year-round appeal. These natives require minimal supplemental watering and provide continuous blooms throughout the growing season. 

Can I create a flower bed without using grass or turf?

Yes. You can use groundcover plants like creeping thyme or native sedums to fill spaces between larger perennials. Mulch options including gravel, bark chips, or decomposed granite provide attractive alternatives that suppress weeds while conserving moisture.

How do I keep flower beds weed-free in Denver’s dry climate?

Apply 2-3 inch mulch layers around plants while maintaining space near stems. Choose drought-tolerant plants that establish quickly and shade soil surfaces naturally. Pre-emergent herbicides applied in early spring prevent annual weed seeds from germinating.

What flower requires the least amount of maintenance?

Yarrow, blanket flower, and penstemon thrive without supplemental watering, fertilizing, or frequent deadheading. These perennials return annually while spreading naturally to fill garden spaces. Ornamental grasses like blue fescue provide year-round structure with annual spring cleanup as the only requirement.

What is the best shape for a garden bed?

No single shape works best for all situations, but curved edges create more natural appeal than straight lines. Consider your home’s architectural style, available space, and maintenance preferences when selecting bed shapes. Circular beds work well around trees while rectangular designs suit formal landscapes.

4.8/5 - (246 votes)

Understanding different types of landscaping rocks becomes crucial for creating sustainable, attractive yards that thrive in Colorado’s demanding environment.

The right rock selection impacts water management, soil temperature regulation, and long-term maintenance costs. Poor choices lead to erosion, weed problems, and costly replacements. Smart choices create beautiful, functional landscapes that work with nature rather than against it.

This guide examines eight essential landscaping rock types perfect for Denver yards. You’ll discover their optimal applications, advantages, limitations, and specific considerations for Colorado’s freeze-thaw cycles.

8 Landscaping Rock Types

Pea Gravel

Pea gravel consists of small, rounded stones typically measuring ¼ to ⅜ inch in diameter. These smooth stones come in earth tones including tan, brown, gray, and cream.

The natural tumbling process creates comfortable surfaces that feel pleasant underfoot.

  • Best Applications: Walkways, patio surfaces, drainage zones, and ground cover around plants. Pea gravel excels in areas requiring permeable surfaces that allow water infiltration while preventing mud formation.
  • Advantages: Cost-effective option that installs quickly and requires minimal preparation. The rounded edges make it comfortable for bare feet, while the small size creates smooth, even surfaces. Excellent drainage properties prevent water pooling during Denver’s occasional heavy rains.
  • Limitations: Without proper edging, pea gravel tends to migrate beyond intended boundaries. High-traffic areas may develop ruts or thin spots requiring periodic replenishment. Snow removal becomes challenging as gravel can scatter with shoveling.
  • Denver-Specific Tip: Combine pea gravel with dry riverbeds to manage snowmelt runoff effectively. Use alongside organic mulch in planting beds to create attractive transitions between hardscape and softscape elements.
Pea Gravel
Pea Gravel

River Rock

River rock features smooth, oval-shaped stones ranging from 1 to 6 inches in diameter. Water action over centuries creates the characteristic rounded edges and polished surfaces.

Color variations include gray, brown, black, white, and mixed earth tones.

  • Best Applications: Dry creek beds, border definitions, moisture retention around plants, and decorative accents. River rock works exceptionally well for creating natural-looking water features and drainage solutions.
  • Advantages: Exceptional durability withstands Colorado’s harsh weather cycles without breaking down. The attractive appearance complements both modern and traditional landscape designs. Heavy weight provides stability in windy conditions common to the Front Range.
  • Limitations: Higher material and installation costs compared to smaller gravel options. The weight requires more labor for installation and makes future modifications challenging. Large sizes can be difficult to walk on comfortably.
  • Denver-Specific Tip: Position river rock strategically in sloped yards to control water flow during spring snowmelt. The stones help prevent soil erosion while creating attractive focal points in otherwise challenging terrain.
River Rock
River Rock

Crushed Granite

Crushed granite consists of angular, mechanically crushed stone particles ranging from fine dust to ¾-inch pieces. The angular edges allow particles to lock together when compacted, creating stable surfaces. Colors vary based on granite source but typically include gray, tan, and reddish tones.

  • Best Applications: Pathways, driveways, xeriscaping projects, and areas requiring firm, stable surfaces. Crushed granite performs well in both formal and naturalistic landscape designs.
  • Advantages: Compacts to form solid, stable surfaces ideal for foot and light vehicle traffic. The natural appearance blends with native Colorado landscapes.
  • Limitations: Without adequate edging systems, material can gradually erode beyond intended boundaries. Fine particles may track onto adjacent surfaces during wet conditions. Requires occasional recompaction to maintain optimal surface integrity.
  • Denver-Specific Tip: Use crushed granite in native plant beds requiring minimal irrigation. The material’s natural drainage properties support drought-tolerant plants while creating cohesive design themes throughout the landscape.
Crushed Granite
Crushed Granite

Lava Rock (Red & Black)

Lava rock originates from volcanic activity, creating porous, lightweight stones with distinctive textures. Available in two primary colors: deep black and rust red. The porous structure provides excellent insulation properties while maintaining low weight.

  • Best Applications: Accent beds, xeriscaping projects, fire-safe mulch alternatives, and areas requiring lightweight fill material. Lava rock works particularly well around succulents and cacti.
  • Advantages: Lightweight nature simplifies installation and reduces structural load on retaining walls or containers. Excellent insulation properties help regulate soil temperature during Colorado’s extreme weather. Fire-resistant characteristics provide safety benefits in wildfire-prone areas.
  • Limitations: Sharp, porous surfaces make lava rock unsuitable for areas with foot traffic. The distinctive appearance may clash with certain architectural styles. Cost typically exceeds standard gravel options.
  • Denver-Specific Tip: Replace traditional organic mulch with lava rock in fire-prone zones near buildings or property lines. The material provides plant protection while eliminating fire risk associated with combustible mulches.
Lava Rock (Red & Black)

Flagstone

Flagstone comprises flat, naturally occurring rock slabs typically measuring 1 to 3 inches thick. Common materials include sandstone, slate, and limestone. Natural color variations range from gray and tan to red and purple, depending on mineral content and origin.

  • Best Applications: Patio surfaces, stepping stone pathways, seating areas, and vertical accent walls. Flagstone creates elegant, functional surfaces suitable for outdoor entertainment and relaxation spaces.
  • Advantages: Natural beauty and durability create long-lasting landscape features. Flat surfaces provide comfortable walking and seating areas. Heat absorption properties make flagstone comfortable even during hot summer days.
  • Limitations: Premium material commands higher prices than other rock options. Installation requires careful base preparation to prevent settling and cracking. Natural variations in thickness demand skilled installation techniques.
  • Denver-Specific Tip: Apply penetrating sealers to flagstone surfaces in areas prone to freeze-thaw cycles. Proper sealing prevents water infiltration that could cause cracking during winter months.
Flagstone
Flagstone

Decomposed Granite (DG)

Decomposed granite consists of granite rock broken down into fine particles ranging from sand-sized to ¼-inch pieces.

Natural weathering processes create this material, though commercial production involves mechanical crushing. Colors mirror parent granite: gray, tan, gold, and reddish hues.

  • Best Applications: Low-traffic pathways, patio surfaces, Zen gardens, and areas requiring natural-looking, permeable surfaces. Decomposed granite works well for creating subtle transitions between different landscape zones.
  • Advantages: Natural appearance blends seamlessly with native Colorado landscapes. Low cost makes it accessible for large-area applications. Compacts to form relatively stable surfaces while maintaining permeability.
  • Limitations: Requires regular maintenance including recompaction and edge definition. Heavy rain or snow can cause surface erosion without proper stabilization. Fine particles may track onto adjacent surfaces.
  • Denver-Specific Tip: Add polymer stabilizers to decomposed granite installations in areas experiencing regular snow and ice. Stabilization extends surface life during Colorado’s challenging winter conditions.
Decomposed Granite (DG)

Boulders and Feature Rocks

Boulders encompass large rocks typically measuring 18 inches or greater in diameter. These substantial stones serve both functional and aesthetic purposes in landscape design. Materials include sandstone, granite, limestone, and locally quarried Colorado stone.

  • Best Applications: Focal points, erosion control, retaining structures, and creating level changes in sloped terrain. Boulders work effectively for both dramatic design statements and practical engineering solutions.
  • Advantages: Maximum visual impact creates instant landscape maturity. Zero ongoing maintenance requirements after proper installation. Excellent erosion control on slopes and in drainage areas.
  • Limitations: Significant installation costs due to specialized equipment requirements. Weight and size make future relocation impractical. Limited availability of desirable specimens increases selection challenges.
  • Denver-Specific Tip: Position boulders in terraced yards to create level planting areas for native gardens. The thermal mass helps moderate soil temperature fluctuations around plant roots.
Boulders and Feature Rocks

Cobblestone

Cobblestone consists of naturally rounded stones measuring 2 to 10 inches in diameter. Historical use in European street construction gives cobblestone distinctive character.

Modern landscape applications focus on decorative rather than structural uses.

  • Best Applications: Border edging, water feature accents, and design elements requiring formal or old-world character. Cobblestone creates attractive transitions between different landscape materials.
  • Advantages: Timeless aesthetic appeal complements various architectural styles. Exceptional durability withstands Colorado’s weather extremes. Rounded surfaces resist damage from freeze-thaw cycles.
  • Limitations: Smooth surfaces become slippery when wet or icy. Higher costs compared to standard gravel options. Installation requires careful placement for optimal appearance.
  • Denver-Specific Tip: Incorporate cobblestone to bridge formal hardscape elements with rustic native plantings. The material successfully unifies diverse design themes common in Denver’s varied architectural landscape.
Cobblestone
Cobblestone

How to Choose Right Landscaping Rock Types for Your Yard

Successful rock selection depends on understanding your specific landscape needs. Consider primary usage patterns, drainage requirements, maintenance preferences, and aesthetic goals before making decisions.

  • Pathway Applications (Prioritize comfort, stability, and longevity): Crushed granite and decomposed granite provide excellent walking surfaces, while flagstone offers premium aesthetics for high-visibility areas.
  • Planting Bed Applications: Focus on drainage, weed suppression, and plant compatibility. Lava rock excels around drought-tolerant plants, while river rock provides attractive mulch alternatives in traditional gardens.
  • Decorative Features: Emphasize visual impact and design cohesion. Boulders create dramatic focal points, while cobblestone adds refined detail to formal elements.

Additional factors affecting selection include water runoff patterns, existing soil conditions, HOA restrictions, and sun exposure levels. Combining multiple rock types often produces more dynamic, visually interesting landscapes than single-material approaches.

How Rock Type Affects Function, Cost, and Design Aesthetics

Understanding material properties helps optimize rock selection for Colorado’s challenging environment.

  • Porosity affects drainage and freeze-thaw performance.
  • Color influences heat absorption and visual compatibility.
  • Weight impacts installation requirements and long-term stability.
Rock TypeAppearanceApprox. CostLocal Availability
Pea GravelSmall, rounded, earth tonesLowExcellent
River RockSmooth, oval, mixed colorsMediumGood
Crushed GraniteAngular, natural gray/tanLow-MediumExcellent
Lava RockPorous, black/redMedium-HighGood
FlagstoneFlat slabs, varied colorsHighFair
Decomposed GraniteFine particles, natural tonesLowGood
BouldersLarge, dramaticHighFair
CobblestoneRounded, uniformMedium-HighFair
  • Functional Considerations: Freeze-thaw cycles demand materials that resist cracking and heaving. Porous rocks like lava stone handle temperature changes better than dense materials. Angular shapes provide better mechanical stability than rounded forms.
  • Cost Factors: Material costs vary based on local availability, transportation distance, and processing requirements. Installation costs depend on equipment needs, site preparation, and labor intensity.
  • Design Integration: Successful landscapes balance color temperature, texture contrast, and scale relationships. Warm-colored rocks complement adobe and stucco architecture, while cool grays suit contemporary designs.
How Rock Type Affects Function, Cost, and Design Aesthetics

Maintenance Considerations by Rock Type

Different landscaping rock types require varying maintenance approaches to preserve appearance and functionality over time. Understanding these requirements helps inform selection decisions and budget planning.

  • Weed Control: Fine materials like decomposed granite benefit from landscape fabric installation before rock placement. Larger materials allow weed suppression through proper depth application and periodic maintenance.
  • Material Migration: Edging systems prevent rock migration beyond intended boundaries. Metal, concrete, or stone edging works effectively with most rock types. Regular inspection and maintenance preserve crisp landscape lines.
  • Cleaning Requirements: Organic debris accumulation varies by rock type and surrounding vegetation. Smooth surfaces shed leaves and debris more easily than porous or angular materials.
  • Weather Resistance: Colorado’s winds can move lighter materials like pea gravel and lava rock. Heavier options like river rock and boulders remain stable in most weather conditions.
  • Snow Management: Consider snow removal methods when selecting pathway materials. Shoveling can scatter loose materials, while snow blowing works better with larger, stable rocks.

Conclusion

Selecting the right landscaping rock types creates sustainable Denver yards that thrive in Colorado’s climate. Each rock type serves specific functions while supporting water-wise principles.

Combining different types of rocks for landscaping maximizes both beauty and function. River rock manages drainage, crushed granite forms pathways, and boulders create focal points.

When searching for “rock landscapers near me,” choose professionals who understand Colorado’s unique demands. Mile High Lifescape delivers expert guidance and installation for lasting landscape success.

Transform your yard with landscaping rock types that work with Colorado’s climate while enhancing property value.

Frequently Asked Questions (FAQs)

What is the most low-maintenance landscaping rock?

River rock is the most low-maintenance option. Its weight prevents shifting, smooth surfaces resist debris buildup, and the material withstands Colorado’s freeze-thaw cycles without breaking down. Once installed with proper edging, river rock needs minimal attention for years.

Can I mix different types of rocks in one yard?

Yes, mixing rock types creates attractive, functional landscapes. Limit combinations to three types maximum and choose materials with similar color temperatures. Use large boulders as focal points, medium river rock for borders, and small pea gravel for pathways.

Are certain rock types better for xeriscaping?

Yes, crushed granite and lava rock work best for xeriscaping. These materials drain well, regulate soil temperature, and complement drought-tolerant plants perfectly. Decomposed granite also suits xeriscaping pathways.

How do I calculate how much rock I need?

Measure your area length × width × desired depth in feet, then divide by 27 for cubic yards. Apply 2-3 inches for decorative uses, 3-4 inches for walkways, and 4-6 inches for drainage. Add 10% extra for settling. Most suppliers provide calculators or professional estimates for accurate quantities.

Do landscaping rocks increase property value in Colorado?

Yes, quality rock landscaping typically increases property value by 70-100% of installation costs. Water-wise rock designs appeal strongly to Colorado buyers who value low maintenance and drought resistance. Professional installation with appropriate materials enhances curb appeal while reducing long-term yard care expenses.

4.8/5 - (125 votes)

Lava rock has emerged as a premier solution for creating beautiful, resilient landscapes that thrive in Colorado’s demanding environment. This volcanic stone offers good durability, water conservation benefits, and fire resistance – critical advantages in our wildfire-prone region. 

Unlike traditional mulch that decomposes or blows away in Denver’s notorious winds, lava rock maintains its appearance and function year after year.

We’ll explore 7 proven lava rock landscaping ideas that transform ordinary yards into stunning, low-maintenance outdoor spaces. Each concept addresses Denver’s specific climate challenges while delivering visual impact and long-term value.

7 Proven Lava Rock Landscaping Ideas

What Is Lava Rock?

Lava rock forms when molten volcanic material cools rapidly, creating a lightweight, porous stone with distinctive texture and color variations. This natural process produces a landscaping material that combines aesthetic appeal with exceptional functionality.

  • The stone’s porous structure provides drainage while retaining beneficial soil moisture. 
  • Its lightweight nature makes installation easier compared to dense alternatives like river rock or granite.
  • The irregular surface texture creates visual interest.

3 Types of Lava Rock

Red Lava Rock

Red lava rock brings warm, earthy tones that harmonize with Denver’s natural environment.

This traditional option complements adobe architecture, southwestern design elements, and drought-tolerant plant palettes. The iron oxide content creates rich burgundy to bright red hues that intensify under Colorado’s high-altitude sunlight.

Red varieties work exceptionally well with native plants like blanketflower, penstemon, and ornamental grasses. The warm tones create cohesive designs when paired with sandstone hardscaping or terra cotta planters.

Many Denver homeowners choose red lava rock for its ability to make green foliage appear more vibrant through color contrast.

3 Types of Lava Rock

Black Lava Rock

Black lava rock delivers contemporary elegance with bold visual impact. This darker option creates dramatic contrast against light-colored homes, concrete surfaces, and bright plant materials.

Black lava rock landscape ideas often incorporate minimalist design principles. The dark stone provides a striking backdrop for colorful succulents, ornamental grasses, and architectural plants like yucca or agave.

Professional designers frequently use black varieties to create focal points and outdoor living spaces.

Crushed or Nugget Form

Lava rock availability includes various sizes from fine crushed material to large nuggets. Smaller particles work well for pathways and tight spaces around plants. Medium-sized pieces suit general mulching applications and decorative ground cover. Larger nuggets create dramatic accent features and natural-looking drainage solutions.

Size selection impacts both appearance and function. Fine crushed lava rock compacts slightly, making it suitable for walking surfaces. Larger pieces maintain better drainage and resist wind displacement – important considerations for Denver’s weather patterns.

Local Benefits of Lava Rock in Denver Landscapes

Withstands Freeze-Thaw Cycles

Traditional mulches break down rapidly under freeze-thaw stress, requiring frequent replacement. Lava rock’s volcanic origin creates exceptional thermal stability that handles Colorado’s extreme temperature swings without degradation.

The stone’s porous structure allows water to freeze and expand without cracking the material. This characteristic prevents the heaving and shifting common with dense stone options.

Property owners save money and effort by choosing materials that maintain their position and appearance through multiple winter cycles.

Fire-Resistant Protection

Wildfire risk remains a constant concern for Denver-area properties, especially those near foothills and open spaces. Lava rock provides excellent fire resistance compared to organic mulches that can fuel flames and spread fire to structures.

Creating space around homes becomes easier with non-combustible landscaping materials. Insurance companies often recognize fire-resistant landscaping in premium calculations.

Mile High Lifescape recommends lava rock installations within 30 feet of structures for optimal fire protection.

Wind and Weather Durability

Colorado’s winds can reach destructive speeds, particularly during spring and fall transition periods. Light organic mulches blow away, creating maintenance headaches and bare soil exposure. Lava rock’s irregular shape and moderate weight help pieces interlock naturally, resisting wind displacement.

The stone doesn’t decompose like organic alternatives, eliminating the need for annual replacement. This durability translates to long-term cost savings and consistent landscape appearance. Property owners enjoy stable ground cover that looks fresh year after year.

Water-Wise Gardening Support

Water conservation remains critical in Denver’s semi-arid environment.

Lava rock supports xeriscaping principles by reducing soil moisture evaporation while allowing proper drainage. The porous structure helps manage occasional heavy rainfall without creating waterlogged conditions.

Smart irrigation systems work more effectively with lava rock mulching. Water reaches plant roots efficiently while surface evaporation decreases. This combination reduces overall water consumption while maintaining healthy plant growth.

7 Proven Lava Rock Landscaping Ideas for Colorado Success

#1: Native Perennial Garden Borders

Frame your existing garden beds with black lava rock landscaping ideas that highlight Colorado native plants. Create clean, defined edges around penstemon, blanketflower, and blue grama grass plantings.

Apply 2-3 inches of black lava rock around established perennials. The dark background intensifies flower colors while suppressing weeds naturally. This technique works especially well with purple coneflowers and native asters.

Install landscape edging first to contain the rock and prevent migration into lawn areas. Metal or concrete edging provides the cleanest appearance.

Native Perennial Garden Borders

#2: Dry Creek Bed Drainage Solutions

Transform drainage areas into attractive landscape features using red lava rock landscaping ideas combined with flagstone accents.

Design meandering pathways that follow natural water flow patterns. Place larger flagstones as stepping points, then fill surrounding areas with medium-grade red lava rock. The contrast creates visual interest while managing stormwater runoff.

The porous lava rock allows water infiltration while directing excess flow away from structures.

Dry Creek Bed Drainage Solutions

#3: Contemporary Zen Garden Spaces

Create minimalist outdoor retreats using black lava rock as your foundation material. This lava rock landscaping idea with lava rocks transforms small courtyards or side yards into peaceful gathering spaces.

Level the area and install landscape fabric before spreading 3-inch layers of black lava rock. Add simple outdoor furniture in neutral tones. Incorporate bamboo privacy screening or steel planters for vertical elements.

Contemporary Zen Garden Spaces

#4: Fire-Smart Tree Surrounds

Replace flammable bark mulch with red lava rock around mature trees. This landscaping idea with a red lava rock approach protects valuable trees while reducing property fire risk.

Clear existing mulch in a 6-foot radius around tree trunks. Install 2-inch layers of red lava rock, keeping material 3 inches away from bark to prevent moisture retention issues.

This technique proves especially valuable for properties in wildland-urban interface zones like Ken Caryl, Littleton foothills, or areas near Chatfield Reservoir.

Fire-Smart Tree Surrounds

#5: Low-Water Succulent Islands

Design eye-catching focal points using black lava rock landscape ideas combined with drought-tolerant plants. Create raised planting areas that require minimal irrigation while providing maximum visual impact.

Group agave, hens and chicks, and ornamental grasses in irregular clusters. Surround plantings with black lava rock, then add boulder accents for scale. The dark rock absorbs heat during the day and releases it slowly, extending growing seasons for cold-sensitive succulents.

Low-Water Succulent Islands

#6: Permeable Pathway Solutions

Develop attractive walkways using crushed lava rock between stepping stones or pavers. This application prevents muddy pathways while maintaining natural drainage.

Excavate pathway areas to 4-inch depths, then install geotextile fabric. Add crushed lava rock in 2-inch lifts, compacting lightly between applications. The finished surface remains stable underfoot while allowing water penetration.

This technique works well for connecting deck areas to garden spaces or creating secondary pathways around properties.

Permeable Pathway Solutions

#7: Artistic Focal Point Enhancement

Elevate garden sculptures, water features, or architectural elements using black lava rock landscaping ideas as accent materials. The dark, textured surface creates dramatic backgrounds that highlight focal points.

Clear areas around existing garden art, then apply black lava rock in organic shapes that complement the feature. Vary depth from 1-3 inches to create subtle topography.

This approach transforms ordinary garden ornaments into striking landscape features that command attention year-round.

Artistic Focal Point Enhancement

Pro Tips for Using Lava Rock in Denver Yards

  • Install landscape fabric first: Lay high-quality weed barrier before placing stone to maximize weed prevention. This foundation prevents soil migration while allowing essential water and air penetration for healthy plant growth.
  • Maintain proper depth: Keep lava rock at 2-3 inches deep for most applications. Excessive depth wastes material and hinders plant establishment, while insufficient coverage reduces weed control effectiveness.
  • Choose drought-tolerant plant partners: Pair lava rock with plants that thrive in Denver’s climate, such as lavender, blue grama grass, and native yucca species. These combinations create cohesive designs that celebrate Colorado’s high-desert environment.
  • Use quality edging materials: Install permanent steel, aluminum, or stone edging to contain rock and maintain clean borders. Quality edging prevents migration into lawn areas and eliminates ongoing maintenance while protecting your landscape investment.
  • Rinse before installation: Clean new lava rock with water to remove dust and reveal true colors. This step prevents dusty residue on nearby surfaces and allows proper water infiltration while intensifying the stone’s natural appearance.
  • Consider sun exposure: Place black lava rock strategically in areas with intense sun exposure, as darker surfaces absorb more heat. Position away from heat-sensitive plants or incorporate shade elements during peak summer conditions.
  • Plan for drainage: Take advantage of lava rock’s excellent drainage properties by using it in areas prone to water accumulation. The porous structure manages Denver’s occasional heavy rainfall while preventing waterlogged soil conditions.

Conclusion

Lava rock landscaping ideas represent a smart, stylish solution for homeowners throughout the Denver Metro area. The combination of colors, textures, and layout flexibility allows creative expression while addressing Colorado’s unique environmental challenges.

Long-term benefits include reduced water usage, lower maintenance requirements, and increased property values.

When you’re ready to explore landscaping rocks near me or implement these lava rock landscaping ideas in your Colorado landscape, professional guidance ensures optimal results. 

Mile High Lifescape brings nearly two decades of experience to your project, designing and delivering durable outdoor solutions that thrive through even toughest seasons. We’ll help you select the right materials, design custom layouts, and install professional-grade solutions that last for decades.

Contact our expert team at (303) 877-9091 or email hello@milehighlifescape.com to discuss how lava rock landscaping can transform your property.

Frequently Asked Questions (FAQs)

Are lava rocks good for landscaping?

Yes, lava rocks excel in landscaping applications. They provide moisture retention, and create low-maintenance designs. Their natural durability and aesthetic appeal make them ideal for various landscaping projects, especially in arid climates like Denver’s.

Does black lava rock get too hot in the sun?

Yes. Black lava rock absorbs significant heat in direct sunlight. Use it sparingly near delicate plants or choose red varieties for full-sun locations. The thermal mass can benefit some plants but may stress others during peak summer temperatures.

What are the disadvantages of lava rock?

The porous nature allows weeds to sprout through gaps without proper underlayment. Regular maintenance keeps areas looking clean and weed-free. Initial costs exceed organic mulches, though long-term value proves superior.

How to make lava rock look better?

Rinse new installations thoroughly to remove dust and reveal natural color intensity. For existing installations, pressure washing restores original appearance. Regular debris removal maintains clean, attractive surfaces.

What happens if lava rocks get wet?

Lava rock absorbs water readily due to its porous structure. This characteristic benefits most landscaping applications by improving drainage and moisture retention for plants. Avoid using wet lava rock in fire features where rapid heating could cause damage.

4.8/5 - (212 votes)

The shift toward rock and mulch landscaping ideas represents more than just a trend; it’s a smart adaptation to Denver’s unique environmental demands. 

Traditional bark mulch, while attractive, often struggles against Colorado’s relentless sun and wind, requiring frequent replacement and constant maintenance. Rock mulch, however, offers durability and fire resistance while creating stunning visual contrasts when paired thoughtfully with organic mulch in designated areas.

Whether you’re planning front yard rock mulch landscaping ideas or reimagining your backyard oasis, these 10 creative approaches will help you design a landscape that you dream of.

10 Rock Mulch Landscaping Ideas in Denver

#1: Curved Gravel Beds with Native Perennials

This rock mulch landscaping approach works well with drought-tolerant perennials like yarrow, penstemon, and blanket flower. The smooth stones provide excellent drainage while suppressing weeds, and their neutral tones allow your colorful native blooms to take center stage.

Design the curved gravel beds to follow your yard’s natural contours, creating visual flow that guides the eye through your landscape.

Use a quality landscape fabric beneath the gravel to prevent weeds while allowing water penetration. The 3/8-inch pea gravel size works best for this application.

Curved Gravel Beds with Native Perennials

#2: River Rock Borders Around Foundation Beds

Create striking definition around your home’s foundation using 3-5 inch river rocks as borders, with decorative mulch filling the interior planting areas.

This landscaping idea with mulch and rocks offers the perfect balance of fire safety and plant health – the river rock creates a non-flammable barrier near your home’s structure while the central mulch zones provide moisture retention for your plantings.

Choose river rocks in complementary earth tones that harmonize with your home’s exterior colors. Within the mulched centers, plant low-water shrubs like juniper, barberry, or native grasses that thrive in Denver’s climate.

River Rock Borders Around Foundation Beds

#3: Mulch-to-Rock Transitions for Slope Control

Implement a graduated system using larger crushed granite or decomposed granite on steeper areas, transitioning to smaller rock mulch on gentler slopes, with organic mulch reserved for flat planting areas.

This rock and mulch landscaping strategy prevents soil erosion and creates interesting textural transitions throughout your yard. Anchor the system with placed boulders that serve as both erosion barriers and focal points.

Plant drought-tolerant groundcovers like creeping phlox or sedum between the rocks to add color and further stabilize the soil.

Mulch-to-Rock Transitions for Slope Control

#4: Rock Mulch Under Trees with Mulch Accent Rings

Maximize fire safety and minimize maintenance by installing rock mulch in the majority of your tree’s root zone. This approach addresses Denver’s wildfire concerns and helps your trees receive adequate organic matter near their base.

Use lava rock or decomposed granite for the main mulched area, extending to the tree’s drip line. Create a 3-4 foot diameter ring of quality bark mulch immediately around the trunk, which provides essential organic nutrients.

This rock and mulch landscape idea works particularly well with established shade trees like maples, oaks, or evergreens.

Rock Mulch Under Trees with Mulch Accent Rings

#5: Dry Creek Bed with Mixed Rock Sizes and Mulch Edges

Design a naturalistic dry creek bed using various sizes of river rock and granite, bordered by mulched planting areas that simulate the vegetation found along Colorado’s mountain streams.

This landscaping idea with rocks and mulch serves both aesthetic and practical purposes, managing water runoff while creating a stunning focal point.

Begin with larger boulders (12-18 inches) to define the creek bed’s banks, fill the center with medium river rock (2-4 inches), and use smaller pea gravel for realistic detail.

Plant the mulched edges with native sedges, ornamental grasses, and moisture-loving perennials that would naturally occur near water sources.

Dry Creek Bed with Mixed Rock Sizes and Mulch Edges

#6: Flagstone Paths with Gravel Fill and Mulch Plant Pockets

Create elegant walkways using large flagstone stepping stones with clean gravel fill, punctuated by mulch-filled plant pockets that soften the hardships.

This sophisticated approach to mulch and rock landscaping ideas provides both functionality and beauty while addressing Denver’s need for low-water landscaping solutions.

Select Colorado buff or red sandstone flagstones for authentic regional character, spacing them naturally for comfortable walking. Fill the gaps with 3/8-inch crushed granite or pea gravel, and create irregular plant pockets filled with quality mulch.

These pockets can accommodate small ornamental grasses, succulents, or native wildflowers that add seasonal color without requiring extensive irrigation.

Flagstone Paths with Gravel Fill and Mulch Plant Pockets

#7: Front Yard Island Bed

Design a show-stopping front yard landscaping feature using large specimen boulders as anchor points, surrounded by zones of contrasting mulch and decorative rock.

Position 2-3 large boulders (3-5 feet in diameter) asymmetrically within your island bed, then create flowing zones of different materials around them. Use dark bark mulch near plantings that require moisture retention, medium-sized river rock in transition areas, and fine gravel or decomposed granite for pathways and accent areas.

Plant with architectural specimens like yucca, ornamental grasses, or dwarf conifers that complement the dramatic stone elements.

Front Yard Island Bed

#8: Raised Rock Beds with Dark Bark Mulch

Construct raised planting beds using stacked flagstone or boulder retaining walls, filled with dark bark mulch that creates striking contrast against the lighter stone colors.

This rock and mulch landscaping approach works exceptionally well in Denver’s intense sunlight, where the interplay of light and shadow creates constantly changing visual interest.

Build the retaining walls using locally quarried stone, ensuring proper drainage through the wall base. Fill with premium bark mulch in rich brown or black tones, and plant with silver-green drought-tolerant specimens like artemisia, Russian sage, or blue fescue.

Raised Rock Beds with Dark Bark Mulch

#9: Xeriscape Tree Ring Using Lava Rock and Native Grass

Create heat-insulated, low-water perimeters around existing trees using dark lava rock mulch, surrounded by rings of native buffalo grass or blue grama grass.

The dark lava rock absorbs heat during the day and releases it slowly at night, creating a beneficial microclimate for tree roots. Extend the rock mulch to cover the entire drip line area, then establish the grass ring beyond.

Xeriscape Tree Ring Using Lava Rock and Native Grass

#10. Fire-Smart Perimeter Beds

Implement defensible space principles by creating gravel-only zones within five feet of your home’s structure, transitioning to mixed rock and mulch areas further away. This critical landscaping idea with mulch and rocks prioritizes fire safety while maintaining attractive curb appeal.

Use clean, angular gravel or decomposed granite in the immediate home perimeter, selecting light colors that won’t absorb excessive heat.

Transition to mixed rock and mulch zones beginning at least five feet from structures, where you can safely incorporate organic materials and more diverse plantings.

Fire-Smart Perimeter Beds

What Is Rock Mulch? How It Differs From Wood Mulch

What Is Rock Mulch?

Rock mulch is simply crushed stone, gravel, or decorative rocks used to cover soil instead of organic materials like bark or wood chips. It serves the same basic purpose as traditional mulch – covering bare soil – but with completely different characteristics and benefits.

Rock Mulch vs. Wood Mulch

FeatureRock MulchWood Mulch
LifespanPermanent – lasts decades without replacement1-2 years before decomposing and needing replacement
Water ManagementPromotes drainage – water flows through quicklyRetains moisture – acts like a sponge for plants
Fire SafetyCompletely fireproof – creates defensible spaceHighly flammable – banned near structures in fire zones
MaintenanceVirtually none – occasional weeding onlyHigh – annual replacement and regular refreshing
Cost Over TimeHigher upfront, no ongoing costsLower upfront, continuous replacement costs
Plant BenefitsBest for drought-tolerant plantsIdeal for moisture-loving plants

Rock Mulch Landscaping Ideas: Tips For Choosing Right Materials That Work

Design Guidelines

  • Create contrast: Pair smooth river rocks with coarse bark mulch, or fine gravel with chunky wood chips
  • Use proper edging: Install steel edging or stone borders to keep materials separate and prevent mixing
  • Plan color combinations: Light-colored rocks make dark mulch pop, while neutral stones complement any mulch color

Fire Safety Rules

  • 5-foot rule: Use only rock mulch within 5 feet of your home’s structure
  • Avoid heat traps: Don’t place organic mulch near south-facing walls or mechanical equipment
  • Create defensible zones: Use rock mulch around fire-prone areas like outdoor kitchens or fire pits

Material Placement Strategy

  • Rock for drainage: Use rock mulch where water needs to flow away quickly (slopes, walkways)
  • Mulch for plants: Use organic mulch around trees and shrubs that need moisture retention
  • Transition zones: Create gradual changes between different materials for natural appearance

Installation Best Practices

  • Install landscape fabric: Place quality fabric under rock areas to prevent weeds (avoid plastic)
  • Prepare soil properly: Add drainage amendments under rock, compost under mulch
  • Plan for maintenance: Keep materials easily accessible for future additions or adjustments

Conclusion

These 10 creative ideas help you tackle wind-blown mulch, drought conditions, and fire safety while creating beautiful, low-maintenance yards that thrive year-round.

Whether you’re starting with simple river rock borders or designing comprehensive xeriscape gardens, the key is matching the right materials to your specific needs. Rock mulch handles Denver’s tough conditions, while strategic mulch placement keeps your plants healthy and happy.

Ready to transform your landscape with decorative landscaping rocks near me? Mile High Lifescape can help you design and install solutions that work perfectly for Colorado’s environment.

Frequently Asked Questions (FAQs)

Does rock mulch get too hot in summer?

Yes, rock mulch retains heat. Choose lighter colors like river rock or buff limestone, and plant heat-tolerant species like sedum or ornamental grasses to minimize issues.

Can you mix rock and mulch in landscaping?

Absolutely. Use proper edging to keep materials separate, place rock mulch in permanent areas, and use organic mulch around plants that need moisture.

Should I use both rock and mulch in the same yard?

Yes, this combination works great. Use rock mulch for walkways and fire-safe zones, organic mulch for planting beds. Keep them clearly separated with edging.

Does rock mulch attract termites?

No, rock mulch doesn’t attract termites because it provides no food source and doesn’t create moisture. It’s actually better than wood mulch for termite prevention.

Should I put topsoil under mulch?

Yes for organic mulch areas where you’re planting. For rock mulch areas, focus on proper drainage rather than rich soil, since most rock-mulched plants prefer well-draining conditions.

4.8/5 - (281 votes)

Extreme temperature swings, intense UV exposure, and water restrictions in Colorado make traditional grass and flower beds impractical around swimming areas. Landscaping around pool with rocks offers the perfect solution for Denver-area homeowners.

Rock landscaping delivers 3 core advantages: water conservation, exceptional durability, and year-round visual appeal. These materials withstand Colorado’s winters, summers, and sudden hailstorms without requiring constant replacement or maintenance.

Discover 21 proven rock landscaping ideas specifically designed for Colorado pools. Each concept addresses local climate conditions while creating safe, functional, and stunning outdoor spaces that enhance your property value and swimming experience.

21 Best Landscaping Around Pool With Rocks in Colorado

#1: River Rock Border for Drainage

Create a natural drainage system using smooth river rocks around your pool perimeter. This river rock landscaping around the pool with rocks approach prevents water accumulation and maintains an organic appearance. The rounded stones provide safe footing and excellent water filtration.

River Rock Border for Drainage

#2: Crushed Granite Lounge Pad

Install decomposed granite areas for poolside furniture placement. This stable surface resists shifting and provides excellent drainage during Colorado’s intense afternoon thunderstorms. The neutral color complements any pool finish.

Crushed Granite Lounge Pad

#3: Flagstone Walkway to Pool Steps

Design safe pathways using Colorado’s native flagstone. These flat stones offer superior traction when wet and withstand freeze-thaw cycles without cracking. Position stones with slight spacing for drainage between joints.

Flagstone Walkway to Pool Steps

#4: Palm-Inspired Pebble Garden

Replace tropical plants with cold-hardy alternatives like blue spruce or dwarf pine surrounded by decorative pebbles. This idea creates visual interest while surviving Colorado winters without protection.

Palm-Inspired Pebble Garden

#5: Rock & Cactus Island Feature

Construct raised beds using local sandstone filled with drought-tolerant cacti and succulents. These landscaping rocks around pool features require minimal water and thrive in Denver’s dry climate while adding architectural interest.

Rock & Cactus Island Feature

#6: Boulder Seating Area with Fire Pit

Position large boulders around a fire feature to extend pool season into Colorado’s cool evenings. Select rounded boulders with flat surfaces for comfortable seating. Ensure proper clearance from pool equipment and safety codes.

Boulder Seating Area with Fire Pit

#7: Tumbled Stone Perimeter with Ornamental Grasses

Border your pool with tumbled limestone and drought-resistant plantings. Lavender and native grasses complement the stone while requiring minimal irrigation. This combination thrives in Colorado’s alkaline soil conditions.

Tumbled Stone Perimeter with Ornamental Grasses

#8: Zen Gravel Meditation Corner

Create a peaceful retreat using raked gravel patterns in a dedicated corner. This low-maintenance approach area provides visual calm and requires only occasional re-raking to maintain crisp lines.

Zen Gravel Meditation Corner

#9: Lava Rock Accent Beds with Yucca or Agave

Use red or black lava rock to create dramatic contrast with architectural plants. The porous nature provides excellent drainage while the dark color absorbs heat during Colorado’s short growing season makes this idea pretty suitable in Colorado.

Lava Rock Accent Beds with Yucca or Agave

#10: Terraced Rock Garden for Sloped Yards

Build retaining walls using stacked stone to create level planting areas on slopes. This landscape rock around pool solution prevents erosion, maximizing usable space around your swimming area.

Terraced Rock Garden for Sloped Yards

#11: Poolside Dry Creek Feature for Rainflow Redirection

Channel rainwater away from your pool using decorative rock creek beds. This functional rock landscape prevents flooding, adding natural beauty that mimics Colorado’s mountain streams.

Poolside Dry Creek Feature for Rainflow Redirection

#12: Rock Bed Between Pool Fence and Lawn

Install a maintenance strip using crushed rock between fencing and grass areas. This barrier prevents grass growth against fence lines and provides a clean transition that reduces mowing requirements.

Rock Bed Between Pool Fence and Lawn

#13: Mulch-to-Rock Transition Zone

Create graduated zones using mulch near plants transitioning to rock near the pool. This protects plant roots from reflected heat while maintaining the benefits of swimming pool landscaping rocks in high-traffic areas.

Mulch-to-Rock Transition Zone

#14: Cobblestone Edging to Prevent Gravel Spread

Install cobblestone borders around loose gravel areas to maintain clean lines. This containment system prevents smaller rocks from migrating into pool areas while providing defined walking surfaces.

Cobblestone Edging to Prevent Gravel Spread

#15: Rock Mural or Mosaic Border Design

Arrange colored stones in patterns or designs around pool edges. Use contrasting colors to create visual interest while maintaining the practical benefits of rock landscaping in Colorado’s challenging climate.

Rock Mural or Mosaic Border Design

#16: Flagstone Dining Area with Rock-Inlaid Border

Extend your outdoor living space with flagstone patios surrounded by decorative rock borders. This above ground pool landscaping with rocks approach works equally well for in-ground installations.

Flagstone Dining Area with Rock-Inlaid Border

#17: Simple Gravel Base Around Above-Ground Pools

Level and stabilize above-ground pool areas using compacted gravel. This foundation prevents settling while providing excellent drainage during Colorado’s heavy spring runoff.

Simple Gravel Base Around Above-Ground Pools

#18: Mini Rock Garden with Boulders and Alpine Perennials

Create mountain-inspired landscapes using large boulders and Colorado native plants. This pool landscaping ideas with rocks approach celebrates local ecology while requiring minimal maintenance and water.

Mini Rock Garden with Boulders and Alpine Perennials

#19: Rock + Artificial Turf Combo

Combine artificial grass with rock borders in areas receiving heavy splash. This hybrid approach provides soft surfaces for children. It also helps maintain drainage and durability where natural grass struggles.

Rock + Artificial Turf Combo

#20: Decorative White Rock Accent Beds with Native Plants

Use white limestone chips to highlight native Colorado plants like penstemon and blanket flower. The light color reflects heat while creating striking contrast against colorful native blooms.

Decorative White Rock Accent Beds with Native Plants

#21: Black Lava Rock with Night Lighting

Install underwater and landscape lighting with dark lava rock for evening ambiance. The porous texture creates interesting shadow patterns and the dark color makes lighting effects more dramatic.

Black Lava Rock with Night Lighting

Benefits of Using Rocks for Pool Landscaping

  1. Low Maintenance Requirements: Rock landscaping eliminates mowing, trimming, and seasonal replanting tasks. Once installed, these surfaces require only occasional cleaning and minimal annual maintenance.
  2. Superior Water Conservation: Colorado’s water restrictions make rock landscaping essential for responsible homeowners. These materials require zero irrigation while supporting xeriscaping principles.
  3. Exceptional Durability: Rocks withstand intense UV exposure, sudden temperature changes, and severe hailstorms without replacement needs. This durability provides long-term value and consistent appearance.
  4. Enhanced Safety Features: Properly selected rocks offer superior traction compared to wet grass or smooth surfaces. Textured stones reduce slip hazards around pool areas while eliminating muddy conditions during Colorado’s monsoon season.
  5. Design Versatility: Rock materials complement any architectural style from modern to rustic. Colors and textures can be mixed to create custom looks that enhance property values while addressing practical landscaping challenges.

Which Rocks Should You Use for Landscaping Around Pool with Rocks

Rounded River Rock vs. Jagged Gravel

Choose rounded river rocks for areas where people walk barefoot. The smooth surfaces prevent cuts while providing excellent drainage. Reserve jagged materials for decorative beds away from traffic areas. River rocks handle Colorado’s freeze-thaw cycles without breaking apart.

Lava Rock

Lava rock’s porous structure provides natural insulation and unique texture. The material absorbs heat during the day and releases it slowly, extending comfortable evening hours. Black varieties create dramatic contrast against light-colored pool finishes.

Decomposed Granite

This compactable material creates firm walking surfaces that remain stable under foot traffic. Decomposed granite drains well while providing a refined appearance suitable for formal landscape designs. The material integrates seamlessly with Colorado’s natural geology.

Flagstone 

Colorado’s native flagstone offers flat surfaces perfect for outdoor furniture and foot traffic. The material’s natural slip resistance makes it ideal for wet areas. Flagstone maintains its appearance through extreme weather cycles without requiring replacement.

Beach Pebbles

 Smooth, uniform pebbles create contemporary looks that complement modern architecture. These materials work well in geometric patterns and provide excellent drainage. Choose larger sizes to prevent displacement during heavy rains or wind events.

Which Rocks Should You Use for Landscaping Around Pool with Rocks

Maintenance Tips for Rock Landscapes Near Pools

  • Weekly Debris Removal: Remove leaves and organic debris promptly to prevent staining and algae growth. Use leaf blowers or stiff brooms to clear surfaces efficiently.
  • Monthly Deep Cleaning: Power wash rock surfaces monthly to remove accumulated dust and chemical residue. This process restores original colors and removes any algae buildup. Rinse thoroughly to prevent cleaning solution accumulation.
  • Annual Gravel Replenishment: Add fresh gravel annually to maintain proper depth and coverage. Colorado’s wind and water movement gradually displaces smaller materials. This maintenance ensures continued drainage performance and visual appeal.
  • Weed Prevention Strategies: Install landscape fabric under rock installations to prevent weed growth. This barrier significantly reduces maintenance while allowing proper drainage. Quality fabric withstands Colorado’s soil conditions for multiple years before replacement.
  • Barefoot Area Safety: Inspect high-traffic areas regularly for sharp edges or displaced stones. Smooth any rough surfaces and replace damaged materials promptly. This proactive approach prevents injuries while maintaining the safe environment that makes rock landscaping practical.

Conclusion

Rock landscaping around pools offers homeowners solutions for creating functional outdoor spaces that thrive in our challenging climate. These 21 proven ideas demonstrate how strategic use of rocks can deliver year-round visual appeal and exceptional durability.

Ready to transform your pool area with Denver landscape rock companies?

Contact Mile High Lifescape today for expert consultation and installation services designed specifically for Colorado’s unique climate challenges.

Frequently Asked Questions (FAQs)

Is river rock slippery around pools?

River rock provides good traction when dry due to its naturally textured surface. Avoid polished stones and choose tumbled varieties for better grip. The rounded edges are safer for barefoot traffic while maintaining excellent drainage properties.

Is it better to mulch or rock around a pool?

Rock landscaping around pool areas significantly outperforms mulch in Colorado conditions. Rocks resist displacement, don’t decompose, and prevent debris from entering pool water. They also withstand chlorine splash and intense UV exposure better than organic materials.

Will landscaping rocks around my pool affect water chemistry?

Properly installed rocks don’t affect pool chemistry unless they enter the water directly. Rinse acidic stones before installation and ensure proper containment. Most Colorado-appropriate rocks are pH-neutral and won’t alter water balance.

Is it okay to put rocks around an above ground pool?

Avoid placing rocks directly against pool walls to prevent damage. Create attractive borders at safe distances while ensuring proper drainage and access for maintenance. Above ground pool rock landscaping enhances appearance but requires careful installation.

What is the best surface to have around a pool?

The optimal surface depends on climate, budget, and usage patterns. In Colorado, flagstone and decomposed granite offer excellent durability and safety. Pavers provide design flexibility while concrete offers cost-effective longevity.

4.8/5 - (125 votes)
Scroll to Top