The shift toward rock and mulch landscaping ideas represents more than just a trend; it’s a smart adaptation to Denver’s unique environmental demands. 

Traditional bark mulch, while attractive, often struggles against Colorado’s relentless sun and wind, requiring frequent replacement and constant maintenance. Rock mulch, however, offers durability and fire resistance while creating stunning visual contrasts when paired thoughtfully with organic mulch in designated areas.

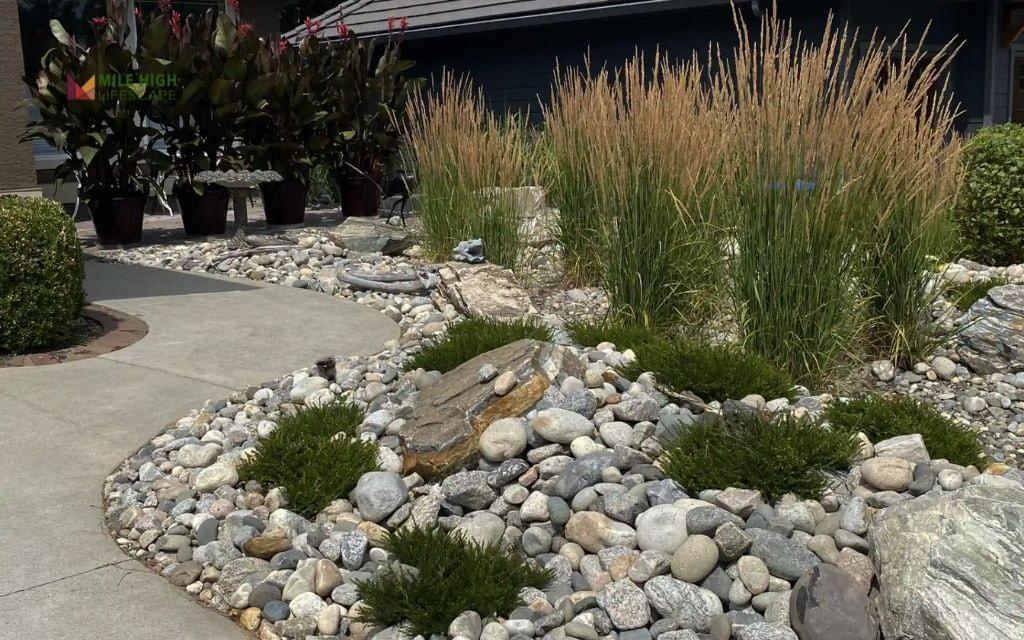
Whether you’re planning front yard rock mulch landscaping ideas or reimagining your backyard oasis, these 10 creative approaches will help you design a landscape that you dream of.

10 Rock Mulch Landscaping Ideas in Denver

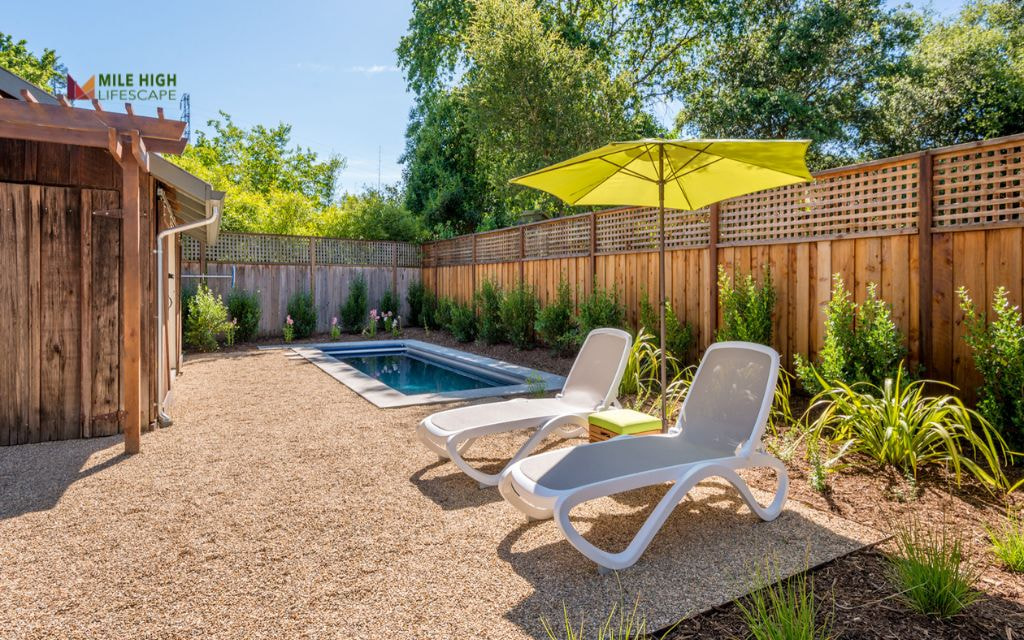
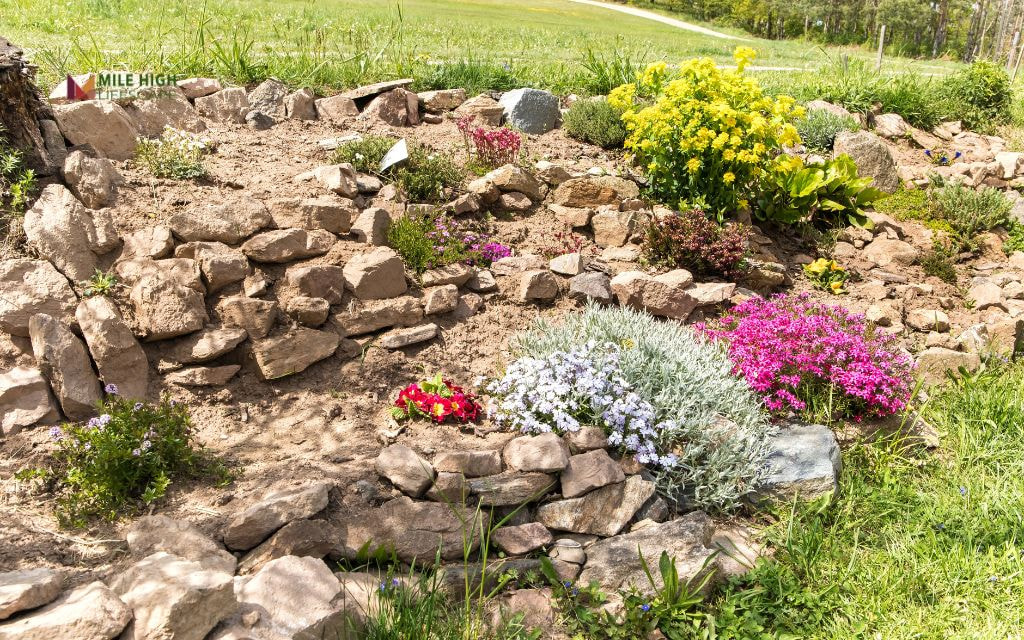
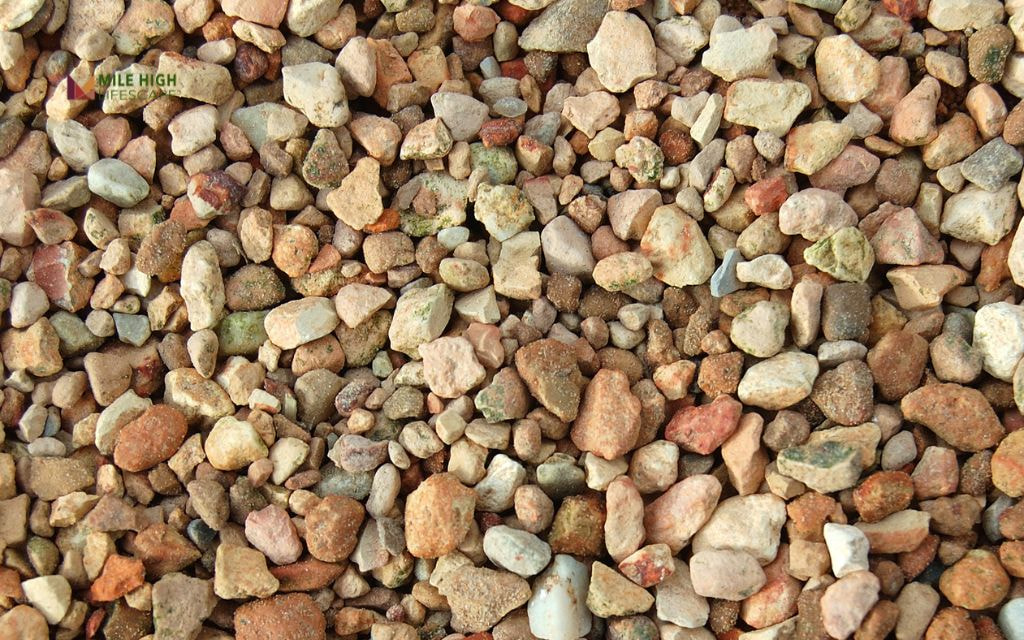
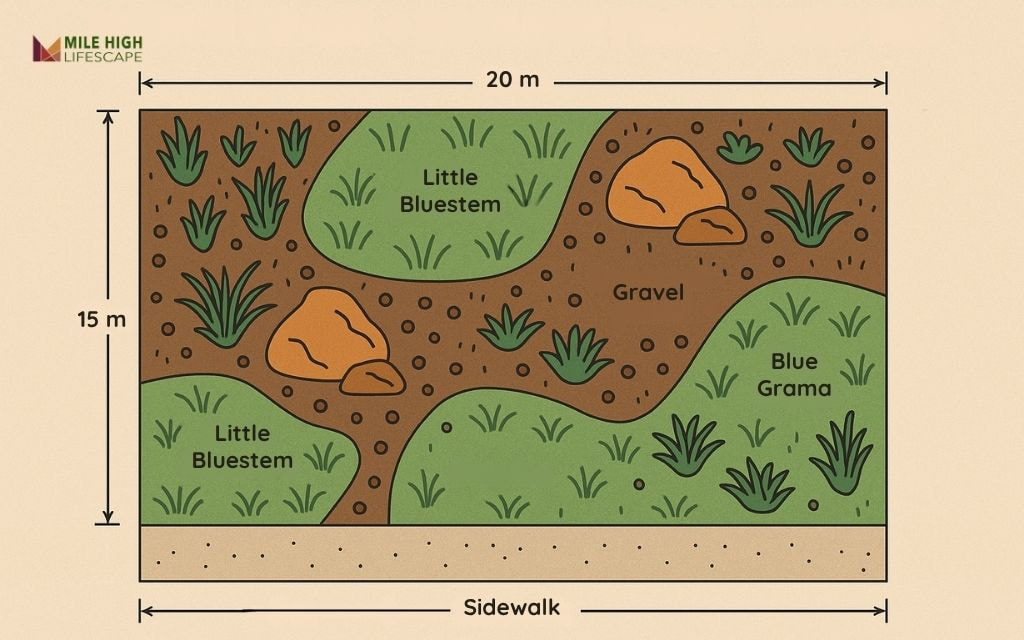
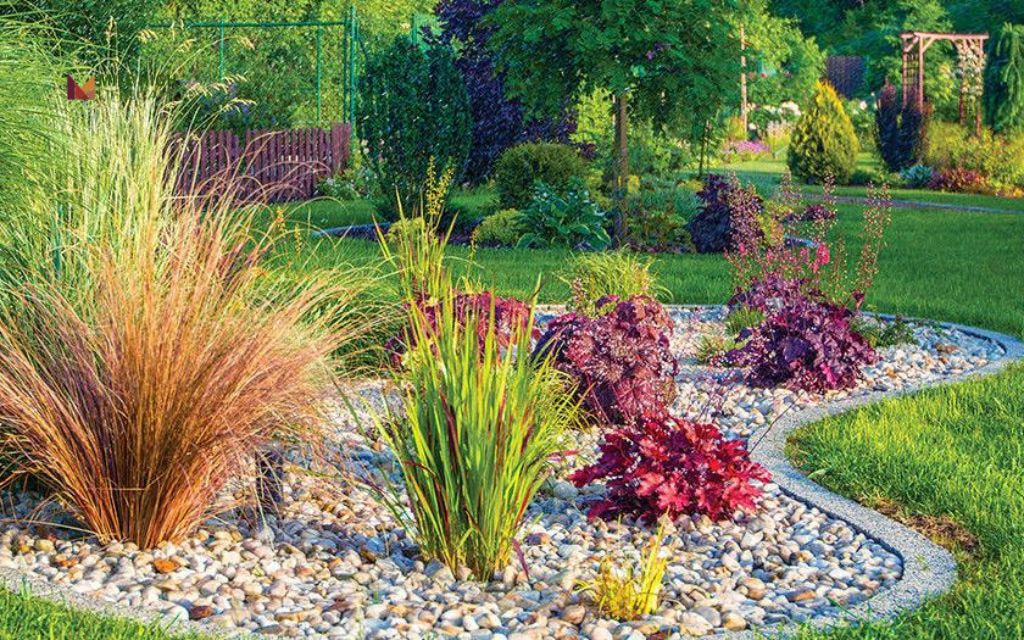
#1: Curved Gravel Beds with Native Perennials

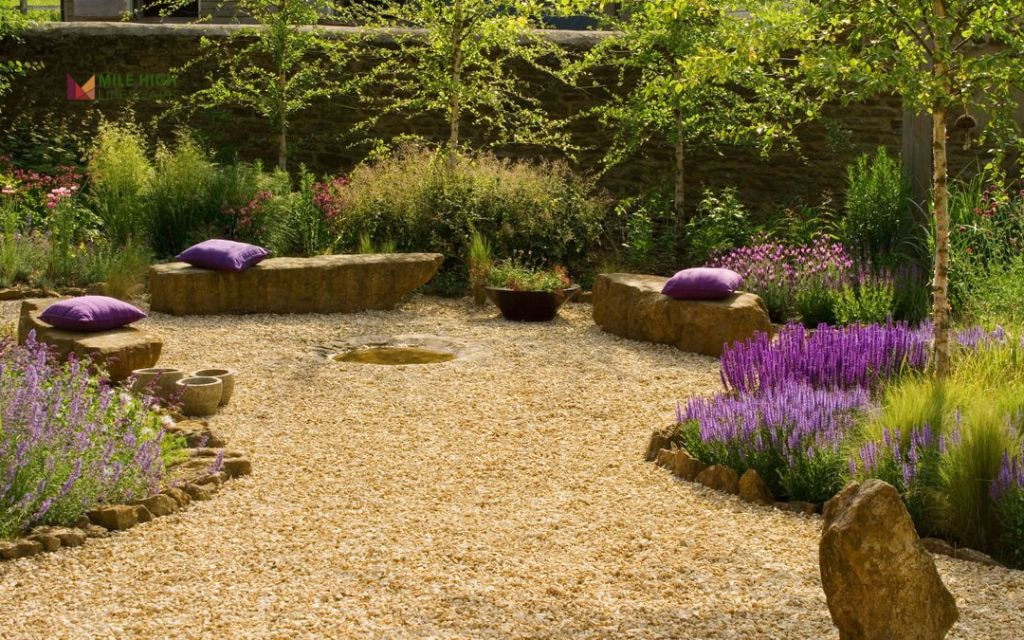
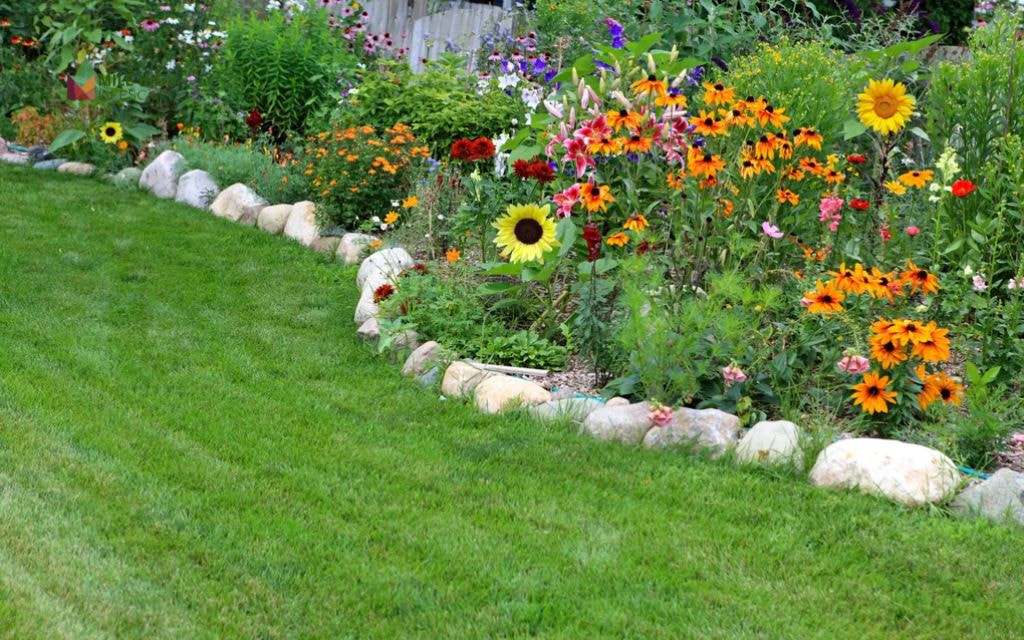
This rock mulch landscaping approach works well with drought-tolerant perennials like yarrow, penstemon, and blanket flower. The smooth stones provide excellent drainage while suppressing weeds, and their neutral tones allow your colorful native blooms to take center stage.

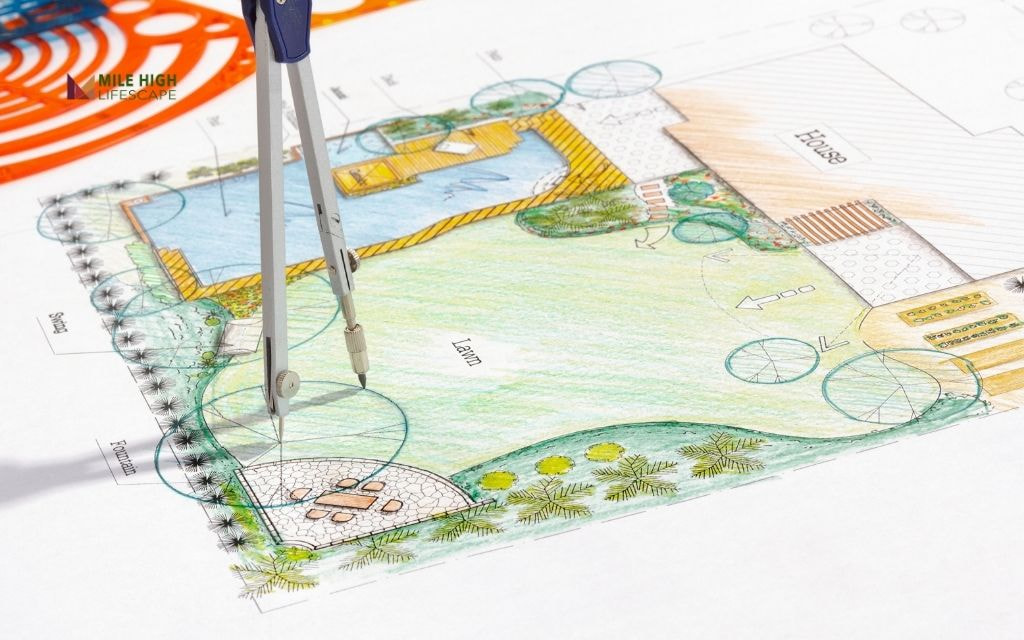
Design the curved gravel beds to follow your yard’s natural contours, creating visual flow that guides the eye through your landscape.

Use a quality landscape fabric beneath the gravel to prevent weeds while allowing water penetration. The 3/8-inch pea gravel size works best for this application.

Curved Gravel Beds with Native Perennials

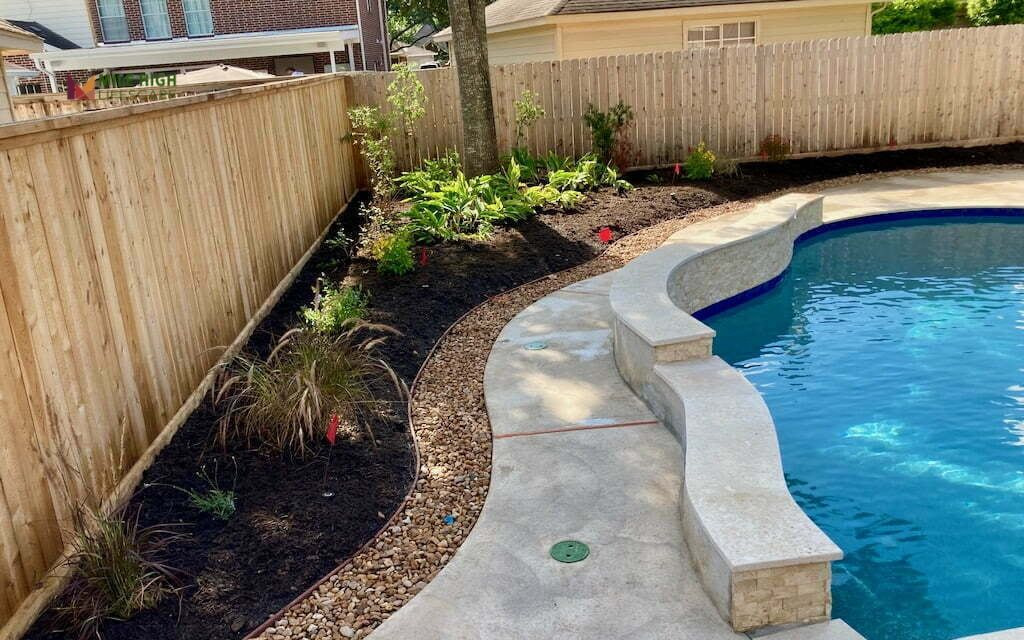
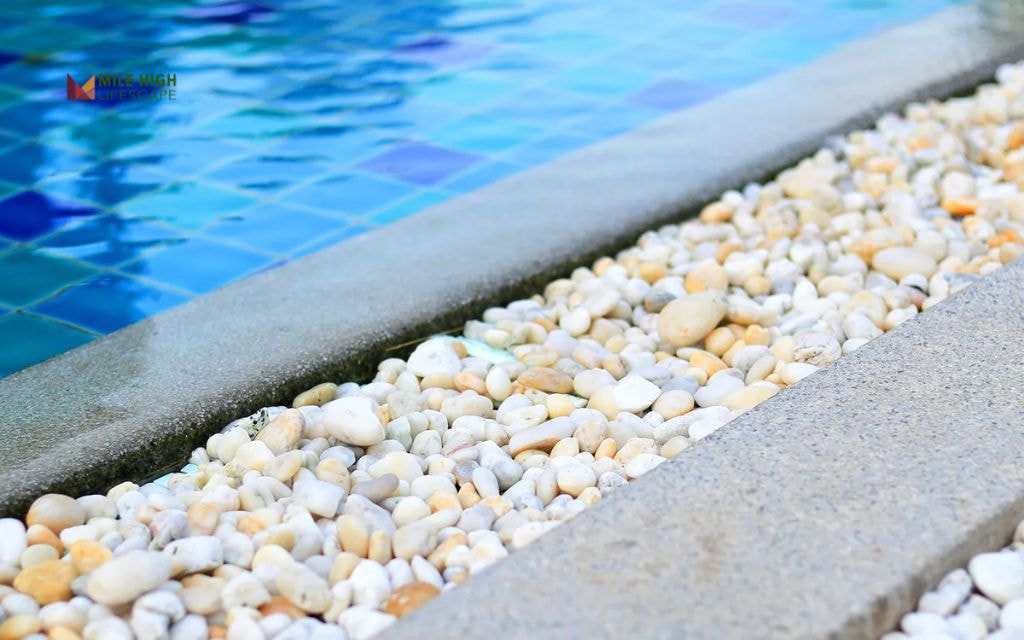
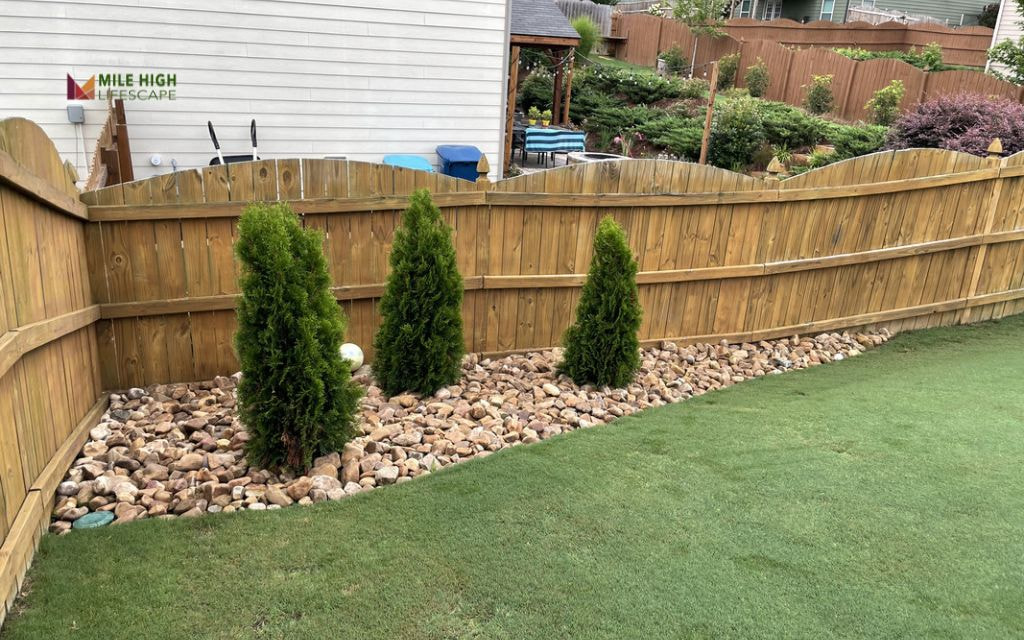
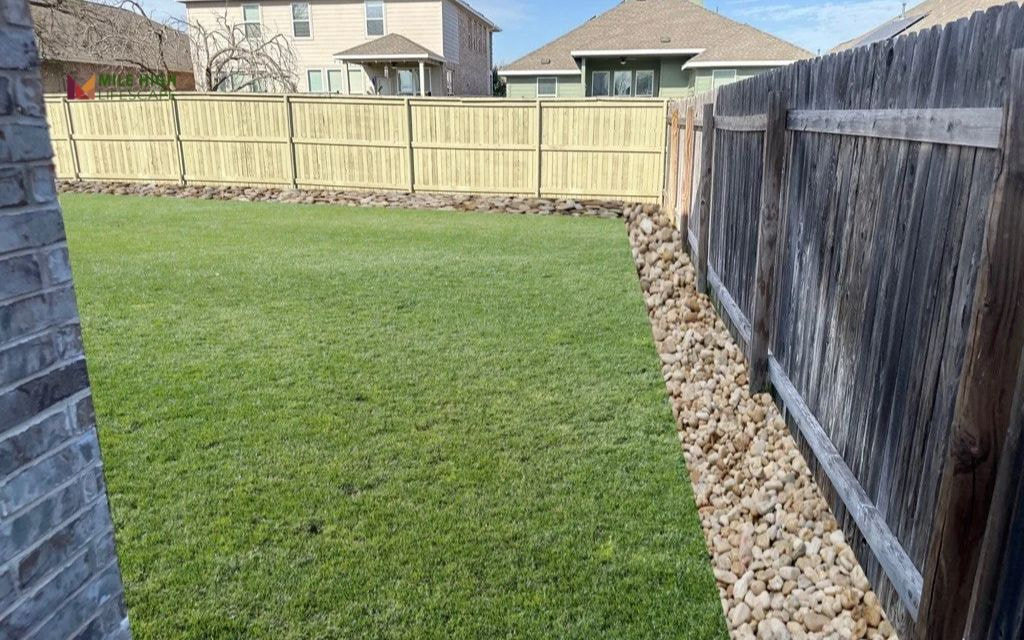
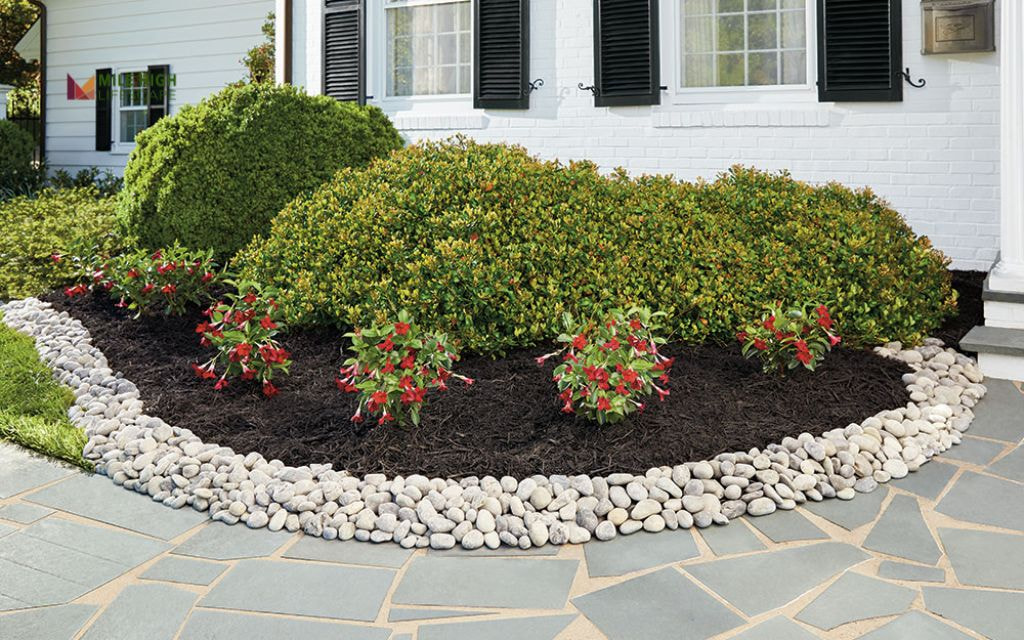
#2: River Rock Borders Around Foundation Beds

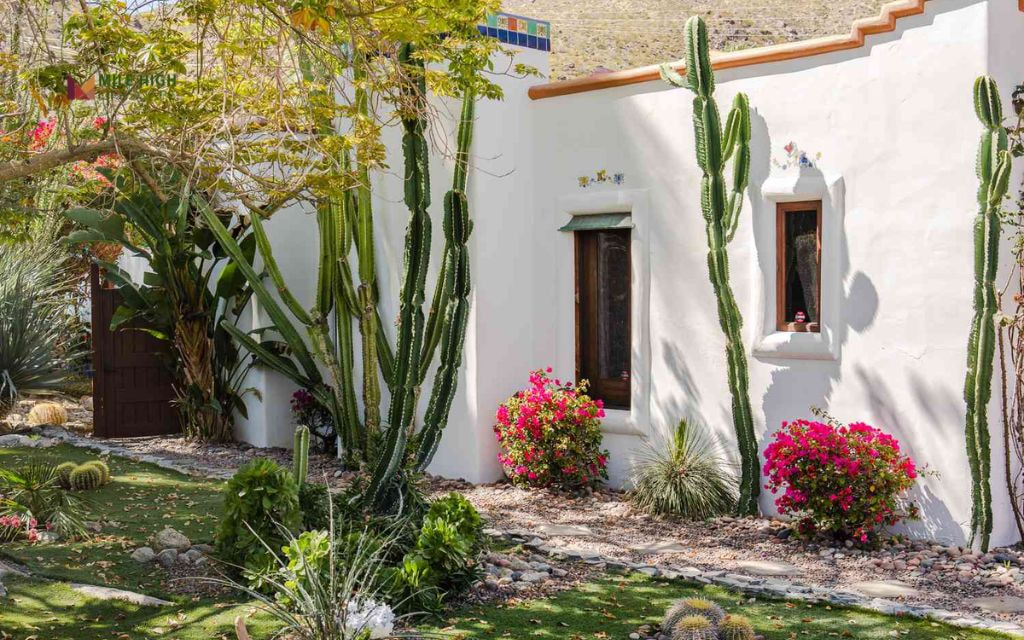
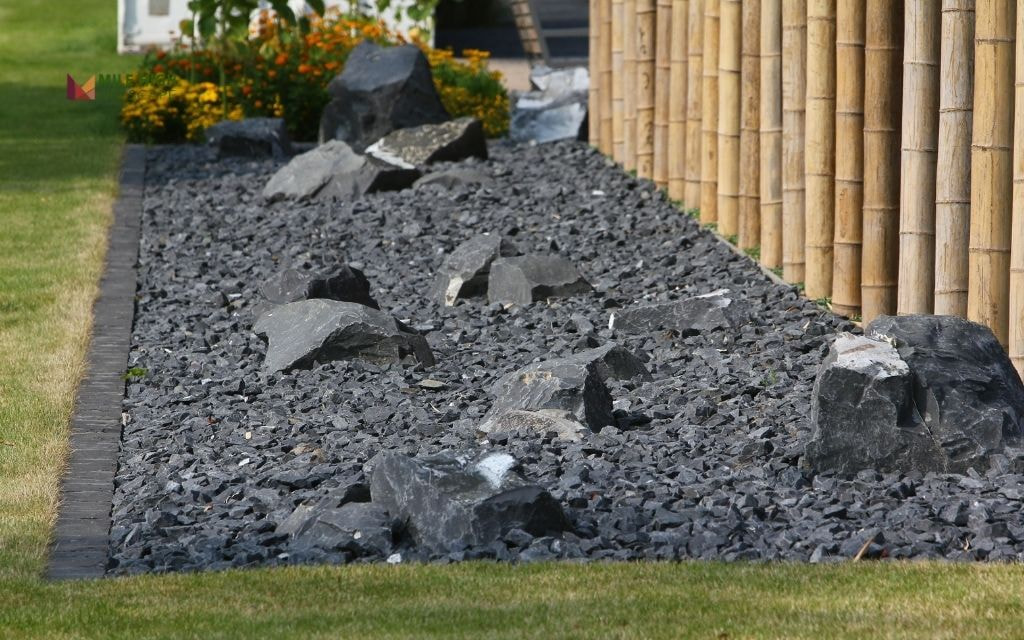
Create striking definition around your home’s foundation using 3-5 inch river rocks as borders, with decorative mulch filling the interior planting areas.

This landscaping idea with mulch and rocks offers the perfect balance of fire safety and plant health – the river rock creates a non-flammable barrier near your home’s structure while the central mulch zones provide moisture retention for your plantings.

Choose river rocks in complementary earth tones that harmonize with your home’s exterior colors. Within the mulched centers, plant low-water shrubs like juniper, barberry, or native grasses that thrive in Denver’s climate.

River Rock Borders Around Foundation Beds

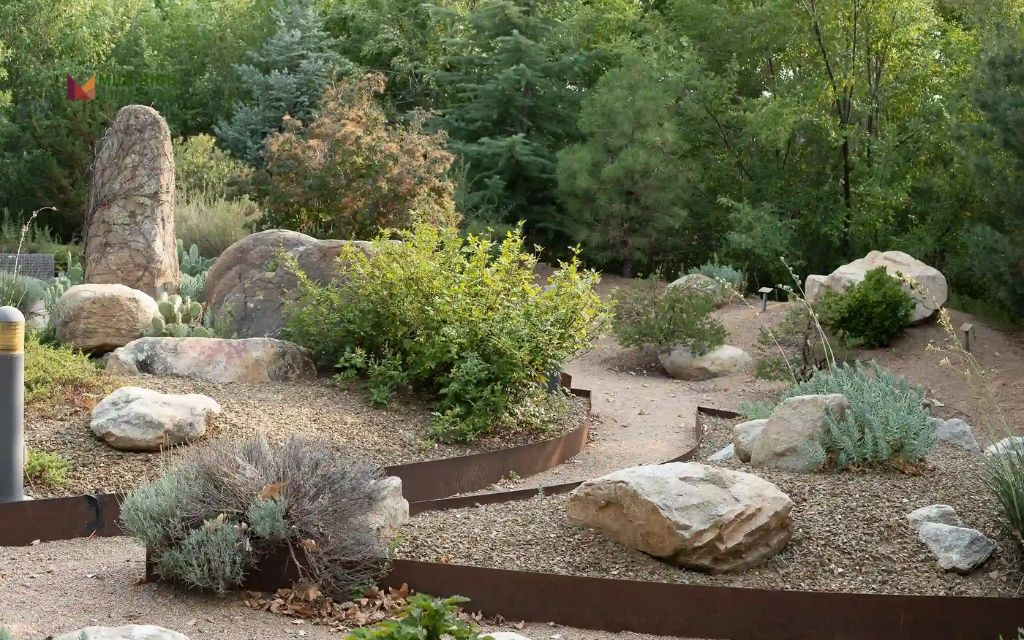
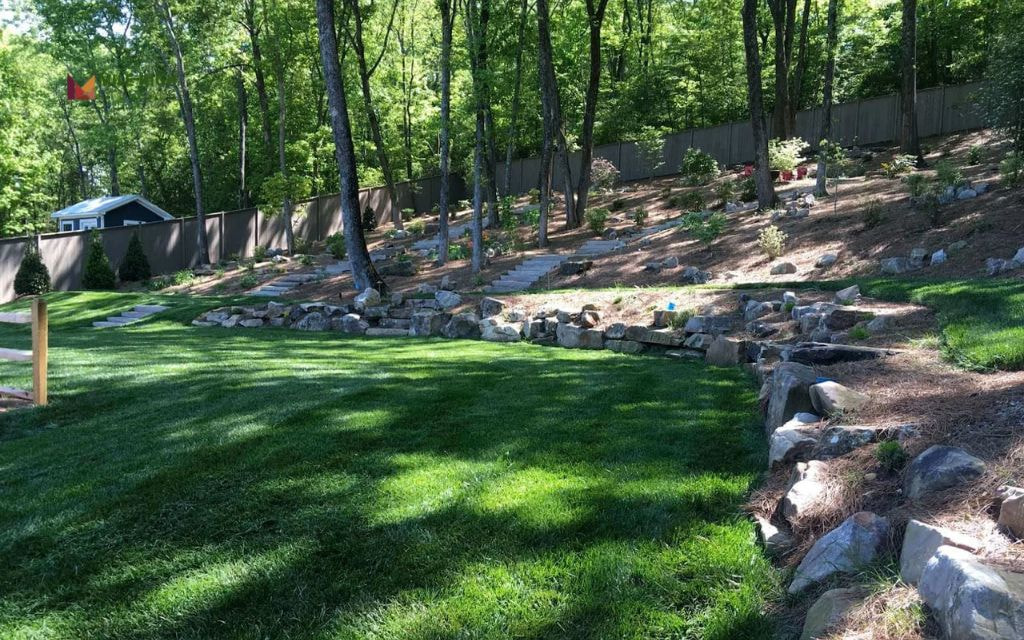
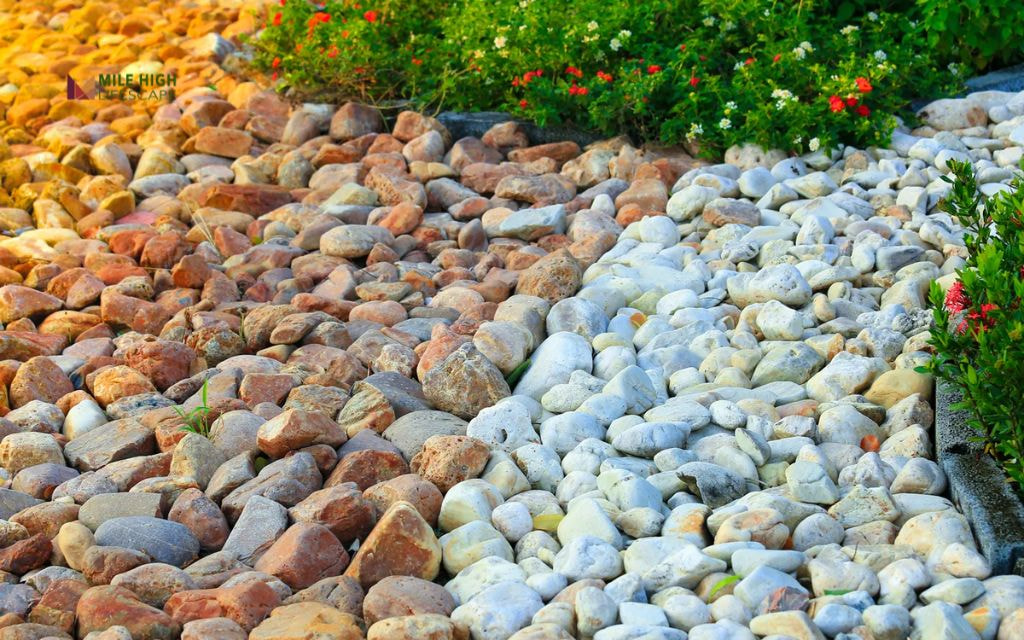
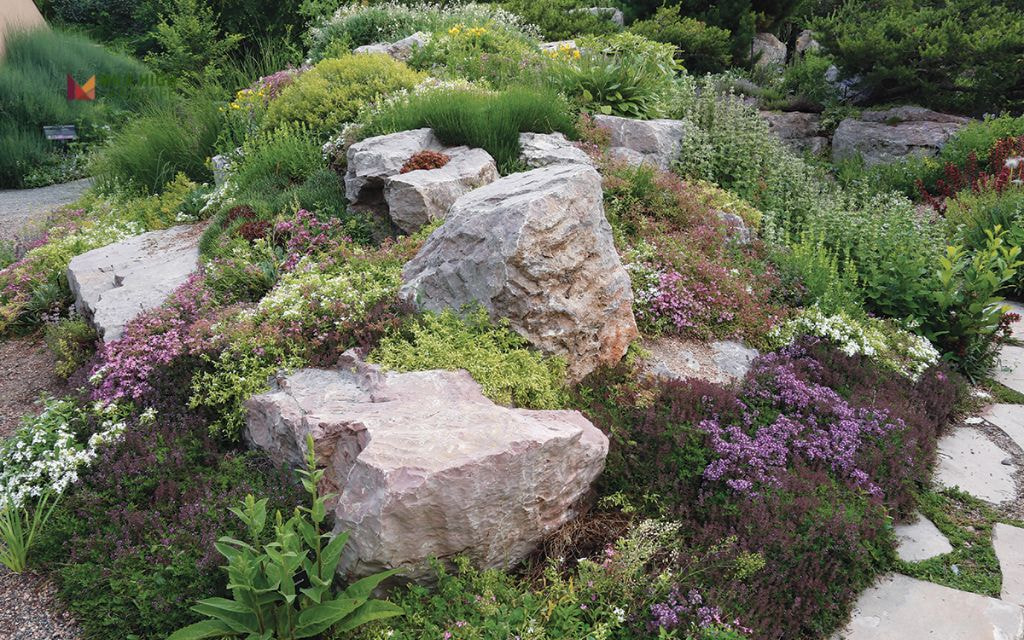
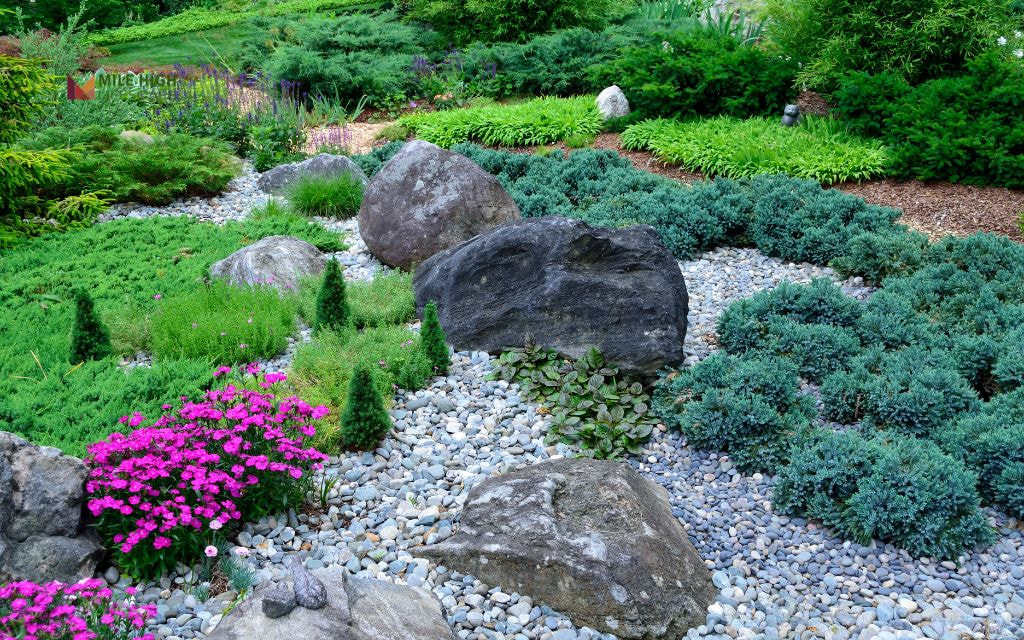
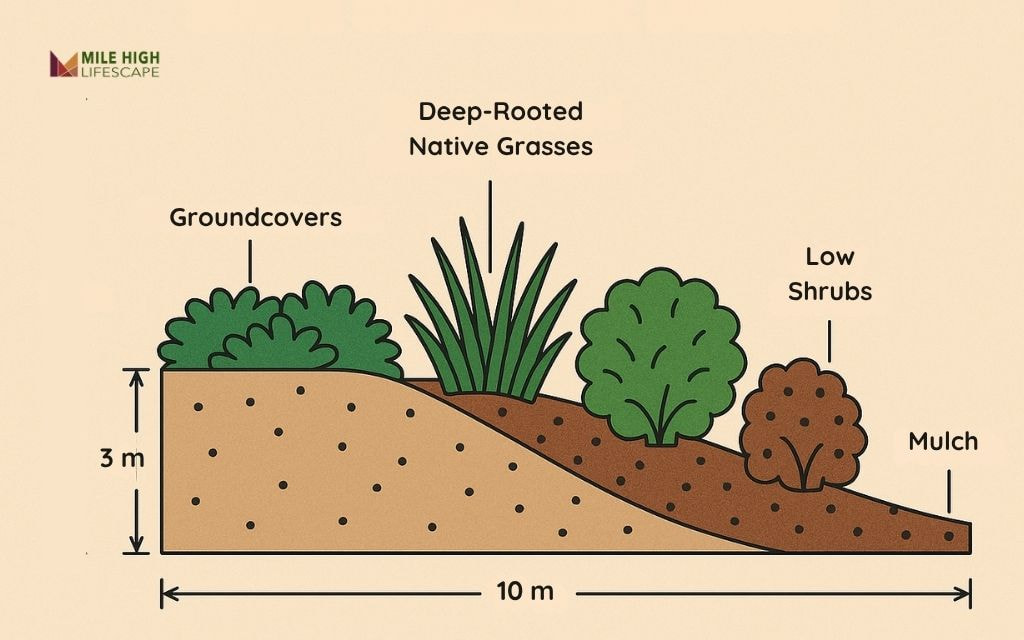
#3: Mulch-to-Rock Transitions for Slope Control

Implement a graduated system using larger crushed granite or decomposed granite on steeper areas, transitioning to smaller rock mulch on gentler slopes, with organic mulch reserved for flat planting areas.

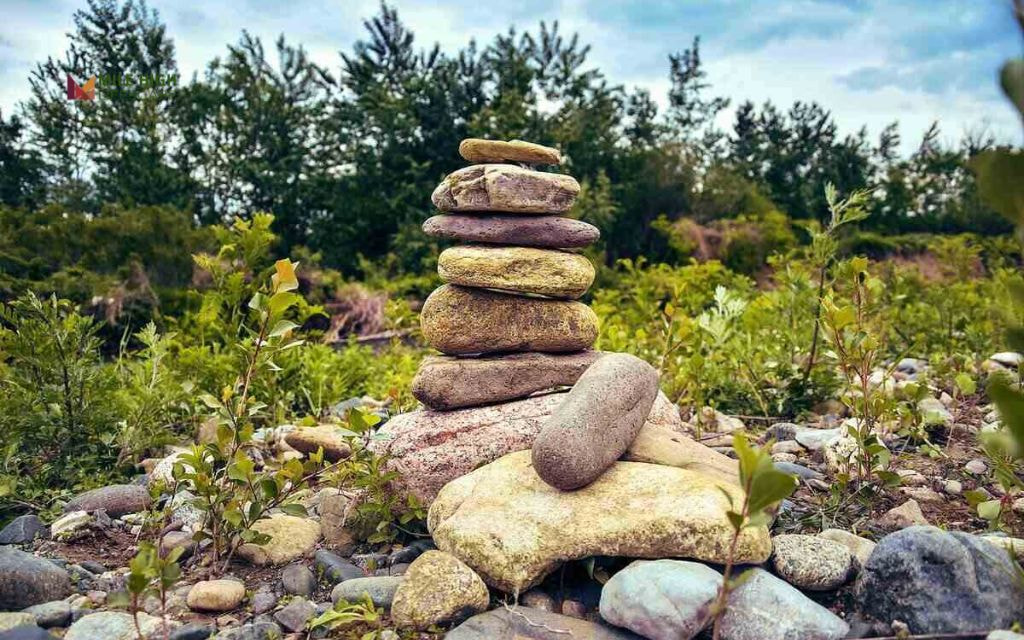
This rock and mulch landscaping strategy prevents soil erosion and creates interesting textural transitions throughout your yard. Anchor the system with placed boulders that serve as both erosion barriers and focal points.

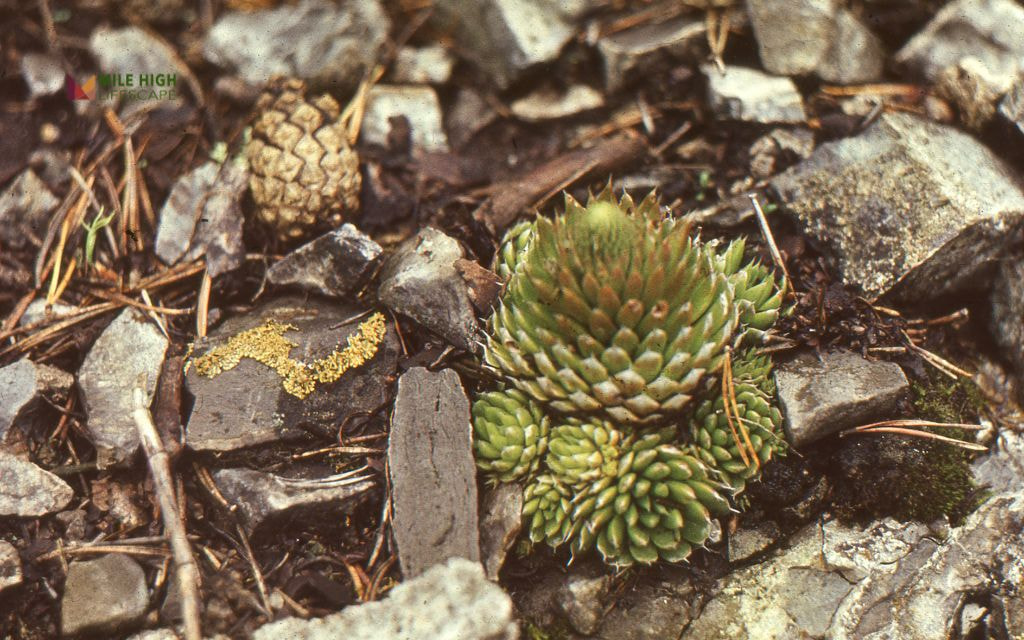
Plant drought-tolerant groundcovers like creeping phlox or sedum between the rocks to add color and further stabilize the soil.

Mulch-to-Rock Transitions for Slope Control

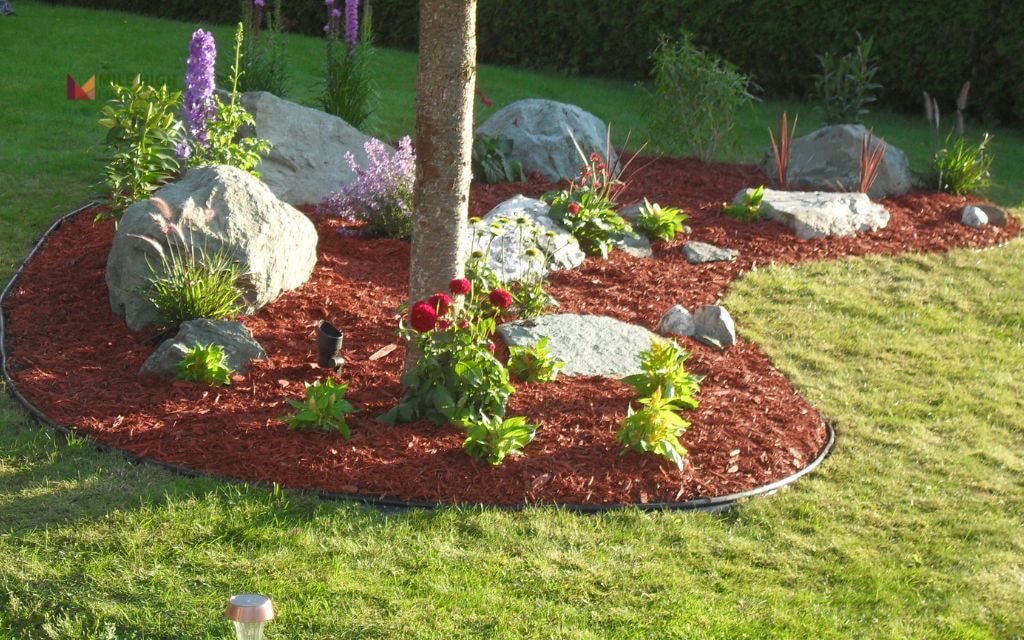
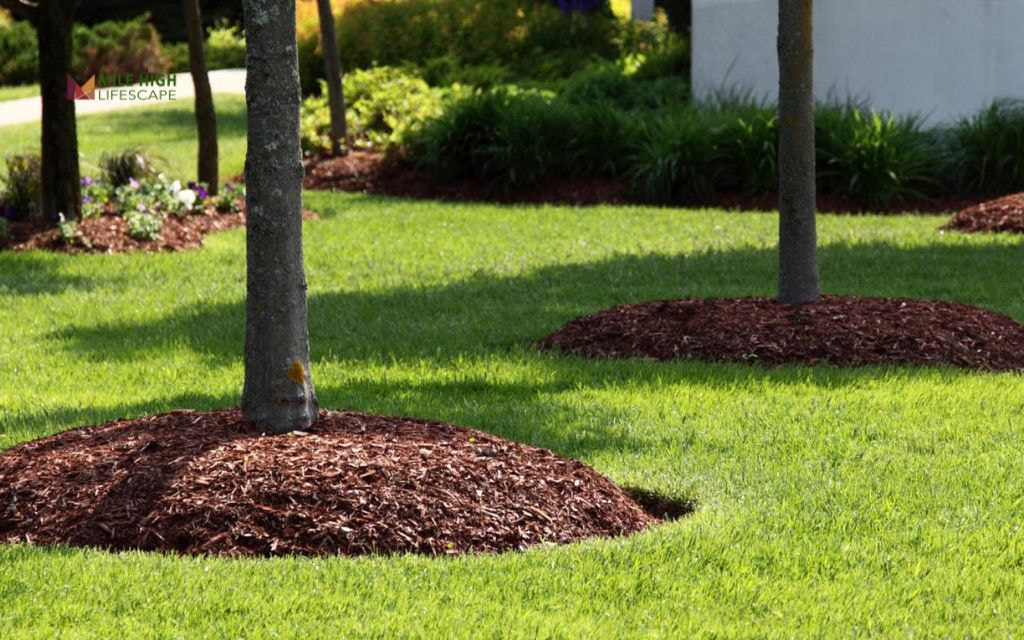
#4: Rock Mulch Under Trees with Mulch Accent Rings

Maximize fire safety and minimize maintenance by installing rock mulch in the majority of your tree’s root zone. This approach addresses Denver’s wildfire concerns and helps your trees receive adequate organic matter near their base.

Use lava rock or decomposed granite for the main mulched area, extending to the tree’s drip line. Create a 3-4 foot diameter ring of quality bark mulch immediately around the trunk, which provides essential organic nutrients.

This rock and mulch landscape idea works particularly well with established shade trees like maples, oaks, or evergreens.

Rock Mulch Under Trees with Mulch Accent Rings

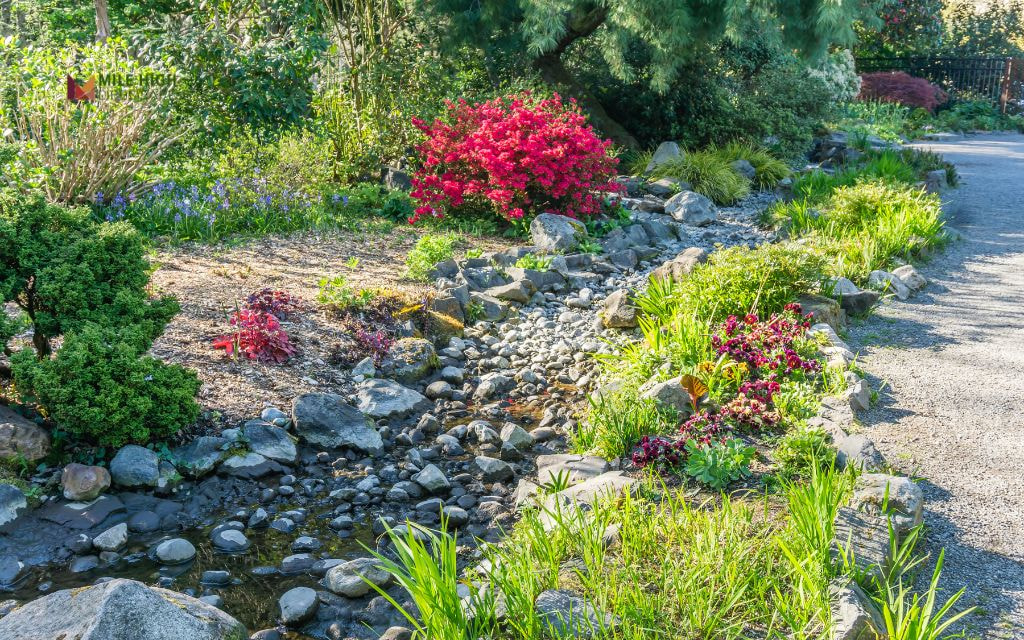
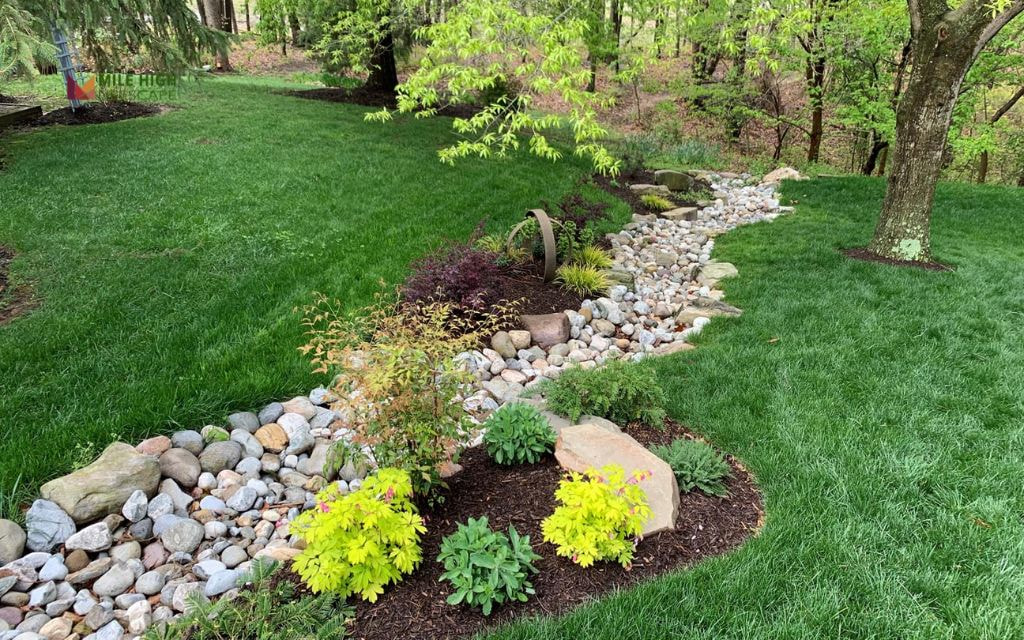
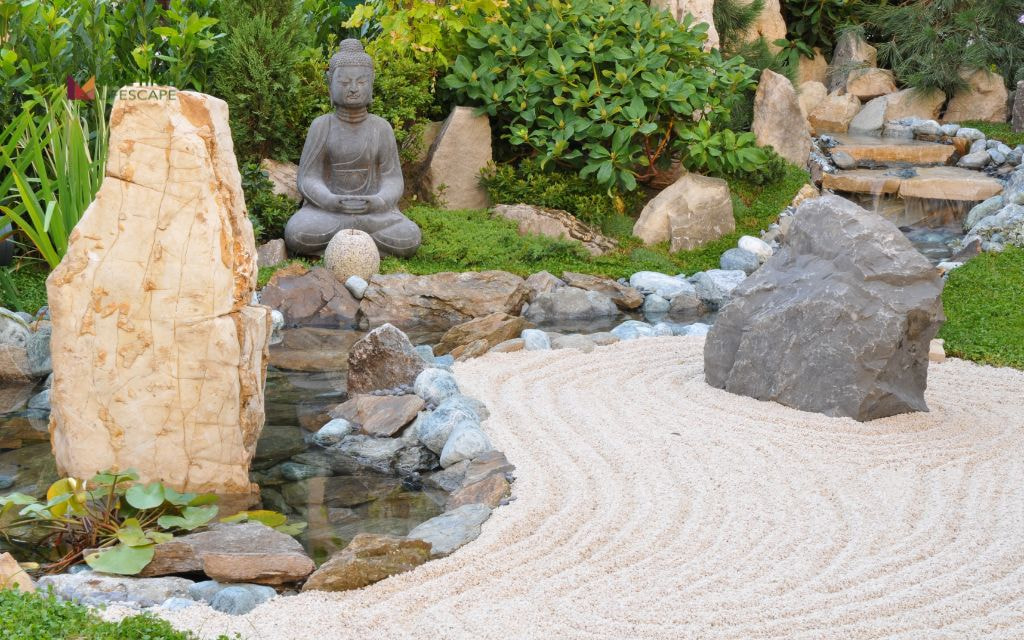
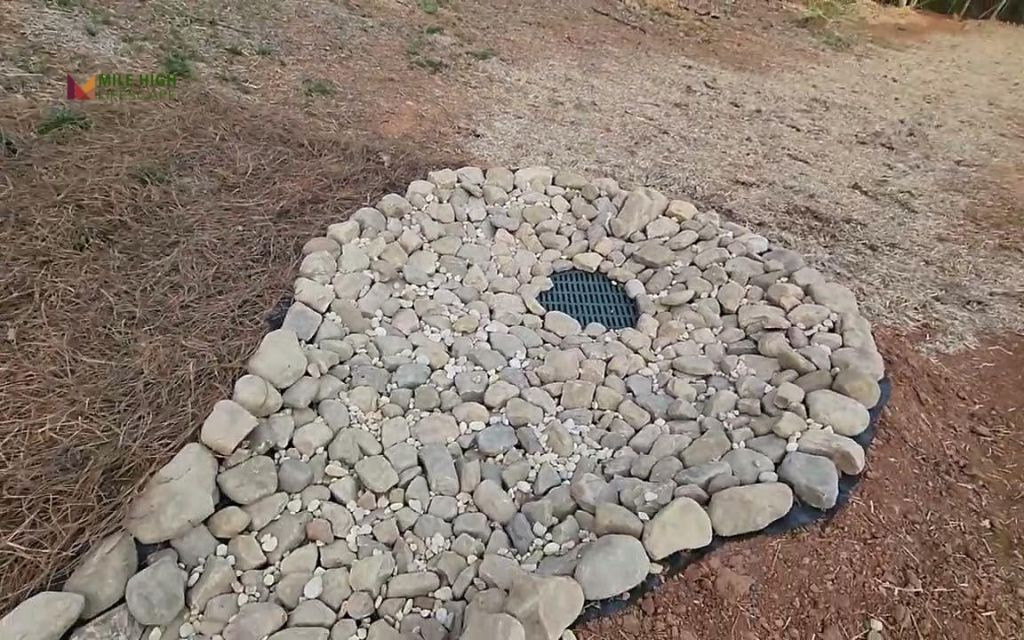
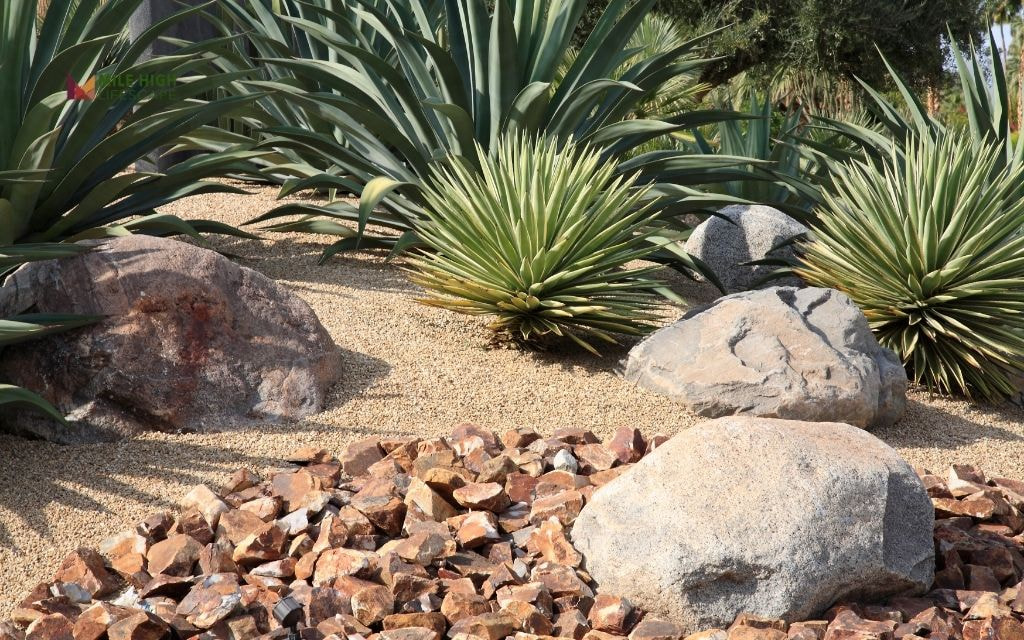
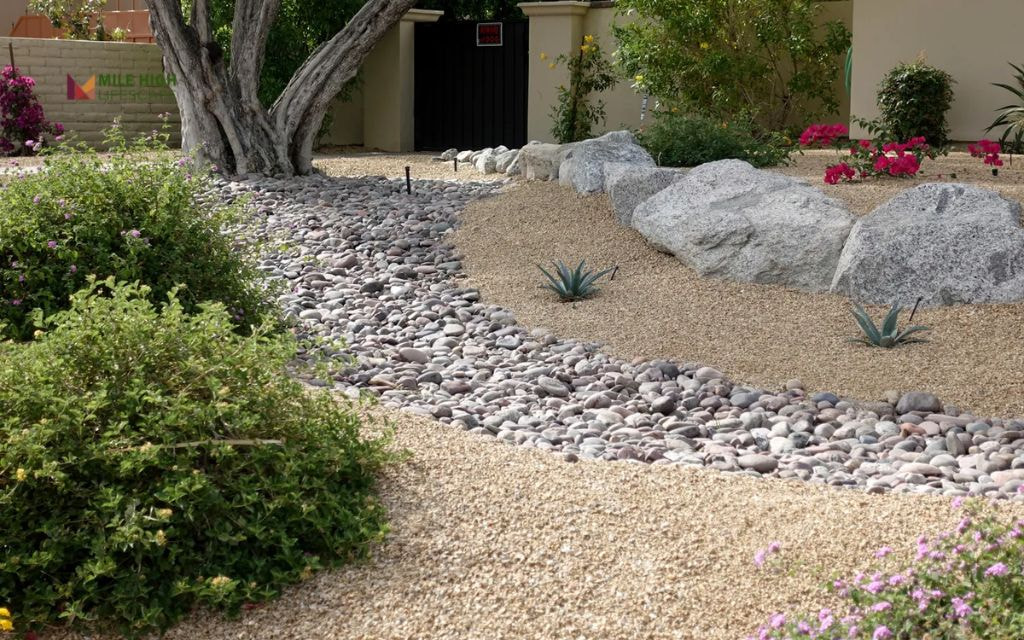
#5: Dry Creek Bed with Mixed Rock Sizes and Mulch Edges

Design a naturalistic dry creek bed using various sizes of river rock and granite, bordered by mulched planting areas that simulate the vegetation found along Colorado’s mountain streams.

This landscaping idea with rocks and mulch serves both aesthetic and practical purposes, managing water runoff while creating a stunning focal point.

Begin with larger boulders (12-18 inches) to define the creek bed’s banks, fill the center with medium river rock (2-4 inches), and use smaller pea gravel for realistic detail.

Plant the mulched edges with native sedges, ornamental grasses, and moisture-loving perennials that would naturally occur near water sources.

Dry Creek Bed with Mixed Rock Sizes and Mulch Edges

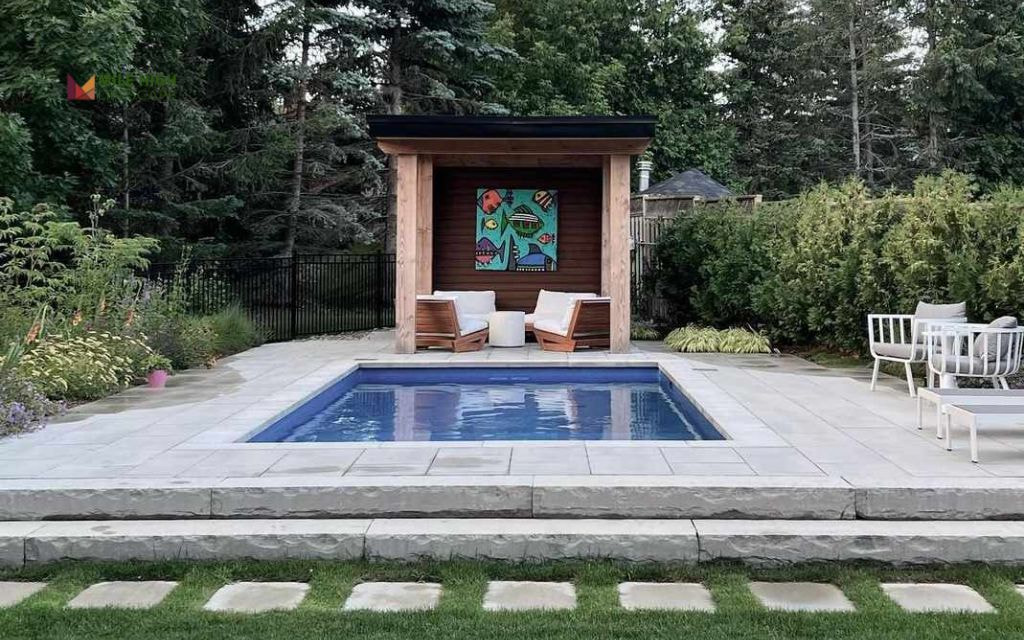
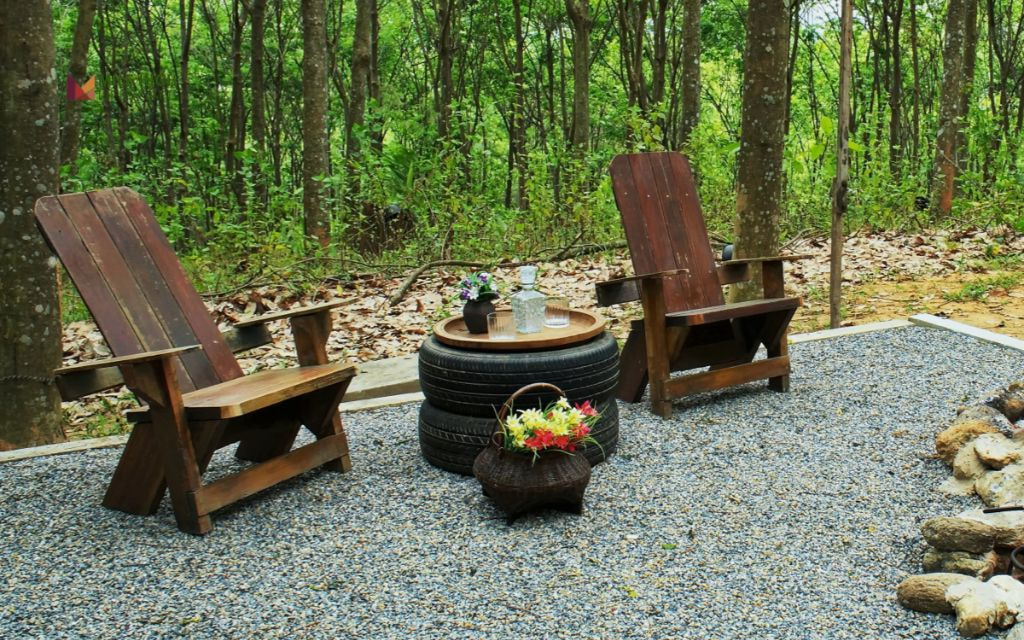
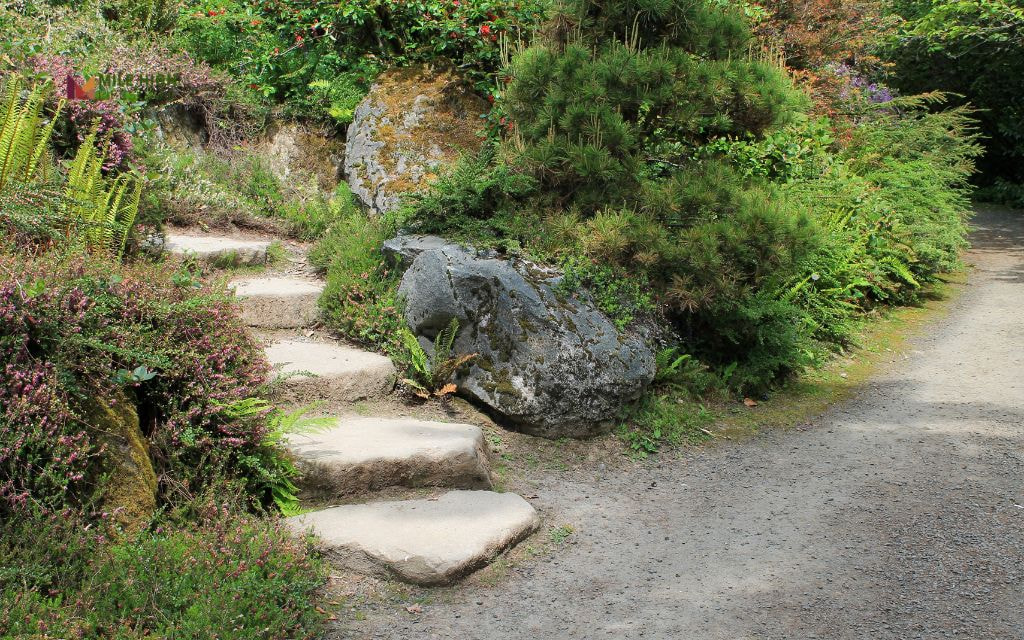
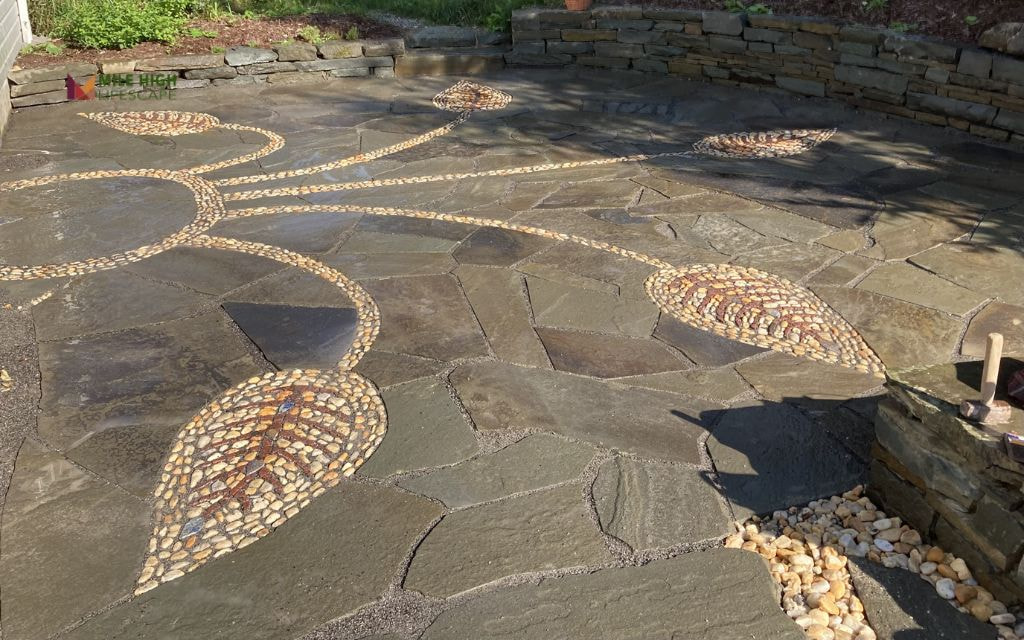
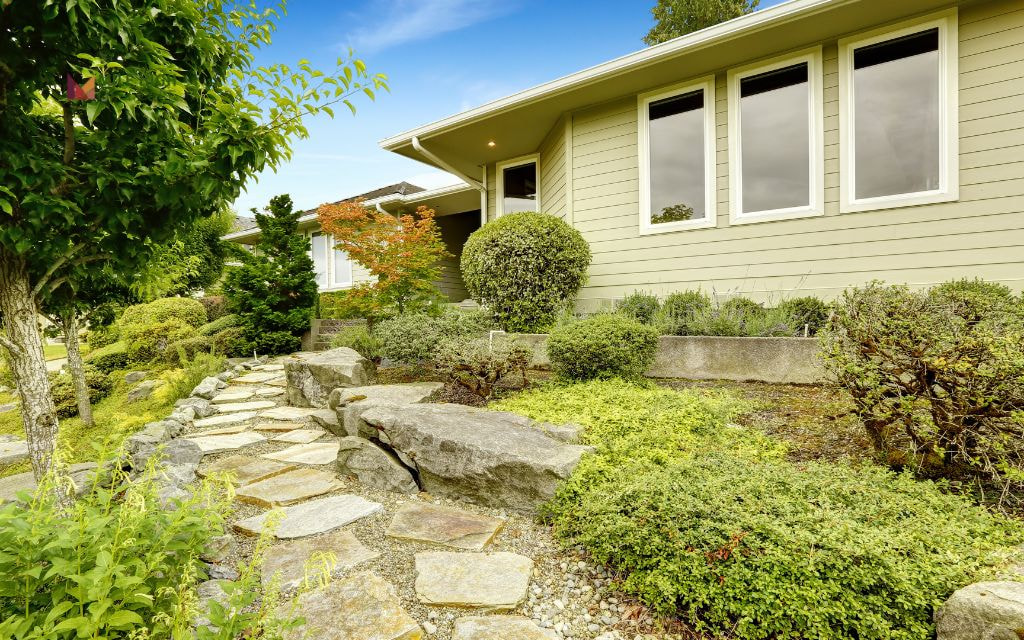
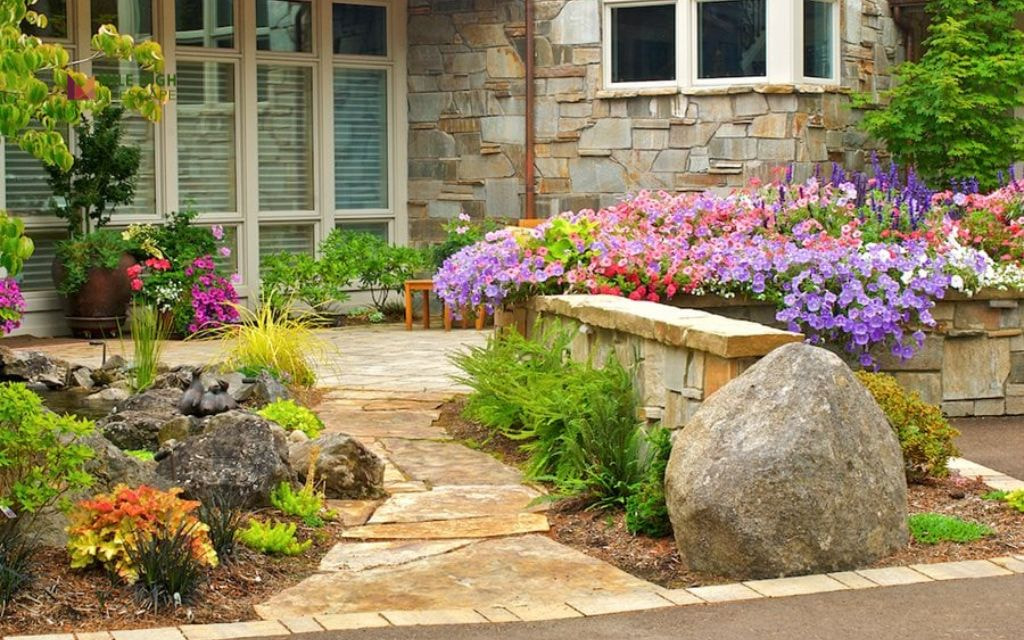
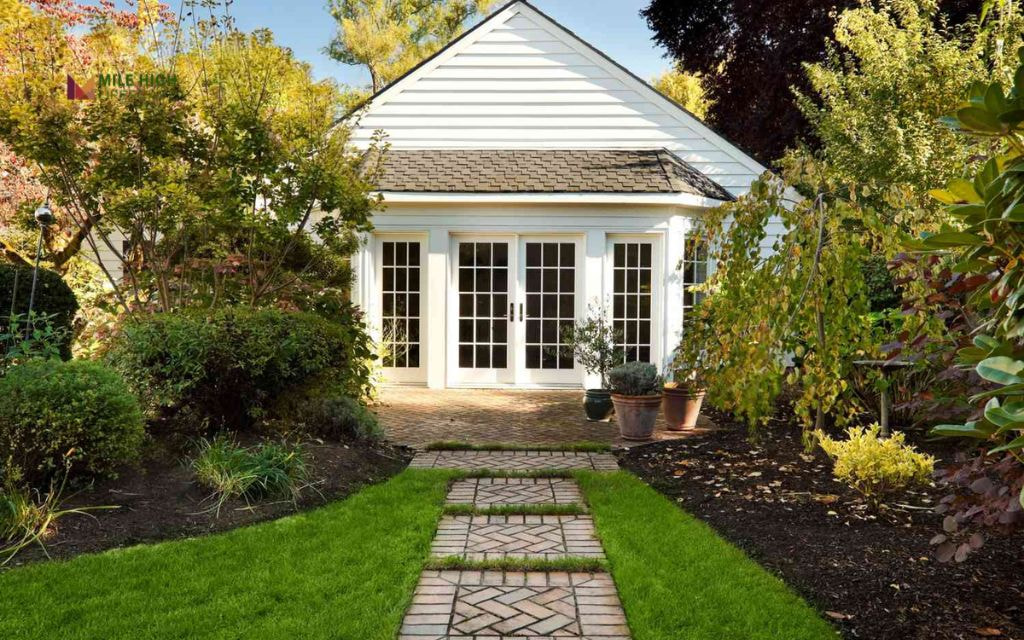
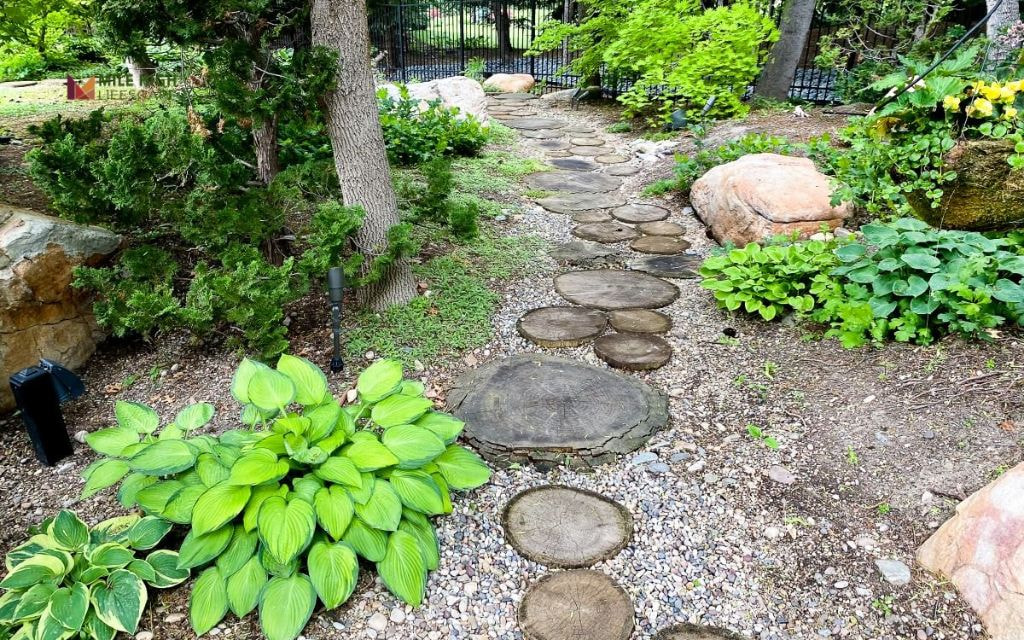
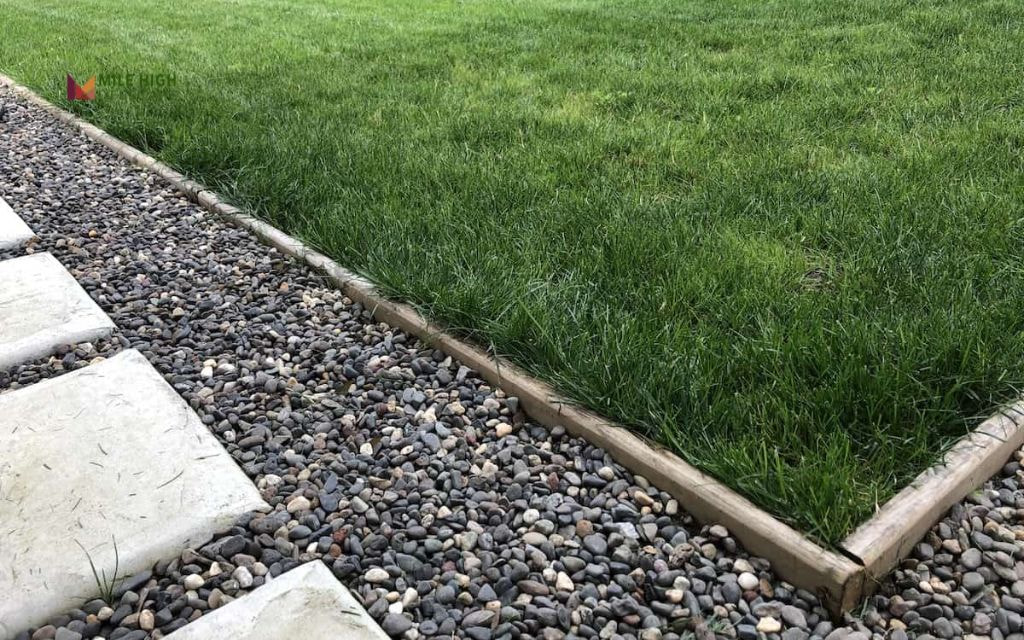
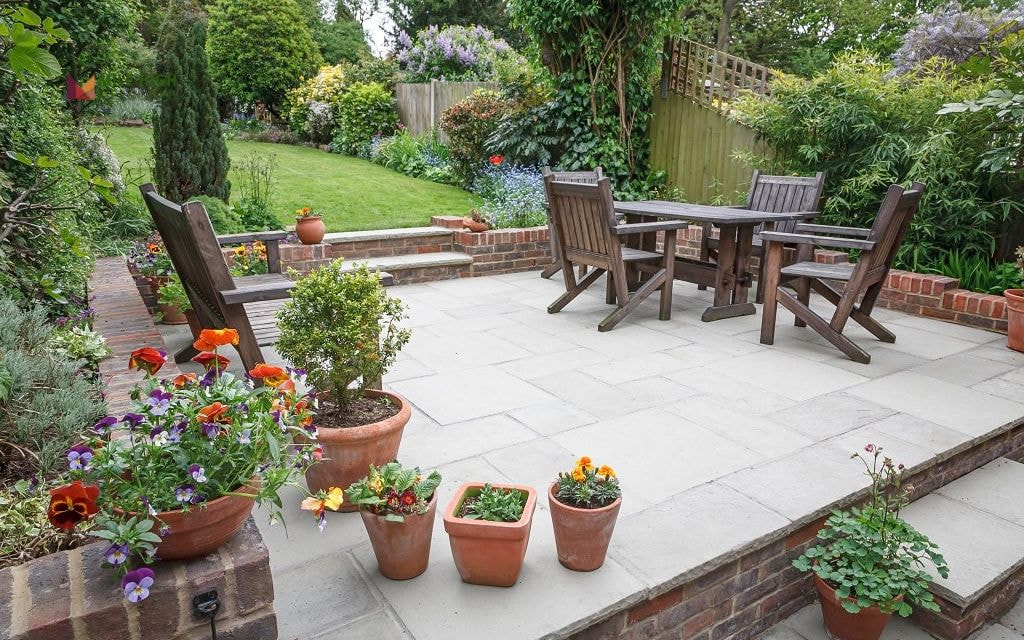
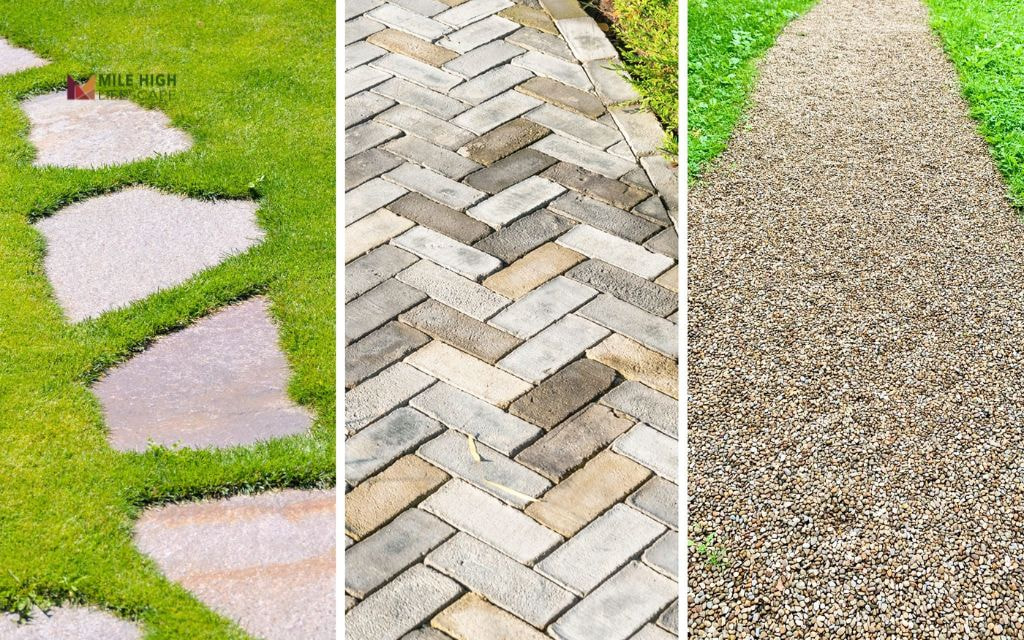
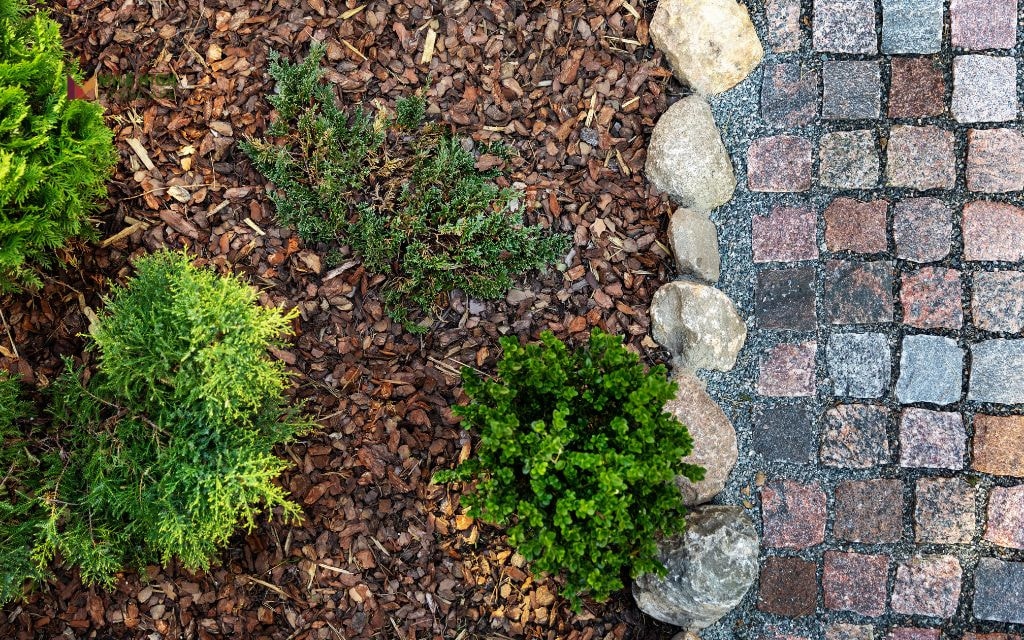
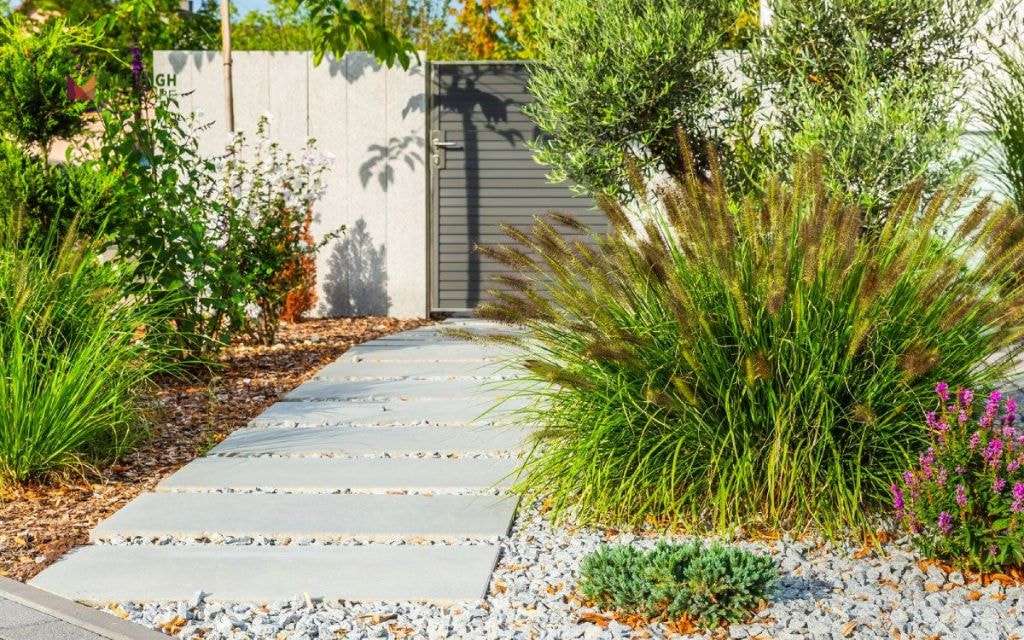
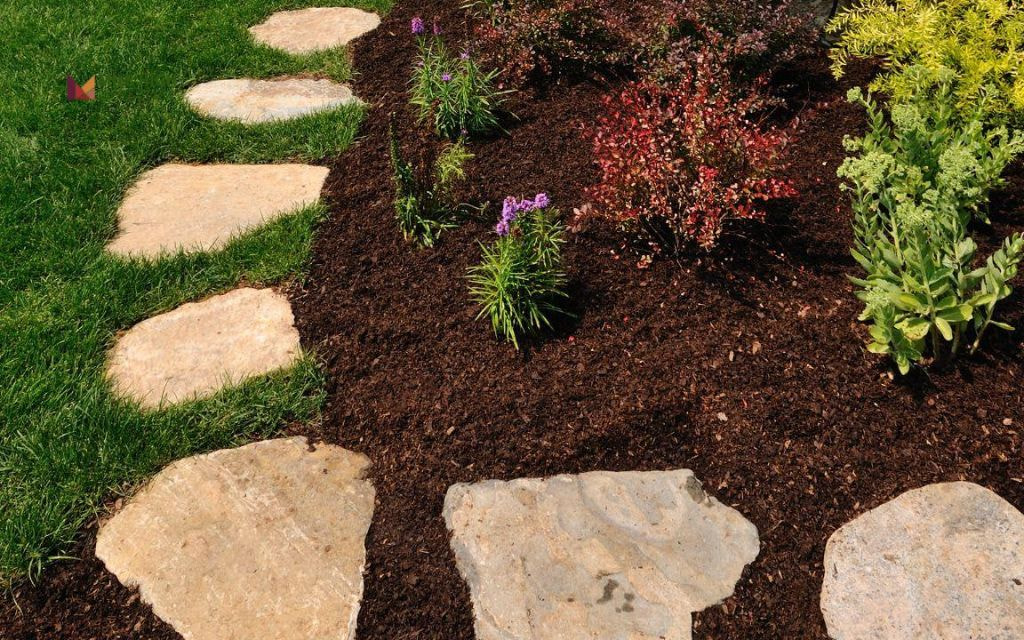
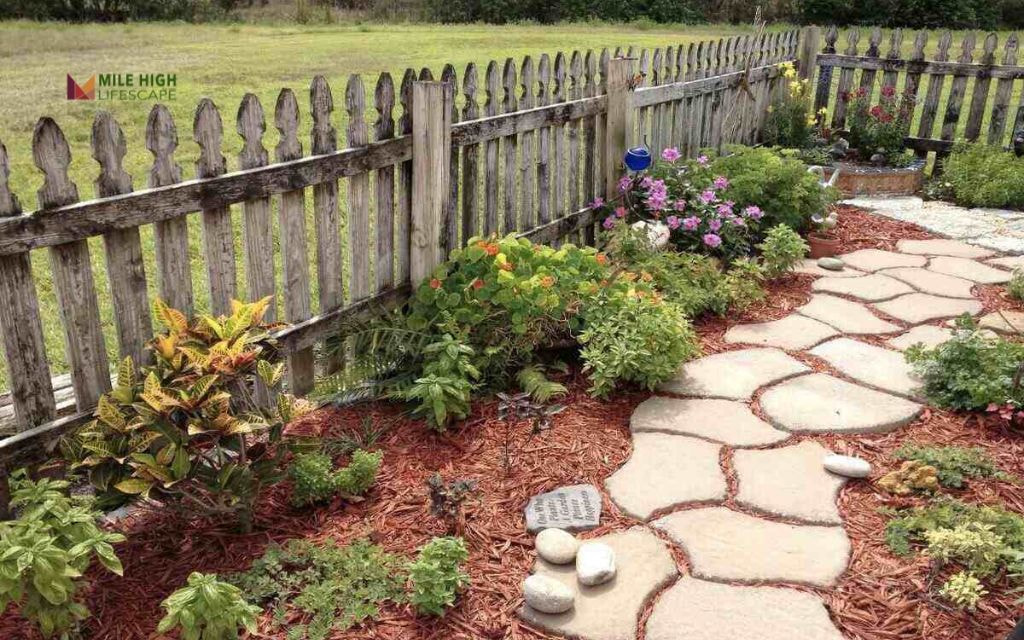
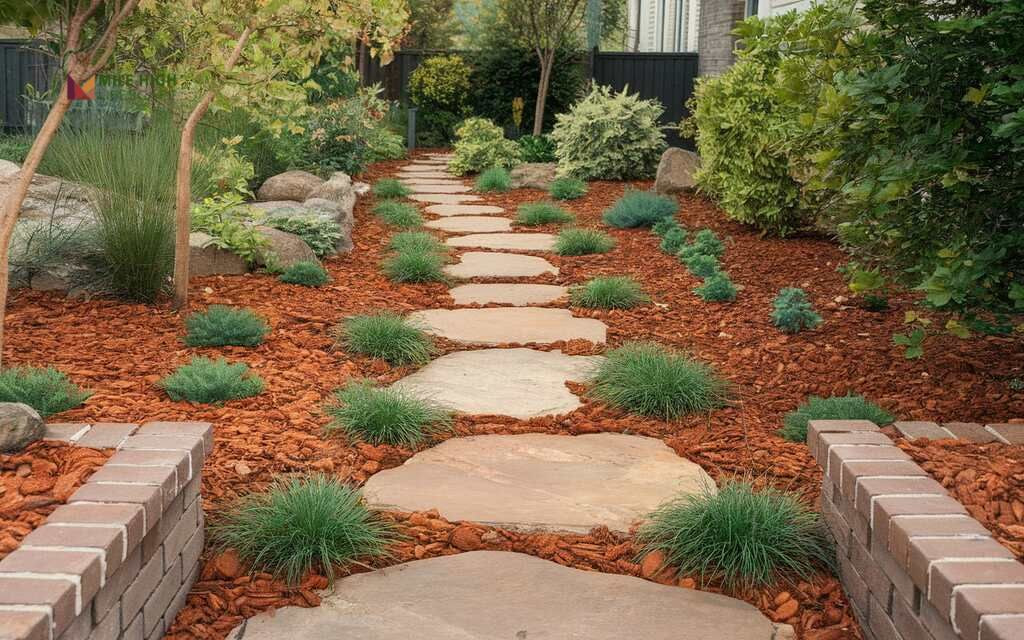
#6: Flagstone Paths with Gravel Fill and Mulch Plant Pockets

Create elegant walkways using large flagstone stepping stones with clean gravel fill, punctuated by mulch-filled plant pockets that soften the hardships.

This sophisticated approach to mulch and rock landscaping ideas provides both functionality and beauty while addressing Denver’s need for low-water landscaping solutions.

Select Colorado buff or red sandstone flagstones for authentic regional character, spacing them naturally for comfortable walking. Fill the gaps with 3/8-inch crushed granite or pea gravel, and create irregular plant pockets filled with quality mulch.

These pockets can accommodate small ornamental grasses, succulents, or native wildflowers that add seasonal color without requiring extensive irrigation.

Flagstone Paths with Gravel Fill and Mulch Plant Pockets

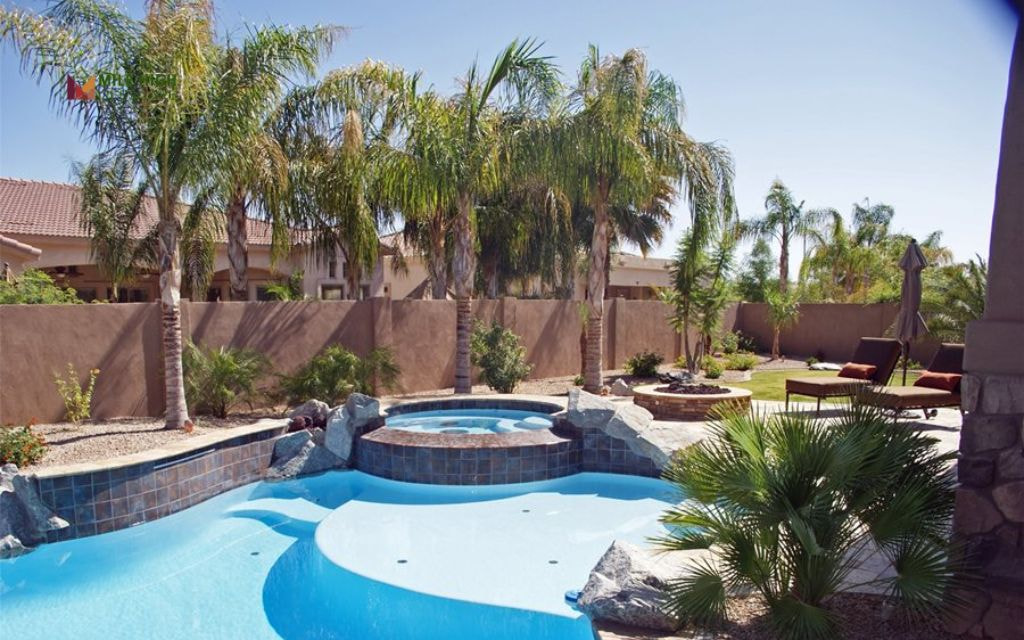
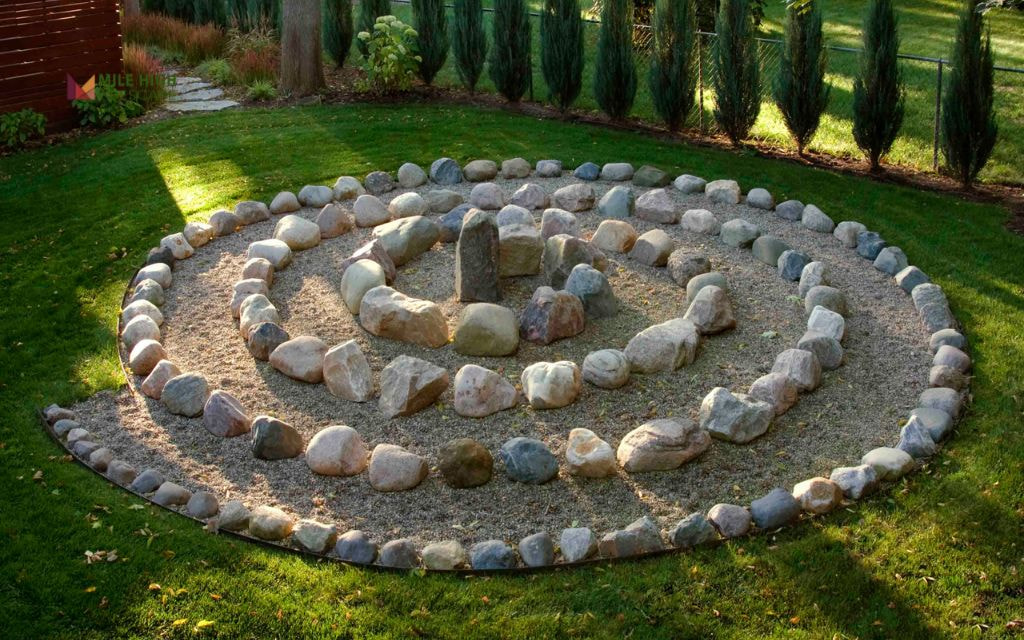
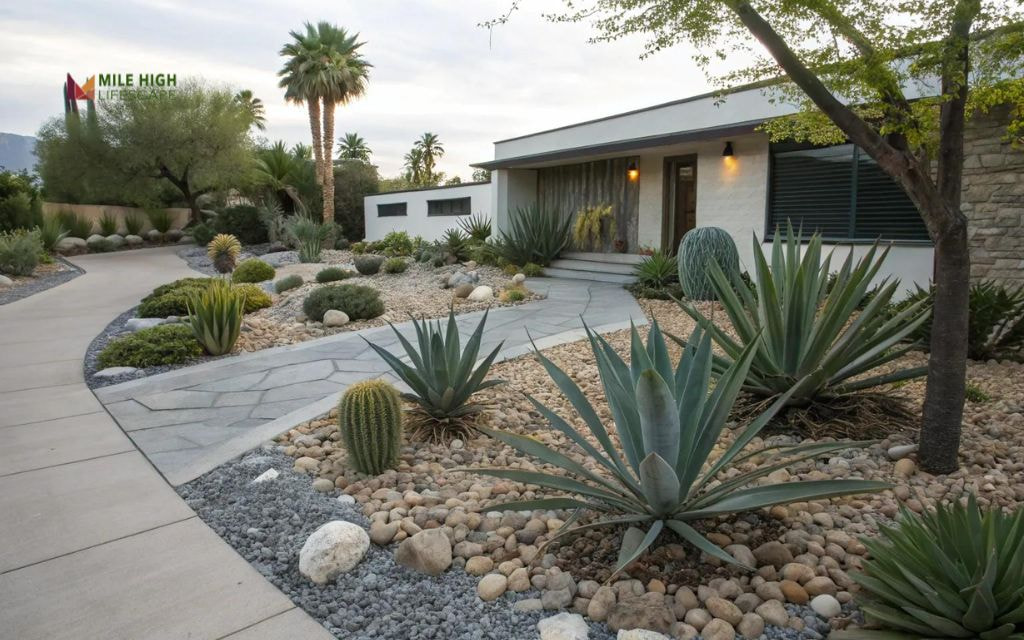
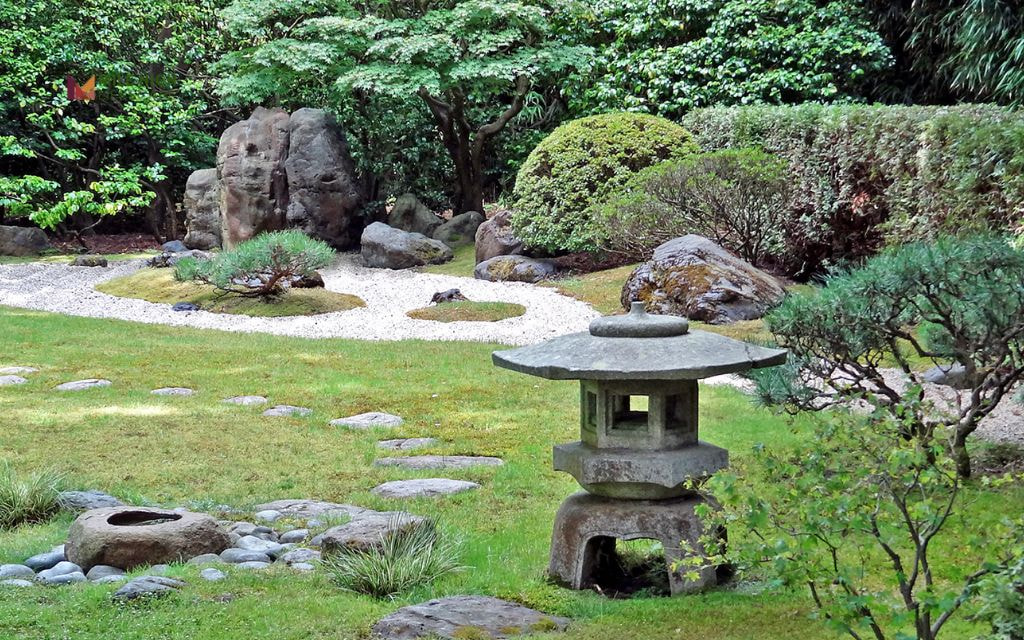
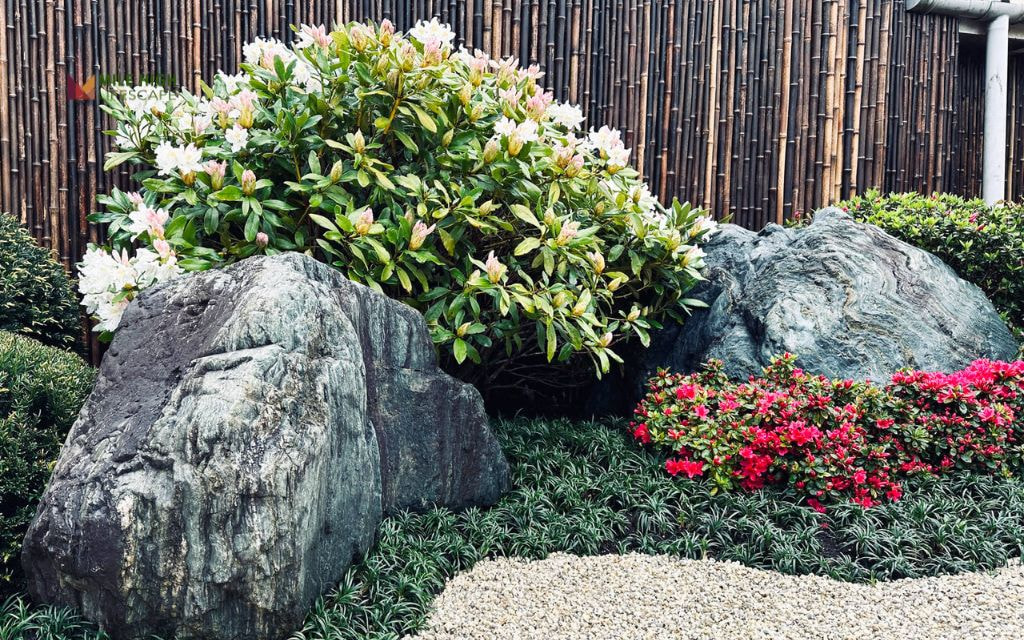
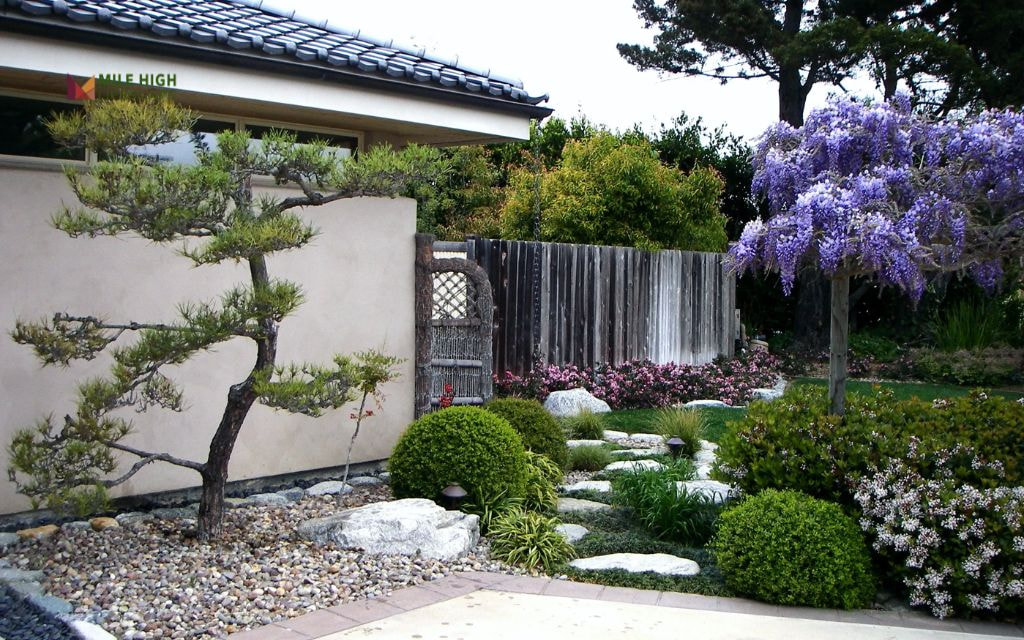
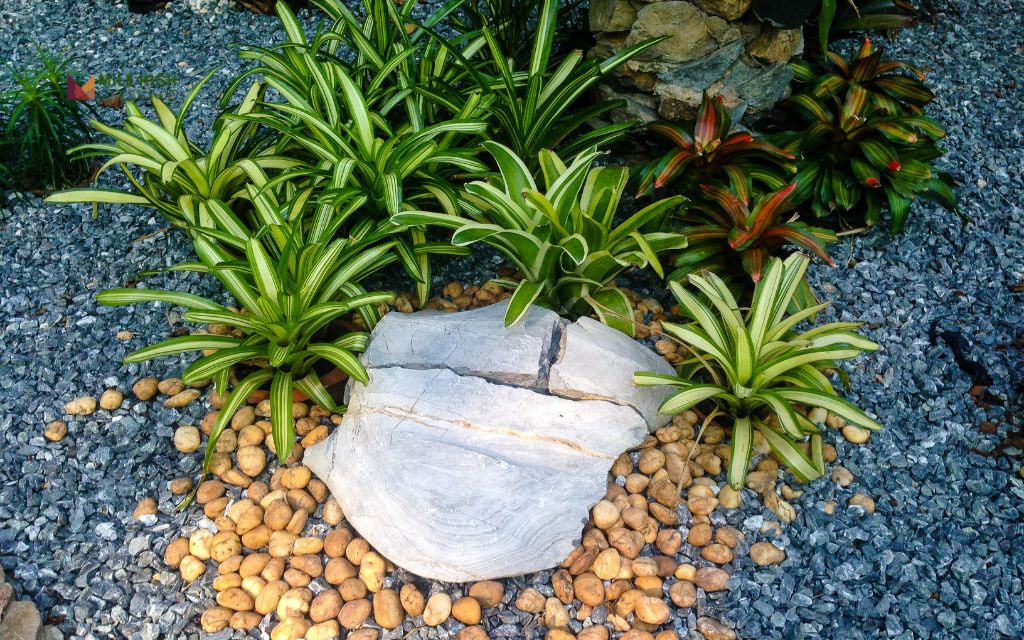
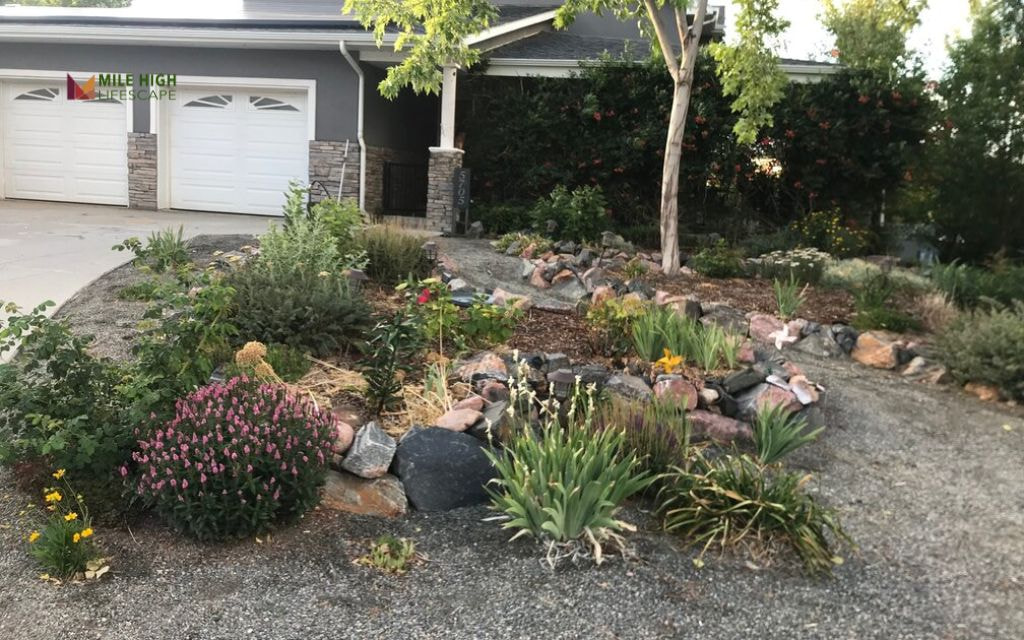
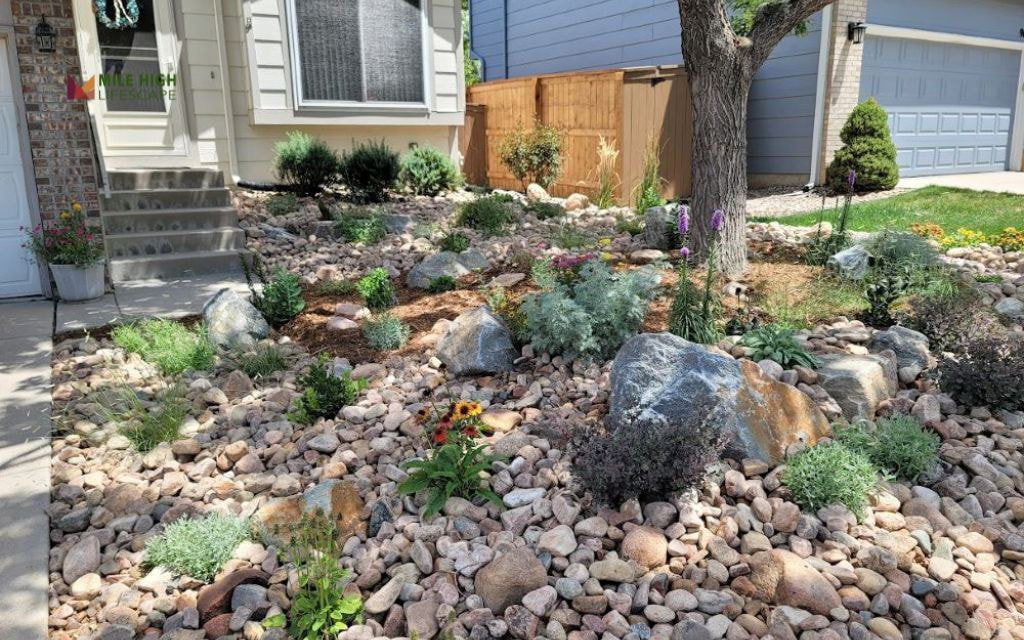
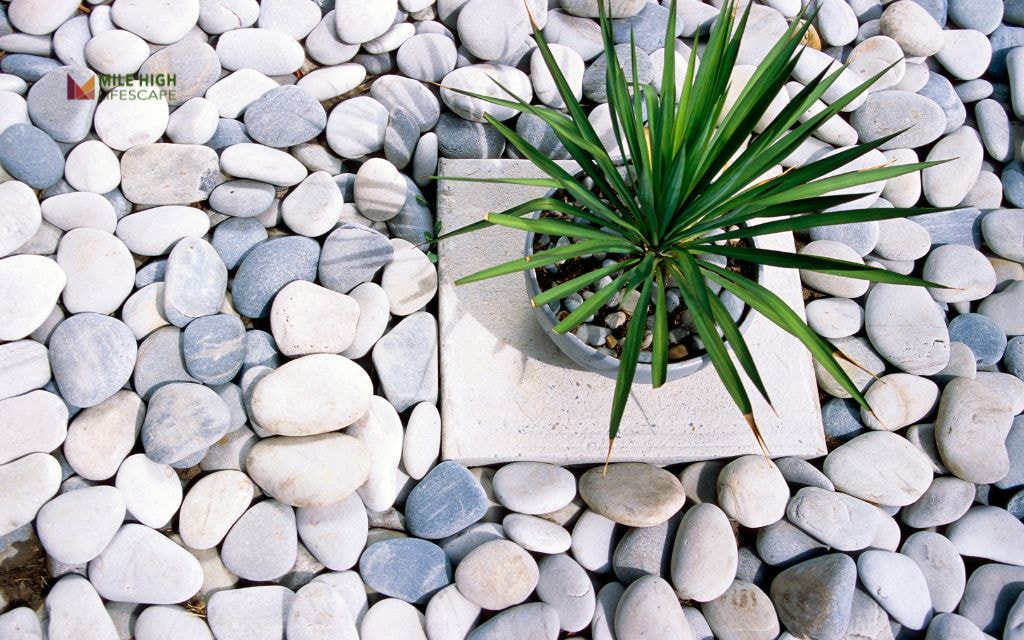
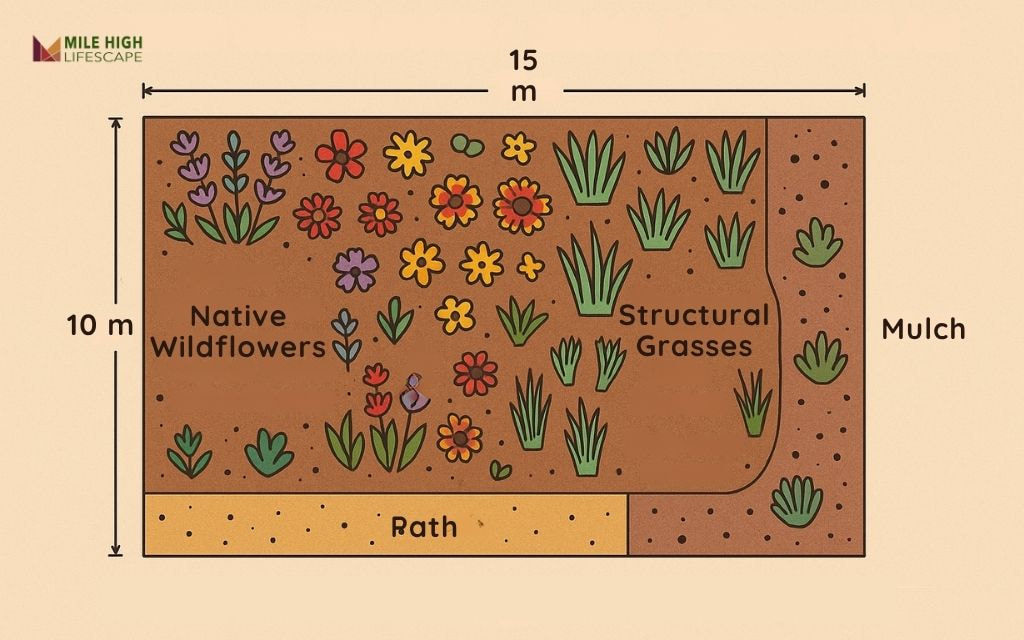
#7: Front Yard Island Bed

Design a show-stopping front yard landscaping feature using large specimen boulders as anchor points, surrounded by zones of contrasting mulch and decorative rock.

Position 2-3 large boulders (3-5 feet in diameter) asymmetrically within your island bed, then create flowing zones of different materials around them. Use dark bark mulch near plantings that require moisture retention, medium-sized river rock in transition areas, and fine gravel or decomposed granite for pathways and accent areas.

Plant with architectural specimens like yucca, ornamental grasses, or dwarf conifers that complement the dramatic stone elements.

Front Yard Island Bed

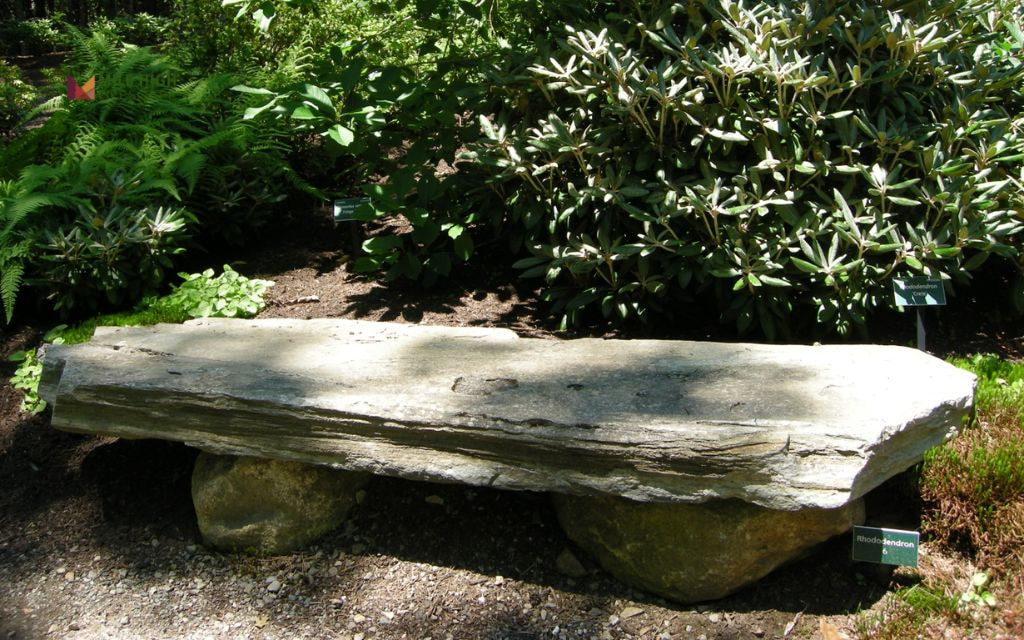
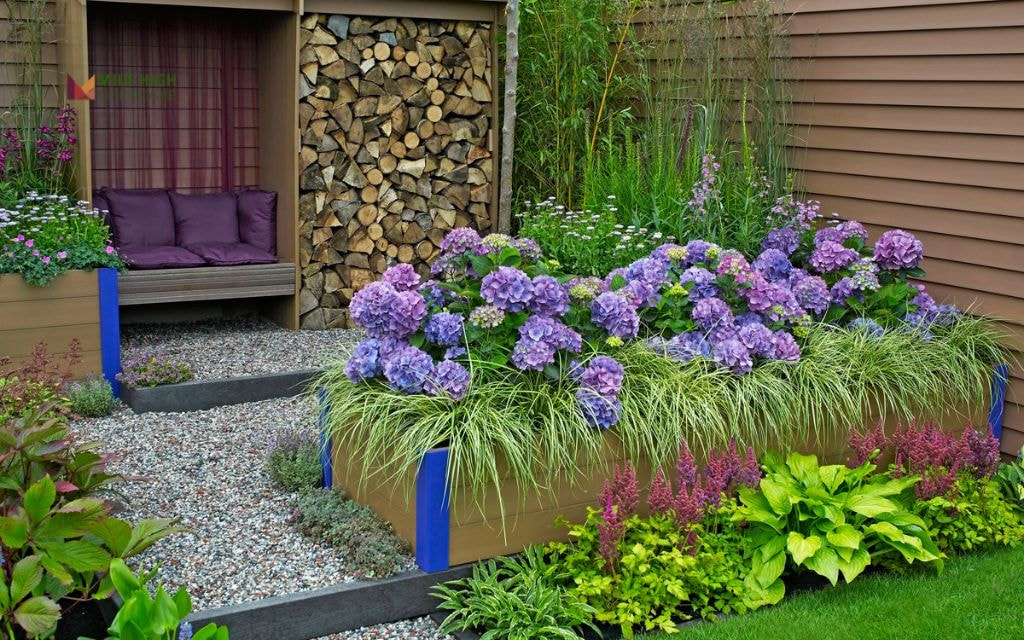
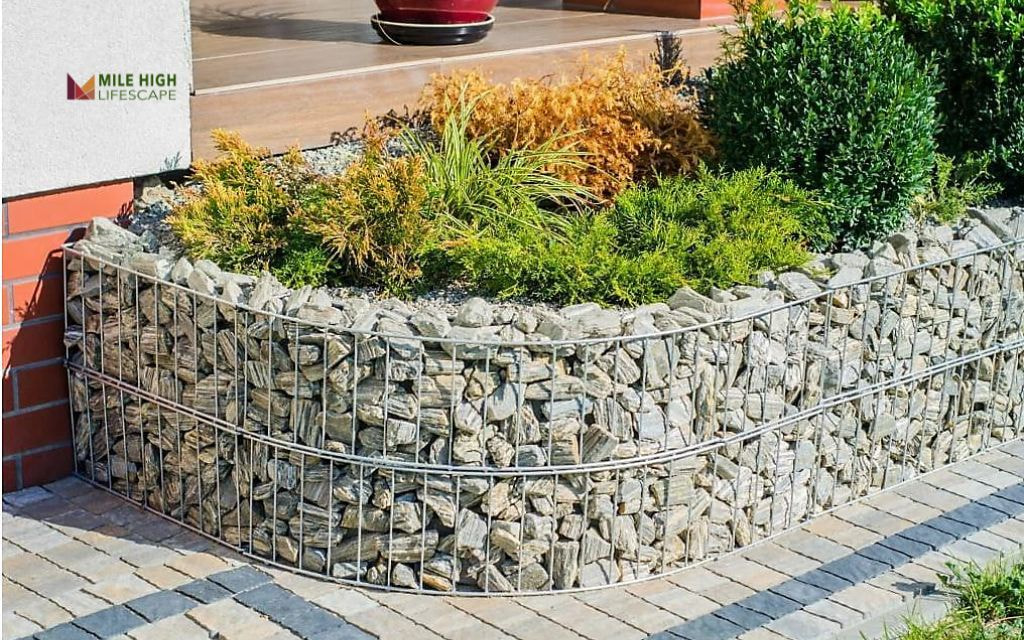
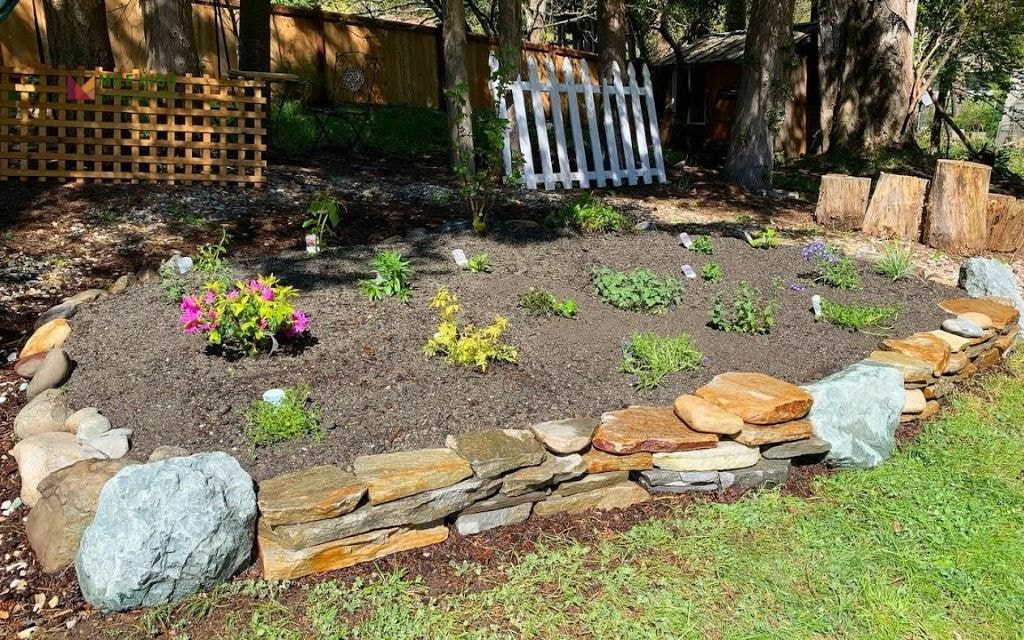
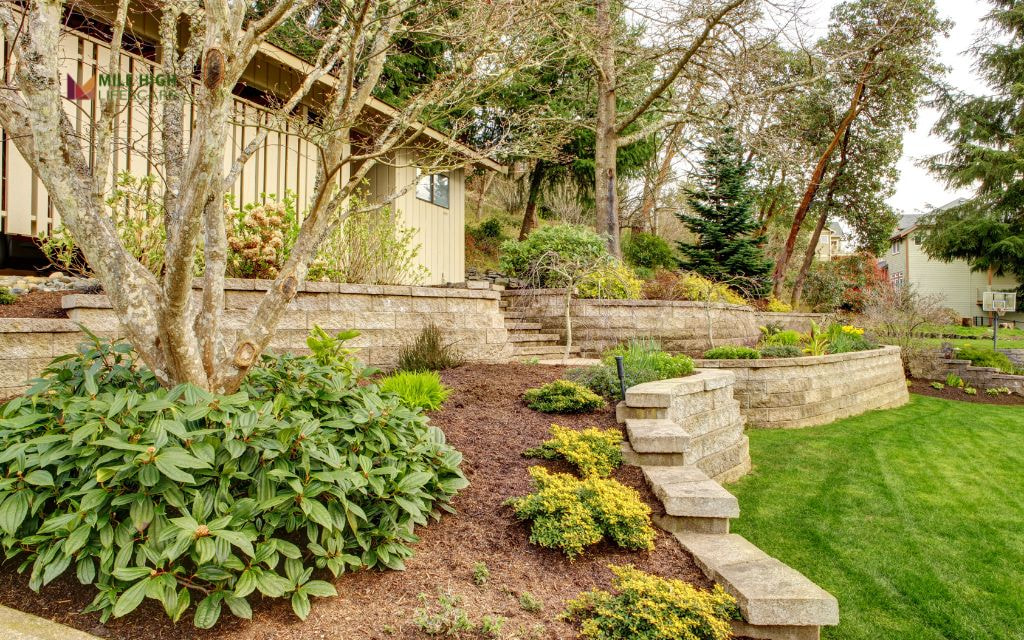
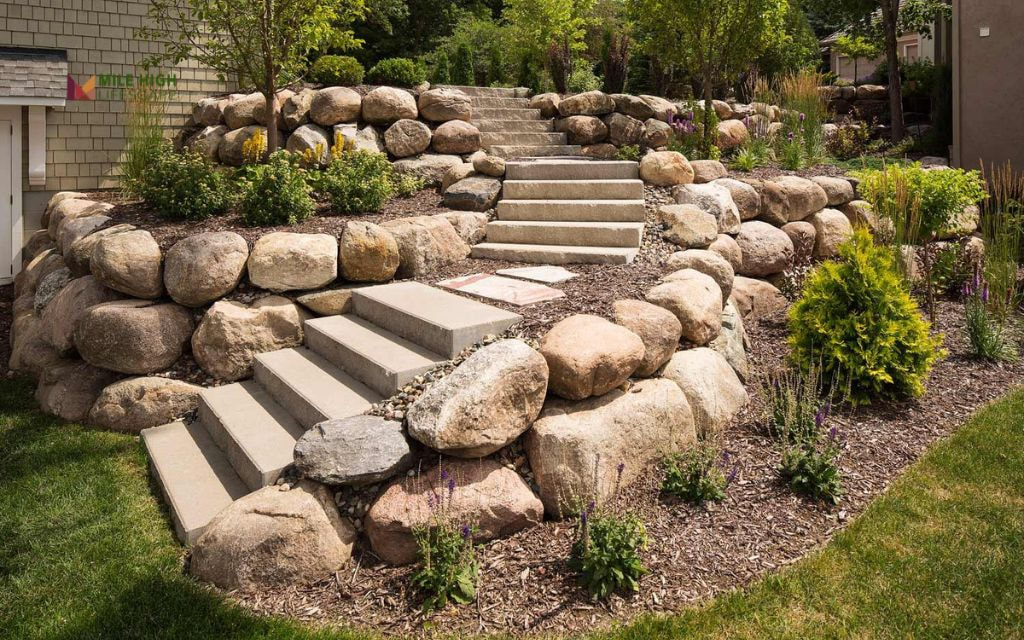
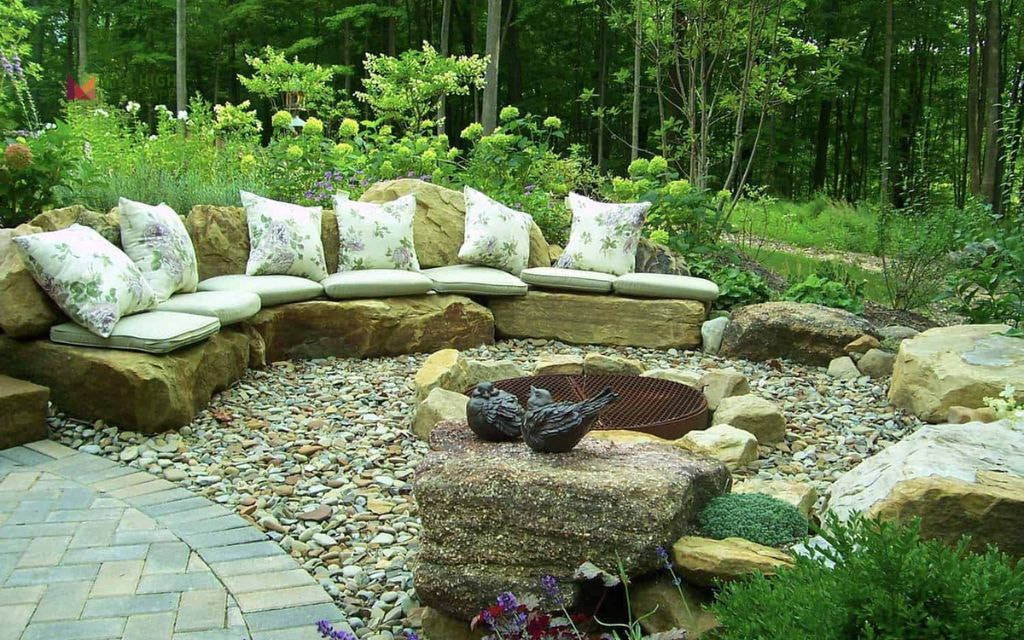
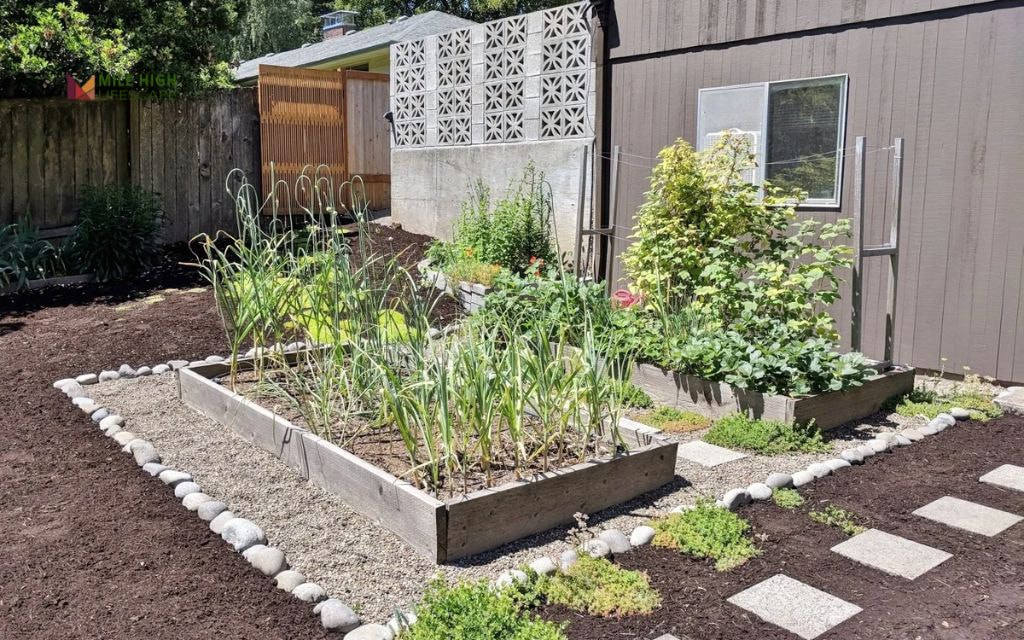
#8: Raised Rock Beds with Dark Bark Mulch

Construct raised planting beds using stacked flagstone or boulder retaining walls, filled with dark bark mulch that creates striking contrast against the lighter stone colors.

This rock and mulch landscaping approach works exceptionally well in Denver’s intense sunlight, where the interplay of light and shadow creates constantly changing visual interest.

Build the retaining walls using locally quarried stone, ensuring proper drainage through the wall base. Fill with premium bark mulch in rich brown or black tones, and plant with silver-green drought-tolerant specimens like artemisia, Russian sage, or blue fescue.

Raised Rock Beds with Dark Bark Mulch

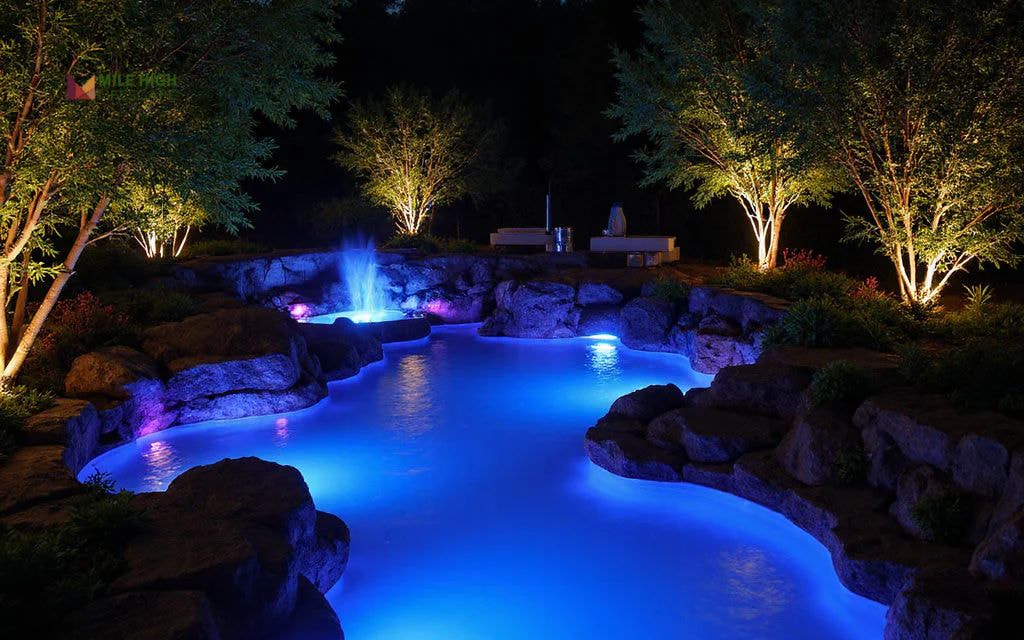
#9: Xeriscape Tree Ring Using Lava Rock and Native Grass

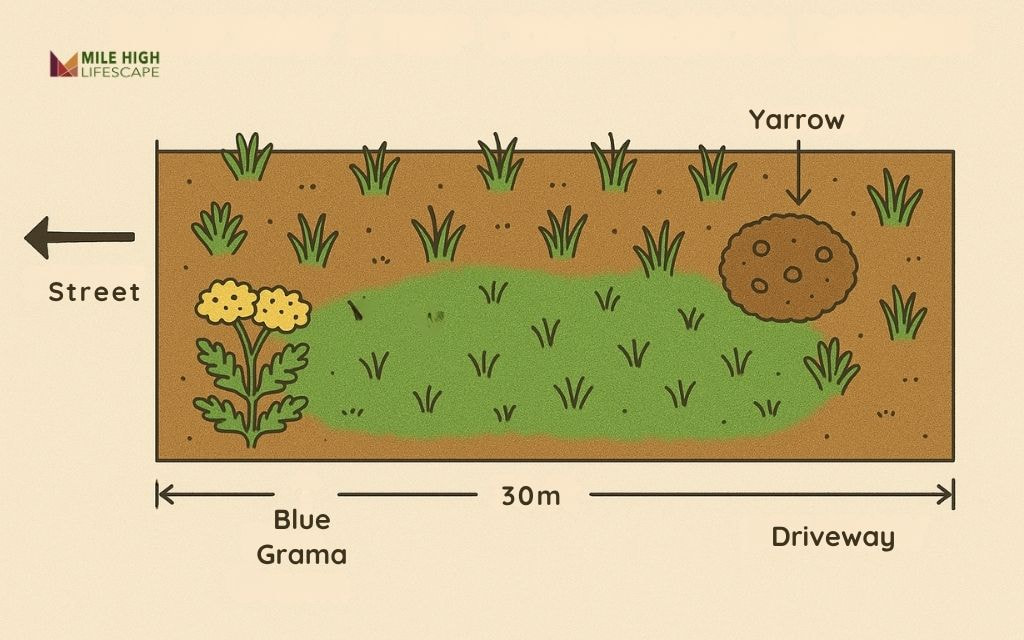
Create heat-insulated, low-water perimeters around existing trees using dark lava rock mulch, surrounded by rings of native buffalo grass or blue grama grass.

The dark lava rock absorbs heat during the day and releases it slowly at night, creating a beneficial microclimate for tree roots. Extend the rock mulch to cover the entire drip line area, then establish the grass ring beyond.

Xeriscape Tree Ring Using Lava Rock and Native Grass

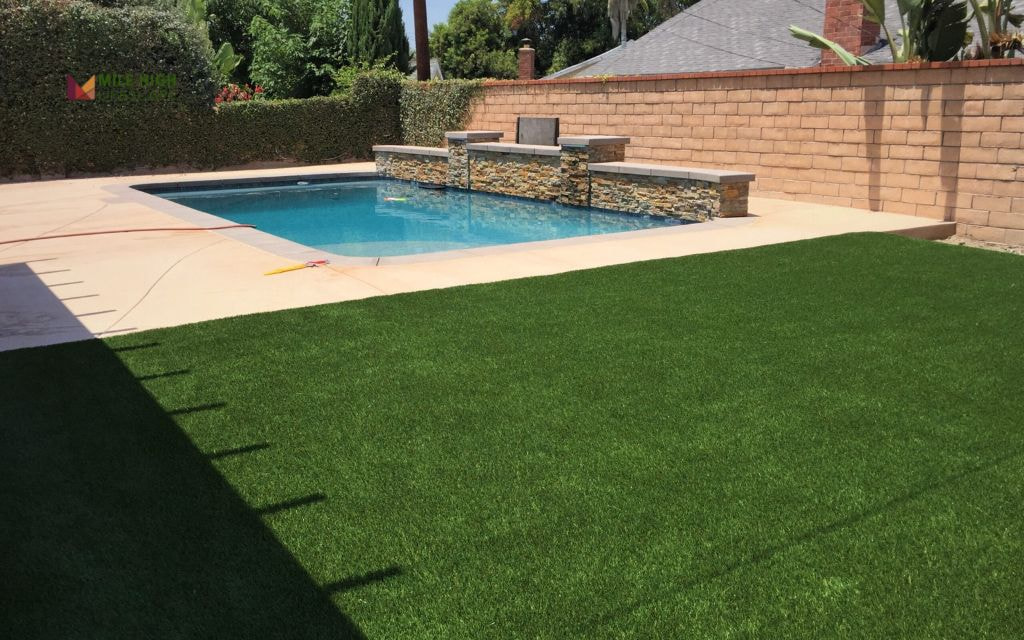
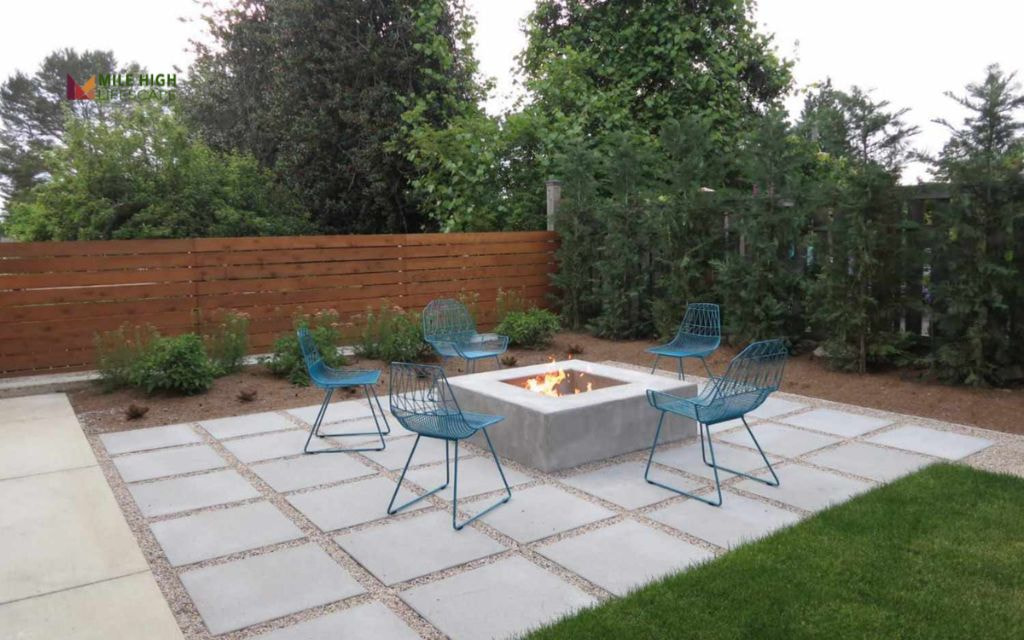
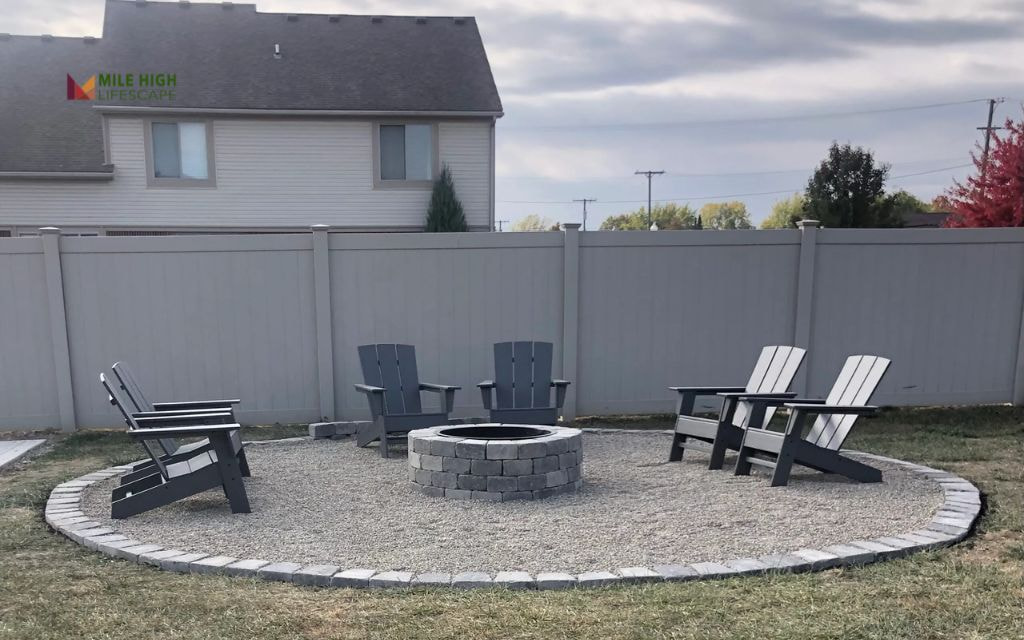
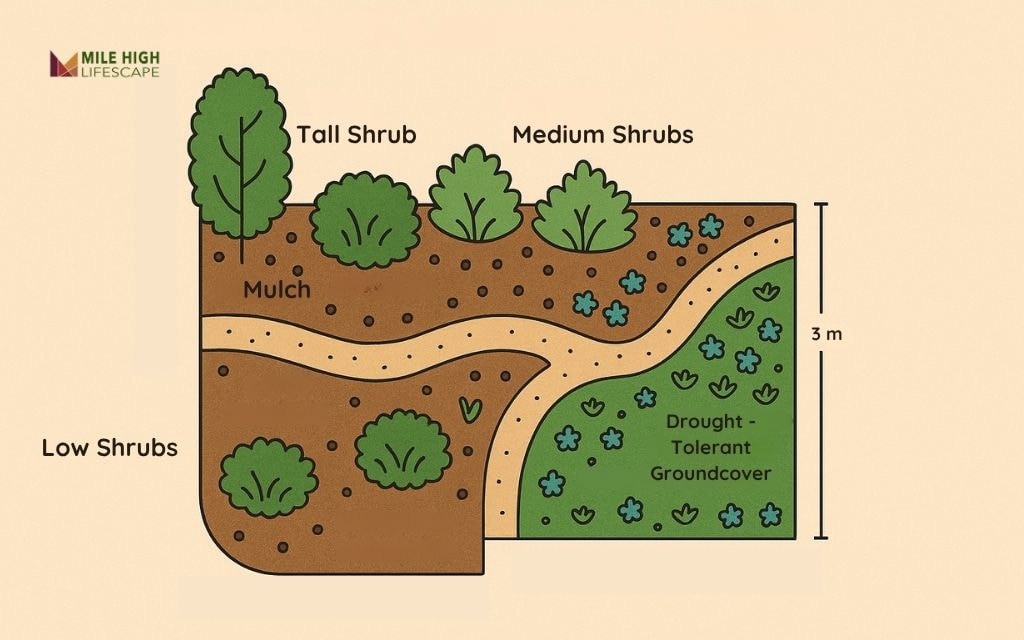
#10. Fire-Smart Perimeter Beds

Implement defensible space principles by creating gravel-only zones within five feet of your home’s structure, transitioning to mixed rock and mulch areas further away. This critical landscaping idea with mulch and rocks prioritizes fire safety while maintaining attractive curb appeal.

Use clean, angular gravel or decomposed granite in the immediate home perimeter, selecting light colors that won’t absorb excessive heat.

Transition to mixed rock and mulch zones beginning at least five feet from structures, where you can safely incorporate organic materials and more diverse plantings.

Fire-Smart Perimeter Beds

What Is Rock Mulch? How It Differs From Wood Mulch

What Is Rock Mulch?

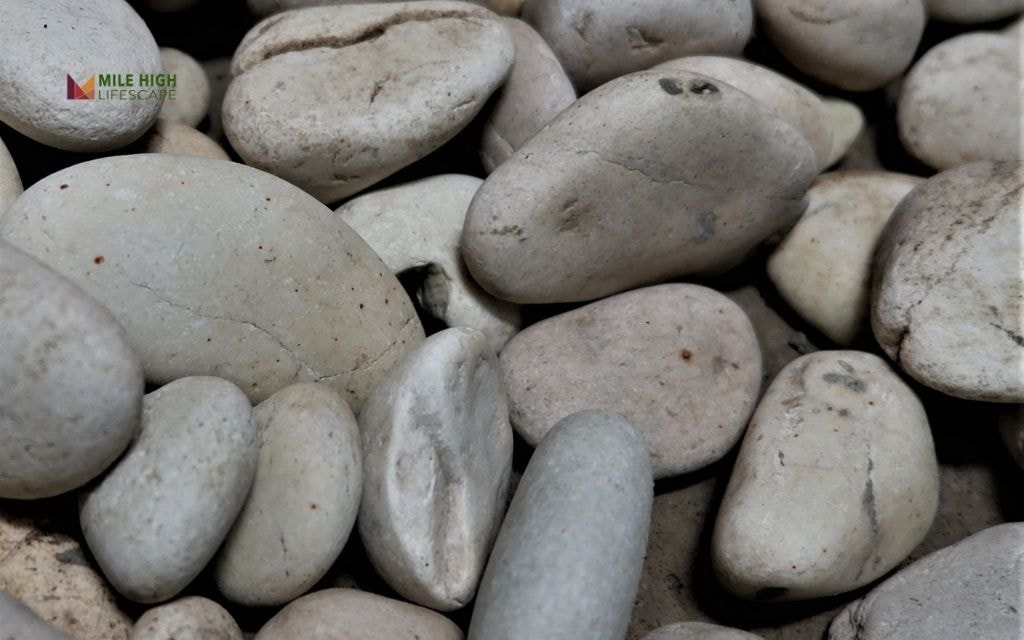
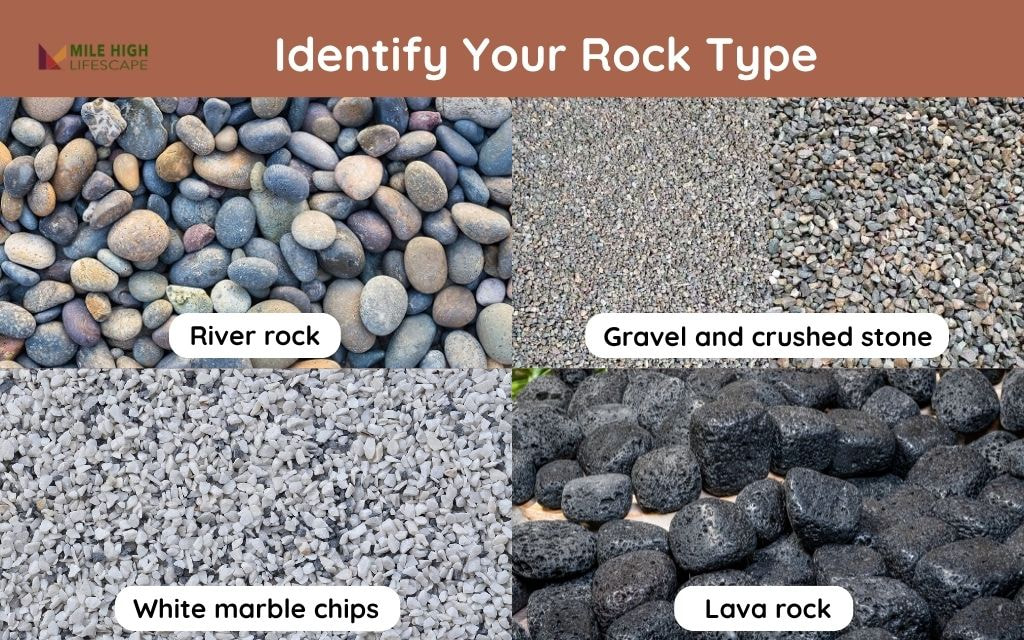
Rock mulch is simply crushed stone, gravel, or decorative rocks used to cover soil instead of organic materials like bark or wood chips. It serves the same basic purpose as traditional mulch – covering bare soil – but with completely different characteristics and benefits.

Rock Mulch vs. Wood Mulch

FeatureRock MulchWood Mulch
LifespanPermanent – lasts decades without replacement1-2 years before decomposing and needing replacement
Water ManagementPromotes drainage – water flows through quicklyRetains moisture – acts like a sponge for plants
Fire SafetyCompletely fireproof – creates defensible spaceHighly flammable – banned near structures in fire zones
MaintenanceVirtually none – occasional weeding onlyHigh – annual replacement and regular refreshing
Cost Over TimeHigher upfront, no ongoing costsLower upfront, continuous replacement costs
Plant BenefitsBest for drought-tolerant plantsIdeal for moisture-loving plants

Rock Mulch Landscaping Ideas: Tips For Choosing Right Materials That Work

Design Guidelines

  • Create contrast: Pair smooth river rocks with coarse bark mulch, or fine gravel with chunky wood chips
  • Use proper edging: Install steel edging or stone borders to keep materials separate and prevent mixing
  • Plan color combinations: Light-colored rocks make dark mulch pop, while neutral stones complement any mulch color

Fire Safety Rules

  • 5-foot rule: Use only rock mulch within 5 feet of your home’s structure
  • Avoid heat traps: Don’t place organic mulch near south-facing walls or mechanical equipment
  • Create defensible zones: Use rock mulch around fire-prone areas like outdoor kitchens or fire pits

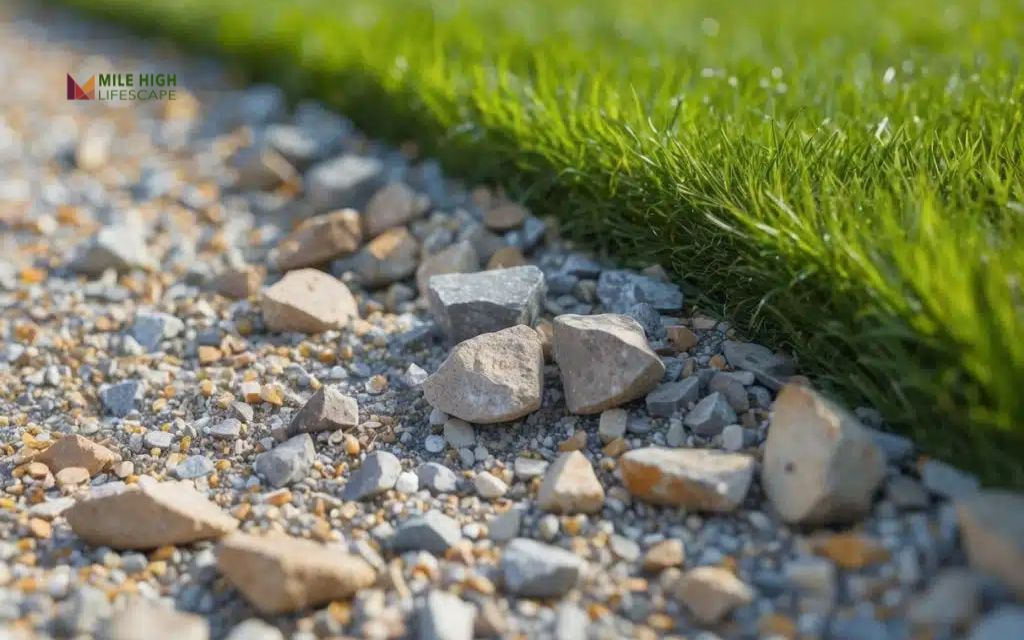
Material Placement Strategy

  • Rock for drainage: Use rock mulch where water needs to flow away quickly (slopes, walkways)
  • Mulch for plants: Use organic mulch around trees and shrubs that need moisture retention
  • Transition zones: Create gradual changes between different materials for natural appearance

Installation Best Practices

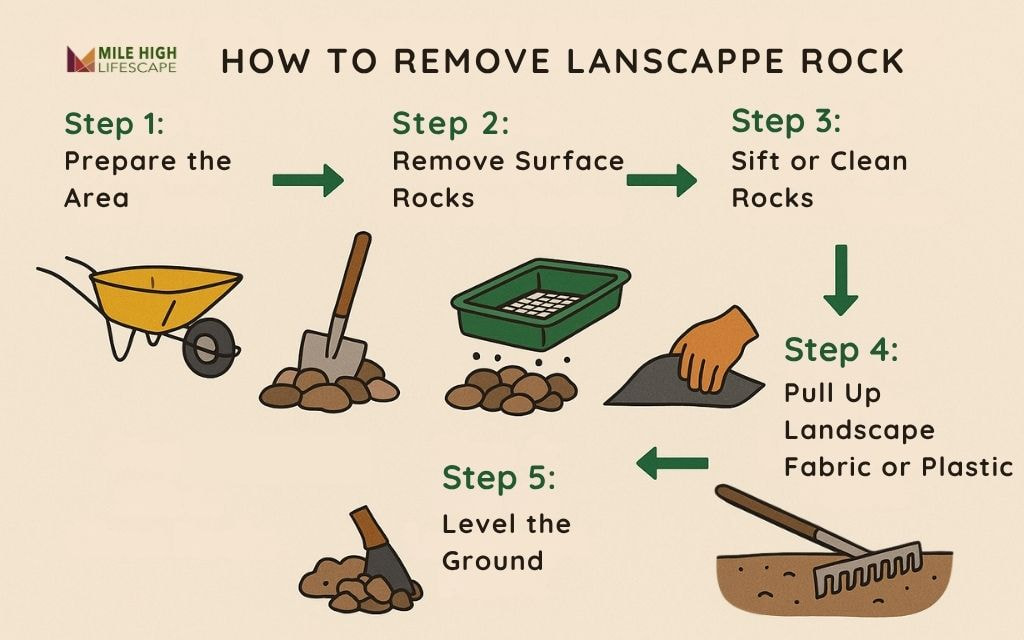
  • Install landscape fabric: Place quality fabric under rock areas to prevent weeds (avoid plastic)
  • Prepare soil properly: Add drainage amendments under rock, compost under mulch
  • Plan for maintenance: Keep materials easily accessible for future additions or adjustments

Conclusion

These 10 creative ideas help you tackle wind-blown mulch, drought conditions, and fire safety while creating beautiful, low-maintenance yards that thrive year-round.

Whether you’re starting with simple river rock borders or designing comprehensive xeriscape gardens, the key is matching the right materials to your specific needs. Rock mulch handles Denver’s tough conditions, while strategic mulch placement keeps your plants healthy and happy.

Ready to transform your landscape with decorative landscaping rocks near me? Mile High Lifescape can help you design and install solutions that work perfectly for Colorado’s environment.

Frequently Asked Questions (FAQs)

Does rock mulch get too hot in summer?

Yes, rock mulch retains heat. Choose lighter colors like river rock or buff limestone, and plant heat-tolerant species like sedum or ornamental grasses to minimize issues.

Can you mix rock and mulch in landscaping?

Absolutely. Use proper edging to keep materials separate, place rock mulch in permanent areas, and use organic mulch around plants that need moisture.

Should I use both rock and mulch in the same yard?

Yes, this combination works great. Use rock mulch for walkways and fire-safe zones, organic mulch for planting beds. Keep them clearly separated with edging.

Does rock mulch attract termites?

No, rock mulch doesn’t attract termites because it provides no food source and doesn’t create moisture. It’s actually better than wood mulch for termite prevention.

Should I put topsoil under mulch?

Yes for organic mulch areas where you’re planting. For rock mulch areas, focus on proper drainage rather than rich soil, since most rock-mulched plants prefer well-draining conditions.

5/5 - (1 vote)

Extreme temperature swings, intense UV exposure, and water restrictions in Colorado make traditional grass and flower beds impractical around swimming areas. Landscaping around pool with rocks offers the perfect solution for Denver-area homeowners.

Rock landscaping delivers 3 core advantages: water conservation, exceptional durability, and year-round visual appeal. These materials withstand Colorado’s winters, summers, and sudden hailstorms without requiring constant replacement or maintenance.

Discover 21 proven rock landscaping ideas specifically designed for Colorado pools. Each concept addresses local climate conditions while creating safe, functional, and stunning outdoor spaces that enhance your property value and swimming experience.

21 Best Landscaping Around Pool With Rocks in Colorado

#1: River Rock Border for Drainage

Create a natural drainage system using smooth river rocks around your pool perimeter. This river rock landscaping around the pool with rocks approach prevents water accumulation and maintains an organic appearance. The rounded stones provide safe footing and excellent water filtration.

River Rock Border for Drainage

#2: Crushed Granite Lounge Pad

Install decomposed granite areas for poolside furniture placement. This stable surface resists shifting and provides excellent drainage during Colorado’s intense afternoon thunderstorms. The neutral color complements any pool finish.

Crushed Granite Lounge Pad

#3: Flagstone Walkway to Pool Steps

Design safe pathways using Colorado’s native flagstone. These flat stones offer superior traction when wet and withstand freeze-thaw cycles without cracking. Position stones with slight spacing for drainage between joints.

Flagstone Walkway to Pool Steps

#4: Palm-Inspired Pebble Garden

Replace tropical plants with cold-hardy alternatives like blue spruce or dwarf pine surrounded by decorative pebbles. This idea creates visual interest while surviving Colorado winters without protection.

Palm-Inspired Pebble Garden

#5: Rock & Cactus Island Feature

Construct raised beds using local sandstone filled with drought-tolerant cacti and succulents. These landscaping rocks around pool features require minimal water and thrive in Denver’s dry climate while adding architectural interest.

Rock & Cactus Island Feature

#6: Boulder Seating Area with Fire Pit

Position large boulders around a fire feature to extend pool season into Colorado’s cool evenings. Select rounded boulders with flat surfaces for comfortable seating. Ensure proper clearance from pool equipment and safety codes.

Boulder Seating Area with Fire Pit

#7: Tumbled Stone Perimeter with Ornamental Grasses

Border your pool with tumbled limestone and drought-resistant plantings. Lavender and native grasses complement the stone while requiring minimal irrigation. This combination thrives in Colorado’s alkaline soil conditions.

Tumbled Stone Perimeter with Ornamental Grasses

#8: Zen Gravel Meditation Corner

Create a peaceful retreat using raked gravel patterns in a dedicated corner. This low-maintenance approach area provides visual calm and requires only occasional re-raking to maintain crisp lines.

Zen Gravel Meditation Corner

#9: Lava Rock Accent Beds with Yucca or Agave

Use red or black lava rock to create dramatic contrast with architectural plants. The porous nature provides excellent drainage while the dark color absorbs heat during Colorado’s short growing season makes this idea pretty suitable in Colorado.

Lava Rock Accent Beds with Yucca or Agave

#10: Terraced Rock Garden for Sloped Yards

Build retaining walls using stacked stone to create level planting areas on slopes. This landscape rock around pool solution prevents erosion, maximizing usable space around your swimming area.

Terraced Rock Garden for Sloped Yards

#11: Poolside Dry Creek Feature for Rainflow Redirection

Channel rainwater away from your pool using decorative rock creek beds. This functional rock landscape prevents flooding, adding natural beauty that mimics Colorado’s mountain streams.

Poolside Dry Creek Feature for Rainflow Redirection

#12: Rock Bed Between Pool Fence and Lawn

Install a maintenance strip using crushed rock between fencing and grass areas. This barrier prevents grass growth against fence lines and provides a clean transition that reduces mowing requirements.

Rock Bed Between Pool Fence and Lawn

#13: Mulch-to-Rock Transition Zone

Create graduated zones using mulch near plants transitioning to rock near the pool. This protects plant roots from reflected heat while maintaining the benefits of swimming pool landscaping rocks in high-traffic areas.

Mulch-to-Rock Transition Zone

#14: Cobblestone Edging to Prevent Gravel Spread

Install cobblestone borders around loose gravel areas to maintain clean lines. This containment system prevents smaller rocks from migrating into pool areas while providing defined walking surfaces.

Cobblestone Edging to Prevent Gravel Spread

#15: Rock Mural or Mosaic Border Design

Arrange colored stones in patterns or designs around pool edges. Use contrasting colors to create visual interest while maintaining the practical benefits of rock landscaping in Colorado’s challenging climate.

Rock Mural or Mosaic Border Design

#16: Flagstone Dining Area with Rock-Inlaid Border

Extend your outdoor living space with flagstone patios surrounded by decorative rock borders. This above ground pool landscaping with rocks approach works equally well for in-ground installations.

Flagstone Dining Area with Rock-Inlaid Border

#17: Simple Gravel Base Around Above-Ground Pools

Level and stabilize above-ground pool areas using compacted gravel. This foundation prevents settling while providing excellent drainage during Colorado’s heavy spring runoff.

Simple Gravel Base Around Above-Ground Pools

#18: Mini Rock Garden with Boulders and Alpine Perennials

Create mountain-inspired landscapes using large boulders and Colorado native plants. This pool landscaping ideas with rocks approach celebrates local ecology while requiring minimal maintenance and water.

Mini Rock Garden with Boulders and Alpine Perennials

#19: Rock + Artificial Turf Combo

Combine artificial grass with rock borders in areas receiving heavy splash. This hybrid approach provides soft surfaces for children. It also helps maintain drainage and durability where natural grass struggles.

Rock + Artificial Turf Combo

#20: Decorative White Rock Accent Beds with Native Plants

Use white limestone chips to highlight native Colorado plants like penstemon and blanket flower. The light color reflects heat while creating striking contrast against colorful native blooms.

Decorative White Rock Accent Beds with Native Plants

#21: Black Lava Rock with Night Lighting

Install underwater and landscape lighting with dark lava rock for evening ambiance. The porous texture creates interesting shadow patterns and the dark color makes lighting effects more dramatic.

Black Lava Rock with Night Lighting

Benefits of Using Rocks for Pool Landscaping

  1. Low Maintenance Requirements: Rock landscaping eliminates mowing, trimming, and seasonal replanting tasks. Once installed, these surfaces require only occasional cleaning and minimal annual maintenance.
  2. Superior Water Conservation: Colorado’s water restrictions make rock landscaping essential for responsible homeowners. These materials require zero irrigation while supporting xeriscaping principles.
  3. Exceptional Durability: Rocks withstand intense UV exposure, sudden temperature changes, and severe hailstorms without replacement needs. This durability provides long-term value and consistent appearance.
  4. Enhanced Safety Features: Properly selected rocks offer superior traction compared to wet grass or smooth surfaces. Textured stones reduce slip hazards around pool areas while eliminating muddy conditions during Colorado’s monsoon season.
  5. Design Versatility: Rock materials complement any architectural style from modern to rustic. Colors and textures can be mixed to create custom looks that enhance property values while addressing practical landscaping challenges.

Which Rocks Should You Use for Landscaping Around Pool with Rocks

Rounded River Rock vs. Jagged Gravel

Choose rounded river rocks for areas where people walk barefoot. The smooth surfaces prevent cuts while providing excellent drainage. Reserve jagged materials for decorative beds away from traffic areas. River rocks handle Colorado’s freeze-thaw cycles without breaking apart.

Lava Rock

Lava rock’s porous structure provides natural insulation and unique texture. The material absorbs heat during the day and releases it slowly, extending comfortable evening hours. Black varieties create dramatic contrast against light-colored pool finishes.

Decomposed Granite

This compactable material creates firm walking surfaces that remain stable under foot traffic. Decomposed granite drains well while providing a refined appearance suitable for formal landscape designs. The material integrates seamlessly with Colorado’s natural geology.

Flagstone 

Colorado’s native flagstone offers flat surfaces perfect for outdoor furniture and foot traffic. The material’s natural slip resistance makes it ideal for wet areas. Flagstone maintains its appearance through extreme weather cycles without requiring replacement.

Beach Pebbles

 Smooth, uniform pebbles create contemporary looks that complement modern architecture. These materials work well in geometric patterns and provide excellent drainage. Choose larger sizes to prevent displacement during heavy rains or wind events.

Which Rocks Should You Use for Landscaping Around Pool with Rocks

Maintenance Tips for Rock Landscapes Near Pools

  • Weekly Debris Removal: Remove leaves and organic debris promptly to prevent staining and algae growth. Use leaf blowers or stiff brooms to clear surfaces efficiently.
  • Monthly Deep Cleaning: Power wash rock surfaces monthly to remove accumulated dust and chemical residue. This process restores original colors and removes any algae buildup. Rinse thoroughly to prevent cleaning solution accumulation.
  • Annual Gravel Replenishment: Add fresh gravel annually to maintain proper depth and coverage. Colorado’s wind and water movement gradually displaces smaller materials. This maintenance ensures continued drainage performance and visual appeal.
  • Weed Prevention Strategies: Install landscape fabric under rock installations to prevent weed growth. This barrier significantly reduces maintenance while allowing proper drainage. Quality fabric withstands Colorado’s soil conditions for multiple years before replacement.
  • Barefoot Area Safety: Inspect high-traffic areas regularly for sharp edges or displaced stones. Smooth any rough surfaces and replace damaged materials promptly. This proactive approach prevents injuries while maintaining the safe environment that makes rock landscaping practical.

Conclusion

Rock landscaping around pools offers homeowners solutions for creating functional outdoor spaces that thrive in our challenging climate. These 21 proven ideas demonstrate how strategic use of rocks can deliver year-round visual appeal and exceptional durability.

Ready to transform your pool area with Denver landscape rock companies?

Contact Mile High Lifescape today for expert consultation and installation services designed specifically for Colorado’s unique climate challenges.

Frequently Asked Questions (FAQs)

Is river rock slippery around pools?

River rock provides good traction when dry due to its naturally textured surface. Avoid polished stones and choose tumbled varieties for better grip. The rounded edges are safer for barefoot traffic while maintaining excellent drainage properties.

Is it better to mulch or rock around a pool?

Rock landscaping around pool areas significantly outperforms mulch in Colorado conditions. Rocks resist displacement, don’t decompose, and prevent debris from entering pool water. They also withstand chlorine splash and intense UV exposure better than organic materials.

Will landscaping rocks around my pool affect water chemistry?

Properly installed rocks don’t affect pool chemistry unless they enter the water directly. Rinse acidic stones before installation and ensure proper containment. Most Colorado-appropriate rocks are pH-neutral and won’t alter water balance.

Is it okay to put rocks around an above ground pool?

Avoid placing rocks directly against pool walls to prevent damage. Create attractive borders at safe distances while ensuring proper drainage and access for maintenance. Above ground pool rock landscaping enhances appearance but requires careful installation.

What is the best surface to have around a pool?

The optimal surface depends on climate, budget, and usage patterns. In Colorado, flagstone and decomposed granite offer excellent durability and safety. Pavers provide design flexibility while concrete offers cost-effective longevity.

5/5 - (1 vote)

You may know rock landscapes handle Colorado’s semi-arid climate better than traditional grass lawns. Because they require no watering, resist erosion from sudden storms, and maintain their appearance through winters and summers is easy, sooner or later, you will slowly love them. 

In this blog, we’ll explore 17+ creative backyard rock landscaping ideas that transform ordinary yards into stunning outdoor spaces.

Each concept addresses Denver’s specific environmental conditions while offering practical implementation guidance for homeowners ready to refresh their garden design.

17+ Inspiring Backyard Rock Landscaping Ideas

17+ Inspiring Backyard Rock Landscaping Ideas

#1: Dry Creek Bed for Drainage and Design

Transform drainage problems into design features with dry creek beds using smooth river rock. This backyard landscape idea with rocks guides stormwater naturally while creating visual interest. The flowing lines of arranged stones mimic natural waterways, adding movement to static spaces.

Dry Creek Bed for Drainage and Design

#2: Zen Gravel Garden with Minimalist Planting

Create a meditation corner using raked gravel patterns and carefully selected sculptural plants. This rock landscaping idea for backyard spaces emphasizes simplicity and tranquility. Small areas work perfectly for this design, requiring minimal maintenance and providing maximum visual impact.

Zen Gravel Garden with Minimalist Planting

#3: Fire Pit Area with Crushed Gravel Base

Establish a level gathering zone using crushed gravel as the foundation for fire pit areas. Surround with boulders or flagstone seating to create natural conversation spaces. This backyard idea with rocks extends outdoor living seasons and provides safe, stable surfaces for entertaining.

Fire Pit Area with Crushed Gravel Base

#4: Flagstone and Gravel Patio Combo

Combine natural stone seating areas with pea gravel between for texture and water permeability. This landscaping idea for a backyard with rocks creates defined spaces while allowing proper drainage. The contrast between smooth stone and textured gravel adds visual depth to flat surfaces.

Flagstone and Gravel Patio Combo

#5: Boulder Groupings as Natural Art Features

Cluster large stones as focal points, particularly effective in sloped yards where they create natural terracing. These backyard rock landscape ideas work especially well with Colorado’s mountain aesthetic. Position boulders to frame views or create natural windbreaks.

Boulder Groupings as Natural Art Features

#6: Rock Edging Around Lawn or Garden Beds

Use flat rock or cobblestone to contain mulch or lawn edges with clean lines. This practical approach to rock landscaping ideas backyard applications prevents soil erosion and creates clear boundaries between different landscape zones. The edging also reduces maintenance by controlling spreading plants.

Rock Edging Around Lawn or Garden Beds

#7: Pathways with Stepping Stones and Gravel

Combine crushed granite or pea gravel with spaced flagstone stepping stones for pedestrian traffic. These pathways handle Denver’s freeze-thaw cycles better than concrete while providing stable walking surfaces. The combination allows for proper drainage during spring snowmelt.

Pathways with Stepping Stones and Gravel

#8: Succulent Bed in Gravel or Lava Rock

Design sunny spots with gravel mulch supporting drought-tolerant succulents.  Lava rock provides excellent drainage and adds unique color variations to garden beds. This backyard rock landscaping idea maximizes water efficiency while creating striking textural contrasts.

Succulent Bed in Gravel or Lava Rock

#9: Kid-Friendly Gravel Play Zone

Install soft-edged pea gravel with large pavers for safe play areas. This family-focused approach to backyard landscape ideas with rocks provides sensory play opportunities. The rounded pea gravel reduces injury risks compared to angular stone options.

Kid-Friendly Gravel Play Zone

#10: Raised Rock Planter with Drought-Tolerant Plants

Construct elevated planters using stone retaining walls filled with native Colorado flowers. These structures provide excellent drainage while creating vertical interest in flat yards. The raised design protects plants from late frost while improving soil conditions.

Raised Rock Planter with Drought-Tolerant Plants

#11: Rock Garden Terraces for Sloped Backyards

Create tiered walls using natural stone or gabion baskets to manage slopes effectively. This landscaping idea for a backyard with rocks prevents erosion while creating planting opportunities at different levels. Terracing also makes steep areas more accessible for maintenance.

Rock Garden Terraces for Sloped Backyards

#12: Boulders and Evergreens

Mix structural rocks with dwarf pines or junipers for constant visual appeal. This combination provides structure through winter months when other plants go dormant. The evergreens soften hard rock edges while the stones anchor plant groupings.

Boulders and Evergreens

#13: Rock Labyrinth or Meditation Spiral

Design flat gravel areas with arranged stepping stones creating quiet contemplation zones. These backyard rock landscape ideas offer personal retreat spaces within larger landscapes. The geometric patterns both provide visual interest and functional purposes.

Rock Labyrinth or Meditation Spiral

#14: Desert Vibe Design with Agave and Crushed Stone

Combine gravel mulch with sculptural desert plants for southwestern aesthetics. This rock landscaping idea backyard approach works particularly well in Denver’s semi-arid climate. The design requires minimal water while providing striking architectural plant forms.

Desert Vibe Design with Agave and Crushed Stone

#15: Rustic Rock Bench Nook

Create boulder seating areas surrounded by gravel or mulch pathways. These natural seating solutions blend seamlessly with Colorado’s landscape character. Position benches to capture mountain views or create intimate gathering spots within larger gardens.

Rustic Rock Bench Nook

#16: Modern Grid Layout with Stones and Pavers

Design minimalist combinations of square pavers with uniform gravel fill between. This contemporary approach to backyard landscaping ideas with rocks creates clean geometric patterns. The grid system works well for smaller spaces where organization enhances visual impact.

Modern Grid Layout with Stones and Pavers

#17: Decorative Rock Mosaic or Pattern

Combine different colored rock types to form shapes, stripes, or artistic swirls. This creative approach allows personal expression while maintaining practical benefits. Colored stones can reflect specific themes or complement home architecture.

Decorative Rock Mosaic or Pattern

#18: Rock Firewood Storage Area

Frame woodpile areas with stacked river rock to create visual boundaries. This practical storage solution integrates functional needs with landscape design. The rock framework helps organize outdoor spaces while providing weather protection for stored materials.

Rock Firewood Storage Area

Benefits of Rock Landscaping in Denver Backyards

  • Water Efficiency: Unlike traditional lawns requiring 1-2 inches of water weekly, rock gardens need no supplemental watering once established. This conservation approach helps homeowners comply with Denver’s water restrictions.
  • Low Maintenance Requirements: Rock installations require no mowing, fertilizing, or seasonal cleanup. Unlike grass lawns demanding weekly attention, rock landscapes maintain their appearance with minimal intervention.
  • Exceptional Durability: Colorado’s intense UV exposure, temperature extremes, and precipitation patterns challenge many landscape materials. Rock withstands these conditions without degradation, maintaining appearance and function through decades of weather exposure.
  • Effective Weed Suppression: Quality landscape fabric beneath rock installations prevents weed establishment while allowing water infiltration. This system reduces herbicide use and manual weeding compared to traditional garden beds.
  • Design Flexibility: Rock landscaping adapts to modern, rustic, or natural architectural styles seamlessly. The material ranges from smooth river rock to angular flagstone provides options for any aesthetic preference.

What Plants Pair Well with Rock Landscapes in Denver?

Native Colorado plants integrate naturally with rock landscaping while requiring minimal water and maintenance. These drought-tolerant species have evolved to thrive in our specific climate conditions.

  • Blue grama grass provides soft texture contrast against hard rock surfaces while requiring no irrigation once established. This native bunch grass handles foot traffic well and maintains attractive seed heads through winter months.
  • Blanket flowers (Gaillardia) offer bright orange and red blooms from spring through fall frost. The flowers complement earth-tone rocks while attracting beneficial pollinators to garden spaces. Self-seeding characteristics ensure natural garden renewal.
  • Penstemon species deliver tubular flowers in purple, pink, or white throughout growing seasons. These native perennials adapt to various soil conditions while providing vertical elements among horizontal rock arrangements. Hummingbirds frequently visit these blooms.
  • Yarrow varieties contribute feathery foliage and flat-topped flower clusters in white, yellow, or pink. The plants spread gradually to fill spaces between rocks while maintaining a neat appearance.
  • Sedum collections offer succulent textures with seasonal color changes from green to red or purple. These low-growing plants soften rock edges while requiring virtually no maintenance. Many varieties produce attractive flowers that attract butterflies.
  • Russian sage provides silvery foliage and spikes of lavender-blue flowers through late summer. The plant’s drought tolerance and deer resistance make it ideal for challenging sites. Aromatic foliage adds sensory appeal to garden spaces.
What Plants Pair Well with Rock Landscapes in Denver?

DIY Tips for Installing Backyard Rock Features in Colorado

  • Site Preparation: Remove existing turf completely and grade slopes to ensure proper drainage. Install landscape fabric to prevent weed growth while allowing water infiltration. Edge boundaries with metal or plastic edging to contain rock materials and prevent spreading.
  • Foundation Requirements: Create stable gravel bases for patios or heavily trafficked pathways. Use crushed limestone or granite fines compacted in 2-inch lifts for solid foundations.
  • Border Installation: Install permanent edging materials to maintain clean boundaries between rock areas and adjacent landscapes. Metal edging provides durability while plastic options offer flexibility for curved designs.
  • Tree and Root Protection: Avoid piling rocks directly against tree trunks or over root zones. Maintain 6-inch clearance from bark to prevent moisture retention and pest issues. Deep rock layers can suffocate tree roots and compromise plant health.
  • Utility Safety: Call 811 Colorado before any digging to locate underground utilities. This free service prevents dangerous accidents and costly repairs. Mark utility locations clearly before beginning excavation work.

Conclusion

Rock landscaping delivers beauty, practicality, and sustainability for Denver homeowners. The combination of water conservation, minimal maintenance, and year-round appeal makes these installations ideal for Colorado’s challenging climate conditions.

Experiment with different rock types, plant combinations, and layout styles to develop designs that match your lifestyle needs. Start with small projects to gain experience before attempting larger installations.

If you’re looking for reliable rock landscapers near me, Mile High Lifescape has been proudly serving the Denver Metro area as the go-to landscape company. With a reputation for excellence, we offer a comprehensive range of friendly and professional landscaping services.

Count on us to transform your outdoor space into a beautiful oasis!

Frequently Asked Questions (FAQs)

How do I stop weeds from growing through my backyard rock landscaping?

You can stop weeds from growing by installing heavy-duty landscape fabric before placing rocks and refresh gravel layers when they thin out over time. Proper fabric installation with overlapped seams prevents most weed growth while allowing water penetration. Periodic gravel addition maintains effective weed suppression.

Do backyard rocks increase heat in summer?

Darker rocks absorb and radiate heat more than lighter colors, especially during Denver’s intense summer sun. Choose light-colored stones like sandstone or limestone for cooler surfaces. Mix rocks with plants or mulch to balance temperature effects in seating areas.

Can I use landscaping rocks in shaded backyards?

Rock landscaping works well in shade but requires different considerations. Avoid moss-prone areas with poor air circulation and choose rocks that resist discoloration from moisture. River rock and flagstone perform better than porous stone types in humid shade conditions.

What’s the cheapest backyard rock option for large spaces?

Pea gravel and decomposed granite typically cost less per cubic yard than larger stones. These materials provide good coverage while maintaining an attractive appearance. Local quarries often offer better pricing than retail suppliers for bulk quantities.

Rate this post

Rock landscapes conserve water, reduce maintenance demands, and create year-round visual appeal. That’s why many Colorado homeowners want to apply these front yard landscaping ideas with rocks into their yard. It delivers both practical benefits and striking aesthetics for people’s properties.

In this guide, we present you 15+ creative, climate-appropriate rock landscaping solutions. Each idea addresses Denver’s environmental conditions and maximizes curb appeal and value.

15+ Stunning Front Yard Landscaping Ideas With Rocks

15+ Stunning Front Yard Landscaping Ideas With Rocks

#1: Dry Creek Bed

Transform drainage challenges into landscape features using river rocks in meandering formations. Position these dry creek beds to guide water flow from higher elevations toward street drainage systems.

Create natural-looking curves that follow your yard’s natural contours. Incorporate varying rock sizes, from small pebbles to larger stones, mimicking authentic creek bed formations. Add native bunch grasses and strategically placed boulders for enhanced realism.

This front yard rock landscaping idea proves especially effective for sloped properties common in Denver foothills neighborhoods.

Dry Creek Bed
Dry Creek Bed

#2: Rock and Mulch Combo

Combine gravel zones with organic mulch to create dynamic textural contrast. Alternate crushed granite sections with bark mulch around native plant groupings. This approach balances the structured appearance of rocks with softer organic elements.

Use metal or stone edging to maintain clean boundaries between materials. Position drought-tolerant plants like purple sage and penstemon in mulched areas, while using gravel zones for pathway access and visual breathing space.

Rock and Mulch Combo

#3: Boulder Focal Points with Native Plant Clusters

Position large sandstone or granite boulders asymmetrically throughout your landscape design. These statement pieces anchor planting zones and create natural gathering points for complementary vegetation.

Surround focal boulders with native plants such as blue grama grass, rabbit brush, and Rocky Mountain penstemon. Use odd-numbered groupings (three or five plants) to achieve natural-looking compositions.

Boulder Focal Points with Native Plant Clusters

#4: Rock Garden Beds with Perennials and Evergreens

Frame dedicated planting beds using crushed granite or pea gravel borders. These defined spaces showcase drought-resistant perennials alongside evergreen anchor plants for year-round structure.

Feature low-maintenance evergreens like mugo pine, juniper varieties, or dwarf spruce as backbone plantings. Complement these with seasonal color from blanket flower, yarrow, and native columbines.

This landscaping idea for the front yard with rocks creates organized, professional appearances while supporting plant health through improved drainage and temperature moderation.

Rock Garden Beds with Perennials and Evergreens

#5: Flagstone Pathway to Front Porch or Mailbox

Install flagstone pathways using decomposed granite or sand as joint filler. Create either straight, formal approaches or gently curving routes that soften architectural lines.

Incorporate low-voltage LED lighting along pathway edges for evening safety and enhanced curb appeal. Choose flagstone colors that complement your home’s exterior palette while providing slip-resistant surfaces.

Flagstone Pathway to Front Porch or Mailbox

#6: Gravel Yard Conversion with Potted Plants

Replace water-intensive lawn areas with decorative gravel surfaces. Use large, weather-resistant planters to introduce color and seasonal interest without permanent planting commitments.

This approach proves ideal for HOA-regulated communities or areas with strict water restrictions. Planters allow flexibility for seasonal changes, holiday decorations, or evolving design preferences.

Select gravel colors and textures that create cohesive backgrounds for container plantings while maintaining visual interest during winter months when containers may be stored.

Gravel Yard Conversion with Potted Plants

#7: Rock Borders Along Fence Lines

Create clean transitions between hardscape elements and landscape areas using small to medium-sized rock borders. These installations prevent soil splash onto building surfaces.

Combine rock edging with low-profile shrubs like spreading juniper or kinnikinnick for softened boundaries. Use consistent rock sizes and colors to maintain visual continuity across your property’s perimeter.

This front yard landscape idea with rocks offers practical benefits including improved drainage around foundations and reduced maintenance requirements near structures.

Rock Borders Along Fence Lines

#8: Corner Rock Islands with Ornamental Trees

Transform unused corner spaces into defined landscape features using crushed rock islands. Center these installations around single specimen trees like serviceberry, redbud, or dwarf maple varieties suited to Colorado conditions.

Layer groundcover plants such as creeping phlox or wild strawberry within rock boundaries. These plantings soften harsh edges while providing seasonal color and texture variation.

Corner Rock Islands with Ornamental Trees

#9: Sloped Yard Rock Tiers or Terracing

Address mild to moderate slopes using large flat rocks or manufactured retaining blocks to create terraced planting zones. Each tier provides opportunities for different plant communities, from drought-tolerant species in upper zones to moisture-loving plants in lower collection areas.

Use native stone materials to maintain natural appearances.

This rock landscaping idea for front yard applications proves especially valuable for properties near foothills or areas with natural grade changes.

Sloped Yard Rock Tiers or Terracing

#10: Symmetrical Rock Patterns

Create geometric designs using square pavers, rectangular gravel sections, or linear stone arrangements. These patterns complement contemporary and mid-century modern architectural styles common in Denver neighborhoods.

Incorporate structured plantings like ornamental grasses in grid patterns or boxwood hedges in geometric shapes. Maintain consistent spacing and proportions to achieve sophisticated, designer-quality results.

Symmetrical Rock Patterns

#11: Rock-Edged Artificial Turf Combo

Combine artificial turf areas with surrounding crushed gravel or flagstone borders. These rock borders create visual separation between artificial and natural elements while providing practical benefits like improved drainage and reduced edge wear on synthetic materials.

This solution proves especially valuable for families with children or pets who desire lawn-like surfaces without ongoing maintenance commitments.

Rock-Edged Artificial Turf Combo

#12: Desert-Style Rock Scape

Create Southwest-inspired landscapes using red lava rock, decomposed granite, or colored gravel as base materials. Incorporate cold-hardy succulents and cacti that thrive in Colorado’s high-altitude desert conditions.

You can try to feature statement plants like agave, yucca, or prickly pear cactus alongside smaller sedums and hens-and-chicks varieties.

Desert-Style Rock Scape

#13: Pathway of River Rock with Plant Pockets

Design flowing pathways using river rock as primary material while leaving strategic openings for plant installations. These pockets accommodate tufts of native grass, wildflowers, or small perennial groupings.

Create organic, curved patterns that guide movement through your landscape while providing visual interest through varied textures and seasonal color changes.

Pathway of River Rock with Plant Pockets

#14: Minimalist Japanese Rock Front Yard

Achieve zen-like simplicity using sand-colored gravel with raked patterns and carefully positioned boulder arrangements. Add subtle elements like dwarf conifers, moss-covered rocks, or simple metal sculptures for enhanced visual interest. Maintain clean lines and uncluttered compositions throughout the design.

This low maintenance front yard landscaping idea with rocks requires minimal water while creating sophisticated, meditative outdoor spaces.

Minimalist Japanese Rock Front Yard

#15: Rock and Steel Raised Beds

Frame rock-filled raised beds using rusted corten steel or powder-coated metal edging for industrial-contemporary aesthetics. Fill beds with crushed granite and select architectural plants with strong forms.

Incorporate drought-tolerant ornamental grasses, sculptural agaves, or geometric succulent arrangements to complement the structured framework.

Rock and Steel Raised Beds

#16: Rock Mosaic or Color Blends

Create artistic focal points using colored rock chips in mosaic patterns or gradient arrangements. These installations can define entrance areas, border flower beds, or highlight architectural features.

Use contrasting colors like red sandstone chips with gray granite, or earth-tone blends that complement your home’s exterior palette. This landscaping rock idea front yard approach adds personalized artistic elements while maintaining practical landscape functions.

Rock Mosaic or Color Blends

Benefits of Using Rocks in Your Front Yard

  • Water Efficiency: Rocks eliminate irrigation needs and reduce evaporation around plant zones.
  • Low Maintenance: Rock installations require no mowing, seasonal replanting, or frequent upkeep. Once established, these landscapes maintain their appearance with minimal intervention.
  • Weed Control: Properly installed rock systems with landscape fabric create barriers against unwanted vegetation. This reduces chemical treatments and manual weeding.
  • Durability: Quality rocks withstand Colorado’s harsh winters, intense summer heat, and occasional hail storms. Unlike organic materials, rocks maintain structural integrity for decades.
  • Visual Appeal: Rock textures, colors, and formations provide four-season interest. These materials complement both modern architectural styles and traditional Denver neighborhood aesthetics.
  • Eco-Friendly: Rock landscaping promotes xeriscaping principles, supports local ecosystems, and reduces environmental impact through decreased water consumption.

Is It Better to Use Mulch or Landscaping Rocks?

FactorMulchRocks
CostLower upfront investmentHigher initial cost, long-term savings
Lifespan1–2 years before replacement5–10+ years of durability
AppearanceOrganic, natural textureStructured, modern or rustic appeal
Weed SuppressionModerate effectivenessHigh control with proper fabric installation
Heat RetentionCooler root zones for plantsCan increase soil temperatures
Water RetentionExcellent moisture conservationLow retention unless paired with drought-adapted plants

Recommendation: Use mulch in shaded garden beds or plant-heavy installations where moisture retention benefits plant health.

Choose rocks for full-sun areas, erosion control applications, or permanent hardscaping where long-term durability and low maintenance take priority.

Conclusion

Rock landscaping delivers beauty, durability, and environmental responsibility for Colorado homeowners. These versatile materials adapt to any property size, architectural style, or budget constraint while addressing Denver’s unique climate challenges.

For homeowners seeking professional guidance, experienced landscape rock installers near me can ensure proper installation and long-term success.

Mile High Lifescape brings decades of Colorado-specific expertise to every project, from design consultation through complete installation. Transform your front yard into a water-wise showcase that enhances curb appeal while supporting sustainable landscaping practices.

Contact Mile High Lifescape today to begin your rock landscaping journey.

Frequently Asked Questions (FAQs)

What are the best low-maintenance rock types for front yards?

For low-maintenance front yards, consider using materials like pea gravel, river rock, or decomposed granite. These options provide visual appeal, easy installation, and minimal upkeep requirements.

Can I mix artificial grass and rock in my front yard?

Yes, combining artificial grass with natural rocks creates dynamic, realistic landscapes that break up the uniform appearance of synthetic materials. Adding rocks provides textural contrast and natural elements that make artificial turf appear more authentic and visually interesting.

Will rock landscaping increase home value in Colorado?

Yes, well-executed rock landscaping can increase home value, particularly in Colorado. The American Society of Landscape Architects notes that professional landscaping can add 15-20% or more to home value.

How do I put rocks in my front yard?

To install rocks effectively, begin by removing existing vegetation and debris from the target area. Install landscape fabric to prevent weed growth, then arrange rocks according to your desired design pattern. Consider rock type and size for specific applications – smaller gravel for pathways, larger stones for borders or focal points.

How do I landscape my front yard on a budget?

Budget-friendly rock landscaping starts with using locally sourced materials to reduce transportation costs. Consider decomposed granite or crushed gravel as cost-effective base materials, then add accent rocks or boulders sparingly for visual interest.

5/5 - (1 vote)

Denver’s climate presents challenges for homeowners seeking sustainable outdoor spaces. 

Traditional lawn care often struggles against water restrictions, intense UV exposure, and temperature fluctuations but rock landscaping ideas offer a practical solution that thrives in Colorado’s demanding environment.

This article presents 20 simple, practical rock landscaping ideas you can implement in your yard. Each concept addresses specific challenges Colorado homeowners face while creating attractive, functional outdoor environments that comply with local water regulations.

20 Simple Rock Landscaping Ideas for Denver Lawns

20 Simple Rock Landscaping Ideas for Denver Lawns

#1: Rock Beds Around Trees and Shrubs

Creating protective rock rings around tree bases eliminates competition from grass roots while conserving precious soil moisture. This approach reduces weed growth and provides clean, defined edges that enhance your property’s professional appearance.

Mix different rock sizes to create visual depth. Combine 2-3 inch river rocks with fist-sized accent stones for natural variation. Plant drought-tolerant groundcovers like sedum or creeping thyme between rocks to soften hard edges while maintaining water efficiency.

Position rocks 6 inches from tree trunks to prevent moisture retention against bark. This landscaping idea with rocks and stones protects root systems and creates attractive focal points

Rock Beds Around Trees and Shrubs

#2: Decorative Rock Borders Along Walkways and Driveways

Line pathways with pea gravel or crushed granite contained by metal edging for crisp, professional borders. This technique defines traffic areas while preventing soil erosion during Denver’s intense summer storms.

  • Install flat stepping stones through grassy areas to create durable pathways that withstand foot traffic.
  • Choose native Colorado sandstone or imported flagstone based on your budget and aesthetic preferences.
  • Add solar path lights between rocks for evening safety and ambiance.

These energy-efficient fixtures charge during Colorado’s abundant sunshine and illuminate walkways without increasing utility costs.

Decorative Rock Borders Along Walkways and Driveways

#3: Xeriscape-Inspired Rock Gardens

Design minimalist rock gardens featuring native succulents, yucca, and ornamental grasses that thrive in Denver’s challenging climate. These ideas for landscaping with rocks are the best because it requires minimal irrigation once established.

  • Use large boulders as anchor points surrounded by smaller river rocks to create natural-looking compositions.
  • Plant drought-resistant flowering species like penstemon and blanket flowers for seasonal color.
  • Arrange rocks in odd-numbered groupings to achieve pleasing visual balance.

Xeriscape-Inspired Rock Gardens

#4: Rock Mulch for Flower Beds and Vegetables

Replace traditional organic mulch with decorative rock for longer-lasting groundcover that never needs replacement.

  • Choose lighter-colored rocks to reflect intense Colorado sunlight away from plant roots.
  • White or tan gravel prevents soil overheating during summer while maintaining consistent temperatures through seasonal changes.
  • Apply rocks 2-3 inches deep around established plants, keeping material away from stems to prevent moisture-related diseases.

This technique works particularly well with perennial beds and vegetable gardens that benefit from consistent soil conditions.

Rock Mulch for Flower Beds and Vegetables

#5: Flat Rock Patio and Seating Areas

Install flagstone or large flat river rocks to create natural outdoor living spaces that blend seamlessly with Denver’s mountain landscape.

  • Combine flat rocks with pavers or decomposed granite for textural contrast that adds visual interest.
  • Mix materials in proportions that complement your home’s architecture while maintaining functional requirements for furniture placement.
  • Arrange large boulders as natural seating elements or sculptural accents.

 These rock landscaping ideas provide durable surfaces that require no ongoing maintenance beyond occasional sweeping.

Flat Rock Patio and Seating Areas

#6: Rock Pathways for Garden and Backyard Access

Construct durable pathways using pea gravel or decomposed granite that allow rainwater infiltration and provide stable walking surfaces. 

Edge pathways with larger stones or concrete curbs to prevent material migration during heavy rains. This containment approach maintains clean lines while protecting adjacent planted areas from gravel intrusion.

Integrate stepping stones at comfortable walking intervals for enhanced accessibility.

Rock Pathways for Garden and Backyard Access

#7: Dry Creek Beds and Waterwise Drainage Solutions

Build decorative dry creek beds using mixed river rock sizes to manage stormwater runoff.

Plant native bunch grasses along creek bed edges to stabilize soil and create realistic transitions between rock and planted areas. Select species like buffalo grass or blue grama that establish quickly and require minimal irrigation.

Size rocks appropriately for expected water flow, using larger stones in potential high-flow areas and smaller material for gentle slopes.

Dry Creek Beds and Waterwise Drainage Solutions

#8: Rock Retaining Walls and Terraces

Use large boulders or carefully stacked stone walls for effective slope management that prevents erosion. These landscaping with rocks ideas solve challenging topography issues common in Denver’s foothills communities.

Incorporate planting pockets within wall construction for color and textural variety. Fill gaps with drought-tolerant perennials that soften hard surfaces while requiring minimal supplemental irrigation. Create tiered garden beds that maximize planting opportunities on sloped sites.

Rock Retaining Walls and Terraces

#9: Rock and Mulch Combinations

This rock garden landscaping ideas approach allows flexibility in plant selection and maintains consistent aesthetic appeal across diverse growing conditions.

  • Use mulch in plant-heavy areas where nutrients are beneficial and rock in open beds requiring minimal maintenance.
  • Choose color palettes that unify different materials throughout your landscape design. 
  • Coordinate rock tones with mulch colors to create cohesive transitions between different garden areas.

Rock and Mulch Combinations

#10: Colored Gravel

Create geometric or abstract patterns using colored gravel that adds artistic elements to functional landscape areas.

  • Outline flower beds or patio areas with contrasting gravel colors that define spaces without requiring permanent structures.
  • Use earth tones that complement Colorado’s natural landscape palette.

These installations remain visually striking while requiring minimal ongoing maintenance.

Colored Gravel
Colored Gravel

#11: Rock Accents Around Water Features and Pools

Position smooth river rocks around pools and fountains to create cohesive transitions between water elements and surrounding landscape. Combine rocks with drought-tolerant plants that provide lush appearances.

Select rounded stones that provide comfortable walking surfaces, create natural-looking borders and complement water feature aesthetics.

Rock Accents Around Water Features and Pools

#12: Rock Borders for Raised Beds and Vegetable Gardens

Define garden bed edges using crushed stone or cobblestones that prevent soil erosion while maintaining tidy appearances. These borders work particularly well with drip irrigation systems that require defined watering zones.

Choose materials that complement your home’s architecture while providing clear separation between cultivated and uncultivated areas.

Remember to install borders at appropriate heights to contain soil but also allow easy access for planting and harvesting activities.

Rock Borders for Raised Beds and Vegetable Gardens

#13: Rock Planting Pockets and Containers

Embed large rocks with carved or natural pockets for succulents and small shrubs that create microhabitats within xeriscaped areas.

Combining container plantings with surrounding gravel for modular designs allows seasonal changes without disturbing permanent installations. This flexibility accommodates evolving preferences while maintaining structural elements.

Rock Planting Pockets and Containers

#14: Rock Steps and Stairways on Slopes

Construct natural-looking steps using flat boulders or flagstone. Combine stone treads with gravel or mulch landings for comfortable footing during wet conditions.

Size steps appropriately for comfortable use while maintaining visual proportion within your overall landscape design. These installations enhance accessibility while creating attractive transitions between different yard elevations.

Rock Steps and Stairways on Slopes

#15: Gravel Seating Pads and Fire Pit Circles

Create circular gravel areas for outdoor seating or fire pit installations that provide stable, well-draining surfaces for entertainment areas. Edge these spaces with large stones or pavers to define boundaries while preventing material migration.

Choose gravel sizes that remain comfortable underfoot plus adequate drainage during precipitation events.

Gravel Seating Pads and Fire Pit Circles

#16: Rock Garden Borders Along Fences and Property Lines

Install rows of large rocks or boulders as natural barriers that provide privacy. Besides, it also complements Denver’s mountain landscape setting. 

  • Try to integrate climbing plants or ornamental grasses for seasonal variety without compromising drought tolerance.
  • Position rocks to create informal barriers that discourage foot traffic while maintaining welcoming appearances for neighbors and visitors.

Rock Garden Borders Along Fences and Property Lines

#17: Xeriscape Rock Medians and Traffic Islands

Design rock beds for median strips or traffic islands that eliminate irrigation requirements while providing attractive landscape elements. These landscaping with rock ideas offer maintenance-free solutions for challenging growing conditions.

Combine rocks with drought-resistant plantings and occasional signage or lighting features for functional yet attractive installations that comply with municipal requirements.

These designs demonstrate environmental responsibility while maintaining neighborhood aesthetic standards.

Xeriscape Rock Medians and Traffic Islands

#18: Low Rock Walls for Garden Art and Sculptural Features

Stack flat stones or arrange boulders into artistic garden walls that serve as sculptural elements. This idea also provides functional benefits like wind protection or space definition. Incorporate native plants around edges for natural transitions.

Design walls at heights that complement surrounding landscape elements while serving intended functional purposes.

These rock bed landscaping ideas create focal points and require no ongoing maintenance beyond occasional plant care.

Low Rock Walls for Garden Art and Sculptural Features

#19: Rock and Grass Hybrid Landscaping

Mix strategic rock beds with native turf grasses or clover for balanced landscapes that reduce overall water consumption. This approach accommodates diverse household needs while maintaining environmental responsibility.

Position rock and grass areas to optimize maintenance efficiency while creating visually pleasing compositions that serve multiple functions.

These grass and rock landscaping ideas work particularly well for pet-friendly yards for active use combined with attractive landscaping that enhances property value.

Rock and Grass Hybrid Landscaping

#20: Gravel and Rock for Driveways and Parking Areas

Use crushed rock or gravel for permeable parking surfaces that reduce stormwater runoff while providing stable vehicle access. These installations improve drainage while offering cost-effective alternatives to traditional paving materials.

Gravel and Rock for Driveways and Parking Areas

Maintenance Tips for Rock Landscaping in Denver

Regular maintenance ensures rock installations remain attractive and functional:

  • Remove accumulated debris and fallen leaves from rock beds monthly
  • Address weed invasion promptly to prevent establishment in rock installations.
  • Apply pre-emergent herbicides in early spring when soil temperatures reach optimal germination conditions for common Denver-area weeds.
  • Refresh rock layers every 2-3 years to maintain proper coverage depth and visual appeal.
  • Add new material to replace stones that have migrated or settled below optimal levels.
  • Monitor soil moisture around planted areas within rock installations.
  • Adjust irrigation schedules seasonally to accommodate changing plant needs while maintaining water conservation goals.

Conclusion

Rock landscaping ideas provide low-maintenance solutions suited to Denver’s challenging climate and water restrictions. These approaches address practical concerns while creating beautiful outdoor spaces that enhance property value and neighborhood appeal.

For nearly 2 decades, Mile High Lifescape has been proudly serving the Denver Metro area as the go-to landscape company.

With a reputation for excellence, we offer a comprehensive range of friendly and professional landscaping and lawn care services, especially rock landscaping service. If you need support from professional rock landscapers near me, count on us to transform your outdoor space into a beautiful oasis you dream of.

Contact Mile High Lifescape for expert design and installation services today!

Frequently Asked Questions (FAQs)

Can I combine rocks with native plants in my yard?

Yes, you can combine rocks with native plants in your yard. Try to choose drought-tolerant species like penstemon, yucca, and ornamental grasses that complement rock installations while requiring minimal irrigation.

What is the cheapest way to landscape with rocks?

Start with locally sourced materials like Colorado river rock or crushed granite, which cost less than imported stones. Focus on high-impact areas first, such as borders around existing plants or small accent beds. Buy materials in bulk when possible and consider DIY installation for simple projects like pathways or mulch replacement.

What is the best size rock for pathways versus beds?

Use pea gravel or 3/8-inch crushed granite for pathways, as these sizes provide stable walking surfaces while allowing proper drainage. For decorative beds, mix 1-3 inch river rocks with larger accent stones to create visual interest. Avoid rocks smaller than 1/2 inch in beds, as they tend to migrate and require frequent replenishment.

What rock looks best for landscaping?

Choose materials that complement your home’s architecture and Colorado’s natural landscape. River rock in earth tones works well for most applications, while flagstone provides elegant options for patios and pathways.

How often do I need to refresh rock landscaping?

Well-installed rock landscapes require refreshing every 2-3 years to maintain proper coverage depth and appearance. Add new material to replace stones that have settled or migrated.

Rate this post

How much does it cost for landscaping rocks in Denver? Most homeowners pay between $50 to $200 per ton for materials, with total project costs ranging from $300 to $2,500 depending on rock type, area size, and installation complexity.

The cost of landscaping rocks varies significantly based on material choice, project scope, and local Denver market conditions. Understanding these costs helps you budget effectively for your outdoor transformation project.

This comprehensive guide examines material costs, installation expenses, and regional pricing factors specific to Denver homeowners. We break down expenses by rock type, project size, and installation method to help you make informed decisions for your landscape investment.

Average Costs of Landscaping Rocks in Denver

Local suppliers price materials by the ton, with costs varying based on rock type, quality, and seasonal demand.

Rock TypePrice Range (per ton)Best UsesKey Features
Pea Gravel$40 – $80Walkways, between stepping stonesSmall, rounded, stays in place
Crushed Granite$50 – $120Driveways, stable pathwaysAngular, compacts well, various colors
River Rock$60 – $150Decorative beds, dry creeksSmooth, polished, premium appearance
Lava Rock$70 – $130Modern designs, drainage areasLightweight, porous, unique texture
Marble Chips$80 – $200Small accent areasBright white, luxury option
Large Boulders$100+ per pieceFocal points, retaining wallsStatement pieces, functional barriers

Notes:

  • Spring demand increases prices by 10-20%
  • Local quarries offer bulk discounts
  • Delivery adds $50-$150 depending on location
  • Transportation distance affects final cost

The most popular choices for Denver homeowners are river rock for visual appeal and crushed granite for functional areas. Pea gravel provides the best value for large coverage areas, while boulders create dramatic focal points worth the premium investment.

Average Costs of Landscaping Rocks in Denver

How Much Are Large Rocks for Landscaping?

Large rocks and boulders use different pricing than standard landscaping materials. How much are large rocks for landscaping depends on size, weight, and transportation needs rather than per-ton calculations.

Individual boulders cost $100 to $800 each, with exceptional pieces reaching $1,500 or more. 

Weight drives pricing since most large rocks weigh 500 to 2,000 pounds. Local Colorado sandstone and granite command higher prices due to their regional appeal.

Rock SizeWeight RangePrice RangeTransportation MethodBest Uses
Small Accent50 – 200 lbs$100 – $250Standard delivery truckGarden borders, small focal points
Medium Boulder200 – 800 lbs$250 – $500Forklift or small craneRetaining walls, property markers
Large Boulder800 – 1,500 lbs$500 – $800Crane placement requiredMajor focal points, privacy screens
XL Statement1,500+ lbs$800 – $1,500+Specialized equipmentLandscape centerpieces, natural barriers

Additional Costs to Consider:

  • Crane placement: $200–$600
  • Site access preparation: $100–$300
  • Professional positioning: $150–$400

Transportation represents a major cost factor. Standard trucks handle rocks up to 800 pounds. Heavier boulders need specialized equipment, adding significant expense to your project.

How Much Landscape Rock Cost Per Square Foot Cost?

Landscape rock cost per square foot ranges from $1 to $6 depending on rock type, coverage depth, and whether you hire professionals. This pricing method helps you budget for specific areas more easily than buying by the ton.

Coverage depth affects your total cost. Most installations need 2 to 4 inches of rock depth. Smaller stones like pea gravel work with 2-inch coverage, while larger river rocks need 3 to 4 inches for proper appearance.

Rock TypeMaterial Cost per Sq FtInstallation Cost per Sq FtTotal Cost per Sq FtRecommended Depth
Pea Gravel$0.50 – $1.25$1.50 – $2.50$2.00 – $3.752 – 3 inches
Crushed Granite$0.75 – $1.50$1.50 – $2.50$2.25 – $4.002 – 3 inches
River Rock$1.00 – $2.50$1.50 – $3.50$2.50 – $6.003 – 4 inches
Lava Rock$1.25 – $2.25$1.50 – $3.00$2.75 – $5.253 – 4 inches
Marble Chips$1.50–$3.50$2.00–$3.50$3.50–$7.002–3 inches

Cost Example: For a 500-square-foot area with river rock at 3-inch depth:

  • Material: $500–$1,250
  • Installation: $750–$1,750
  • Total: $1,250–$3,000

Professional installation includes site preparation, landscape fabric, and proper rock placement. DIY installation saves $1.50 to $3.50 per square foot but requires proper tools and techniques for lasting results.

How Much Landscape Rock Cost Per Square Foot Cost?

How Much Rock Do You Need?

How much rock do I need for landscaping depends on your area size and coverage depth. Accurate calculations prevent over-ordering or running short during installation.

Measuring Your Project Area

Start by measuring length and width in feet, then multiply for square footage. For irregular shapes, break the area into rectangles and add them together. Always order 10% extra for waste and future touch-ups.

Determining coverage depth:

Most landscaping projects use these standard depths:

  • Pea gravel and small stones: 2–3 inches
  • River rock and medium stones: 3–4 inches
  • Large decorative rocks: 4–6 inches

Simple calculation formula:

  • Step 1: Square footage × depth (in feet) = cubic feet
  • Step 2: Cubic feet ÷ 27 = cubic yards
  • Step 3: Cubic yards × weight per yard = total tons needed

Rock weight by type:

Different rocks have different weights per cubic yard:

  • River rock: 1.5 tons per cubic yard
  • Crushed granite: 1.4 tons per cubic yard
  • Lava rock: 1.3 tons per cubic yard
  • Pea gravel: 1.6 tons per cubic yard

Real Example Calculation

Project: 500 square feet with 3-inch river rock coverage

  1. Area: 500 sq ft
  2. Depth: 3 inches = 0.25 feet
  3. Volume: 500 × 0.25 = 125 cubic feet
  4. Cubic yards: 125 ÷ 27 = 4.6 cubic yards
  5. Total weight: 4.6 × 1.5 = 7 tons needed
  6. Cost estimate: 7 tons × $100 = $700 (plus delivery)

Landscaping Rock Installation Costs in Denver

Professional installation involves multiple steps beyond simply placing rocks. How much does it cost to have landscape rock installed includes site preparation, materials, and finishing work that ensures long-lasting results.

Installation costs vary based on project size, terrain difficulty, and access to your property. DIY installation eliminates labor costs but requires proper tools and technique for professional results.

Installation ComponentCost RangeWhat’s IncludedDIY Savings Potential
Site Preparation$0.50–$1.50 per sq ftGrass removal, grading, debris clearingHigh – basic tools needed
Landscape Fabric$0.50–$1.25 per sq ftWeed barrier installationMedium – requires precision
Rock Delivery$50–$150 flat feeTransportation to your propertyNone – delivery required
Rock Spreading$1.50–$3.50 per sq ftProfessional placement and levelingHigh – labor intensive
Edging Installation$3–$6 per linear footSteel/aluminum borders for clean linesMedium – needs proper tools

Total Professional Installation: $2.50–$7.25 per square foot (excluding materials)

Cost Factors That Increase Pricing

Terrain Challenges:

  • Steep slopes: +25–50% labor costs
  • Rocky soil: +$0.25–$0.75 per sq ft
  • Tight access areas: +$0.50–$1.00 per sq ft

Project Size Impact:

  • Small areas (under 200 sq ft): Higher per-sq-ft costs
  • Large areas (over 1,000 sq ft): Lower per-sq-ft costs
  • Complex designs: +$1.00–$2.00 per sq ft

Professional vs. DIY Installation

Professional Benefits:

  • Warranty coverage on workmanship
  • Proper drainage and grading
  • Long-term stability and appearance
  • Time savings (2-3 days vs. 1-2 weeks DIY)

DIY Considerations:

  • Requires wheelbarrow, rake, and compacting tools
  • Physical demands increase with project size
  • Risk of improper drainage or settling
  • No warranty on installation quality

Landscaping Rock Installation Costs in Denver

Money-Saving Tips for Landscaping Rock Projects

Strategic planning reduces the cost of landscaping rocks without sacrificing quality or visual appeal. Smart purchasing and installation decisions can save hundreds of dollars on typical Denver projects.

Smart Purchasing Strategies

  • Buy in bulk or full pallets: Volume discounts range from 10-20% for orders exceeding minimum quantities
  • Coordinate with neighbors: Combine orders to reach bulk pricing thresholds and split delivery costs
  • Shop during off-season: Fall and winter orders often receive 15-25% discounted rates as suppliers clear inventory
  • Compare local quarries vs. retail centers: Direct quarry purchases typically cost 20-30% less than garden centers

Design Cost Control

  • Mix expensive and economical rocks: Use premium accent rocks sparingly with base materials like crushed granite
  • Focus spending on visible areas: Invest in quality materials for front yards and entertainment spaces
  • Consider recycled or reclaimed materials: Salvaged rocks from construction sites offer 30-50% savings when available
  • Use rocks strategically: Replace expensive hardscape walls with natural boulder placement

Long-Term Value Optimization

  • Invest in quality landscape fabric – Prevents costly weed problems and rock replacement needs
  • Choose durable edging materials – Steel or aluminum edging lasts 15-20 years vs. 3-5 years for plastic
  • Plan for proper drainage: Prevent erosion issues that require expensive repairs later

Conclusion

Understanding the cost of landscaping rocks components enables informed decision-making for your Denver landscape transformation. Material selection, installation method, and project scope all significantly impact final costs.

Local supplier relationships and bulk purchasing provide the best value for most homeowners. Combining professional installation with DIY site preparation optimizes both cost and quality outcomes.

Rock landscaping delivers exceptional long-term value through minimal maintenance requirements and permanent installation. Initial investment exceeds traditional groundcover but provides decades of beauty without replacement costs.

If you’re finding rock landscapers near me in Denver, Mile High Lifescape offers custom estimates and expert project planning for Denver-area homeowners.

Our experience with local suppliers, installation techniques, and regional requirements ensures your rock landscaping project achieves both budgetary and aesthetic goals.

Frequently Asked Questions (FAQs)

What is the cheapest rock to use for landscaping?

Pea gravel offers the most economical option at $40 to $80 per ton. This small, rounded material works well for pathways and basic groundcover applications while providing excellent drainage.

How much does 1 ton of rocks cover?

One ton of landscaping rock typically covers 100 to 120 square feet at 2-inch depth, or 60 to 80 square feet at 3-inch depth. Coverage varies by rock size and density.

How much is 1 yard of landscape rocks?

Landscape rock costs $60 to $200 per cubic yard in Denver, depending on material type. River rock averages $90 to $150 per yard, while crushed granite costs $60 to $120 per yard.

How much does a truck bed full of rocks cost?

A standard pickup truck holds approximately 1 to 1.5 cubic yards of rock, costing $60 to $300 depending on material choice. Factor in delivery fees if purchasing from suppliers without pickup options.

Where can I find free landscape rocks?

Check construction sites (with permission), Craigslist ads from homeowners removing rocks, or public land areas where rock collection is permitted. Always verify legal collection rights before removing materials.

4.8/5 - (1195 votes)

“How to remove landscaping rocks?” Landscape rock removal can be done using a combination of tools and equipment like a wheelbarrow or even a mini excavator for larger areas. The approach depends on your project scope (yard size, rock type,…) and future plans.

Denver residents remove landscape rocks for three primary reasons.

  1. They redesign spaces to incorporate native plants that thrive in Colorado’s climate.
  2. They convert existing rock beds to functional lawn or garden areas for family activities.
  3. They address aged and degraded rock installations where weeds have overtaken the original design intent.

This guide walks you through safe, effective DIY methods for removing landscape materials. 

You’ll discover proper tool selection, understand disposal options, learn project costs, and recognize when professional help delivers better value for your specific situation.

Should You Remove Your Landscape Rock?

Aging landscape materials signal the need for change. Rocks that once looked crisp now harbor weeds and debris. Faded colors and scattered stones create an unkempt appearance that reduces curb appeal.

More Denver homeowners shift from lava rock and gravel installations to plant-based landscapes. These organic designs offer better water management and seasonal interest.

Property resale considerations drive many removal decisions. Buyers often prefer established gardens over rock-dominated yards. HOA requirements may also mandate certain landscape standards that rock beds cannot meet.

Should You Remove Your Landscape Rock?

Choosing the Right Tools for Landscape Rock Removal

Match your tools to yard size, rock type, and depth. Small projects need basic hand tools. Large installations require power equipment or professional machinery.

Essential Tools for Rock Removal:

  • A flat shovel handles shallow installations and small rocks efficiently.
  • Hard rakes loosen embedded stones and scrape rock beds clean.
  • Wheelbarrows transport heavy loads without straining your back.
  • Soil sifter screens separate reusable rocks from dirt and debris.
  • Tarps and buckets stage materials for easy hauling.
  • Heavy-duty gloves protect hands during extended work sessions.

Large projects benefit from rental equipment. Skid steer loaders handle rock beds over 500 square feet. These machines complete in hours what hand tools accomplish in days.

Local tool libraries and rental centers in Denver offer weekend rates for heavier equipment. Reserve machinery in advance during peak landscaping seasons.

How to Remove Landscape Rock: Step-by-Step DIY Guide

Step 1: Prepare the Area

Start by clearing all obstacles from your work zone. Remove patio furniture, planters, and decorative items that might interfere with rock removal. Take photos of your current landscape before beginning work to reference plant locations or irrigation system layouts later.

Walk through the area and identify irrigation lines using flags or spray paint. Look for sprinkler heads, drip irrigation tubing, and main water lines that run beneath the rock bed. Mark these locations clearly to prevent accidental damage during removal. Contact your irrigation company if you cannot locate all system components.

Check for utility lines by calling 811 at least two business days before starting work. Gas, electric, and cable lines sometimes run through landscape beds. Professional marking services provide this safety check at no cost to homeowners.

Step 2: Remove Surface Rocks

Begin with surface rocks using a hard rake to loosen materials. Pull rocks toward yourself rather than pushing them away for better control and less back strain. Work from one corner to create clear pathways for wheelbarrow access.

Use a flat shovel for embedded stones that resist rake removal. Insert the shovel blade beneath rocks at a shallow angle to pop them free from surrounding soil. Avoid aggressive chopping motions that can damage underground irrigation components or create unnecessary soil disturbance.

Load rocks directly into wheelbarrows or onto tarps for transport. Fill containers to comfortable lifting weights rather than maximum capacity. Most people handle 50-75 pounds per load without excessive strain. Make multiple trips to maintain safe working conditions.

Sort materials as you work when planning to reuse rocks. Separate quality stones from broken pieces and soil-contaminated materials. Clean rocks command better resale prices and work better for future landscape projects.

Step 3: Sift or Clean Rocks (Optional)

Set up screening equipment using hardware cloth or commercial soil sifters. Choose mesh sizes based on your smallest rocks to retain valuable materials while removing dirt and debris. The quarter-inch screen works well for most landscape rock applications.

Work in small batches to maintain efficiency and prevent material buildup. Shake screens gently to separate soil without damaging rocks. Use garden hoses to rinse stubborn dirt from valuable stones when planning reuse or resale.

Create separate piles for different rock grades and sizes. Group similar materials together for easier handling during disposal or relocation. Label piles clearly if working over multiple days to maintain organization.

Consider soil disposal separately from rock removal. Contaminated soil may require special handling depending on your area’s environmental regulations. Clean soil can often be reused for garden bed amendments or lawn repair projects.

How to Remove Landscape Rock: Step-by-Step DIY Guide

Step 4: Pull Up Landscape Fabric or Plastic

Locate fabric edges by feeling along rock bed perimeters or looking for visible material borders. Most installations extend slightly beyond rock coverage areas. Start removal from corners or edges where fabric typically overlaps.

Cut degraded fabric into manageable sections using utility knives or heavy scissors. Old landscape fabric often tears during removal, making large piece extraction difficult. Work systematically to prevent leaving fabric remnants in the soil.

Check fabric condition as you remove each section. Intact materials in good condition can be reused for future landscape projects or other properties. Dispose of torn, brittle, or chemically degraded fabric according to local waste management guidelines.

Remove all staples, pins, and securing hardware completely. These metal pieces create safety hazards and interfere with future planting or lawn installation. Use pliers or pry bars to extract stubborn fasteners embedded in hard soil.

Step 5: Level the Ground

Smooth exposed soil using garden rakes to eliminate high and low spots created during rock removal. Work soil when moisture content allows easy manipulation without creating hard clods or muddy conditions.

Fill depressions with quality topsoil or compost amendments when planning garden installations. Avoid using excavated soil that may contain fabric remnants or poor-quality fill materials.

Test soil drainage by digging small test holes and observing water infiltration rates.

Grade surfaces to promote proper water drainage away from structures and toward appropriate outlets. Maintain gentle slopes of one to two percent to prevent water pooling while avoiding erosion problems during heavy Denver rainfall events.

Add soil amendments based on your next landscape phase. Garden beds benefit from compost or aged manure incorporation. Lawn areas may require different soil preparations depending on seed or sod installation requirements.

Easiest Way to Remove Large Quantities of Rock

Rock Vacuum Systems

Rock vacuums handle loose materials quickly and efficiently. These specialized machines suction rocks directly into collection containers, eliminating manual loading and transport. Rental companies in Denver offer daily and weekly rates for homeowner projects.

Skid Steer Loaders

Skid steer equipment moves tons of stone in hours rather than days. These compact machines navigate residential yards while providing substantial lifting capacity. Experienced operators can complete large removals with minimal landscape disruption.

Mini Excavators

Mini excavators excel at removing deeply embedded rock installations. Their precision digging capabilities separate rocks from soil while preserving surrounding landscape features. Rental packages typically include operator training or professional service options.

Professional Landscape Removal Teams

Landscape contractors offer complete removal solutions for whole-yard conversions. Professional teams provide specialized equipment, experienced operators, and proper disposal services in single packages. This approach works best for major redesign projects or time-sensitive renovations.

Easiest Way to Remove Large Quantities of Rock

How to Dispose of Landscape Rock in Denver

Step 1: Assess Your Rock Quality and Quantity

Clean and sort your removed rocks by size and condition. Separate high-quality stones from broken or soil-contaminated materials. Measure or estimate total volume to determine the best disposal method for your quantity.

Step 2: Consider On-Site Reuse First

Plan creative reuse projects before disposal. Use quality rocks for garden pathways, decorative borders, or dry creek beds. Create drainage areas around downspouts or low-lying sections of your property. This option eliminates disposal costs entirely.

Step 3: Sell or Give Away Quality Materials

Post clean rocks on online marketplaces like Craigslist, Nextdoor, or Facebook Marketplace. Include photos and accurate measurements in your listings. Price rocks competitively based on local market rates, typically $20-50 per cubic yard for quality materials.

Step 4: Clean Rocks for Recycling

Remove all landscape fabric, soil, and organic debris from rocks destined for recycling centers. Use garden hoses or pressure washers to clean materials thoroughly. Contaminated loads face rejection or additional processing fees at recycling facilities.

Step 5: Transport to Recycling Centers

Contact facilities like Arvada Recycling or local rock yards to confirm acceptance policies and hours. Load clean rocks into pickup trucks or trailers for transport. Weigh loaded vehicles if facilities charge by tonnage rather than volume.

Step 6: Rent Dumpster for Mixed Debris

Order appropriate dumpster sizes for projects with mixed landscape waste. Combine rocks with other materials like old plants, fabric, and soil to maximize container value. Check weight limits carefully, as rocks add substantial weight quickly.

Safety Considerations for Landscape Rock Removal

Protective gear prevents common injuries during rock removal projects:

  • Heavy-duty gloves provide essential grip and hand protection.
  • Steel-toe boots shield feet from dropped stones. Safety glasses block dust and debris.
  • Dust masks reduce respiratory irritation from dry materials. Use N95 or better filtration for extended exposure periods.

Proper lifting technique protects your back during repetitive tasks. Bend your knees when picking up rocks. Avoid twisting motions while carrying heavy buckets. Take regular breaks to prevent muscle fatigue.

Call 811 before digging to locate buried utilities. Gas, electric, and water lines may run beneath landscape beds. Accurate marking prevents costly damage and safety hazards.

Conclusion

How to remove landscape rock successfully requires planning, proper tools, and realistic timeline expectations. Whether you choose DIY methods or professional services, removing outdated materials creates opportunities for landscape improvement.

The best way to remove rock landscaping depends on your specific situation. Small projects work well as weekend DIY tasks. Large installations benefit from professional equipment and expertise.

Rock removal represents the first step toward yard revitalization. You’ll reclaim space for gardens, improve drainage patterns, and increase property value through thoughtful redesign.

If you need help with landscape rock installation or removal, contact us today! Our experienced team delivers quality results that exceed expectations, giving you the chance to enjoy your beautiful landscape rocks.

Frequently Asked Questions (FAQs)

Can I reuse rock I remove from one part of the yard?

Yes, clean landscape rocks work well for drainage projects, pathways, and decorative borders. Screen out soil and debris before reusing materials. Quality stones maintain value for future landscape applications.

Who removes rocks from a yard?

Landscape contractors, excavation companies, and specialized removal services handle rock removal projects. DIY removal works for small areas. Professional services provide equipment and disposal for larger installations.

Will a landscape rake remove rocks?

Landscape rakes handle surface rocks and loose materials effectively. They cannot remove embedded stones or deep installations. Combine raking with shoveling for complete removal of mixed materials.

Can I recycle old lava rock in Denver?

Yes, several Denver-area facilities accept clean lava rock for recycling. Remove all fabric, soil, and organic matter before transport. Contact recycling centers for current acceptance policies and drop-off procedures.

Do I need a permit or inspection to remove landscaping rock?

Generally, no permits are required for landscape rock removal in Denver. However, check HOA requirements and city codes for your specific area. Large excavation projects may require utility marking and inspection.

4.8/5 - (900 votes)

Colorado’s arid climate presents challenges for homeowners who want beautiful xeriscape landscapes without sky-high water bills. Traditional grass lawns demand irrigation, fertilization, and maintenance – a costly cycle that fights against nature’s design.

This comprehensive guide features 10 xeriscape design templates, plus expert guidance on selecting the perfect template for your property’s unique conditions.

These professionally crafted plans provide plant placement, spacing guidelines, and seasonal structure tailored specifically for Denver’s climate zone. Simply download, follow the layout, and watch your yard transform into a sustainable oasis.

What Are Xeriscape Design Templates?

Xeriscape design templates are created landscape blueprints engineered for low-water use in arid and semi-arid climates.

These detailed plans specify exact plant placement, sun and shade orientation requirements, soil compatibility factors, and proper spacing measurements for optimal growth.

Each template eliminates the trial-and-error approach that often leads to plant failures and wasted investment. The designs incorporate plant for xeriscaping that provide seasonal interest throughout the growing season, from spring emergence through winter dormancy. 

Templates also address practical concerns like maintenance access, growth patterns, and long-term sustainability.

Expert Tip: Templates simplify DIY landscaping for first-timers and homeowners working within tight budgets, providing professional-level planning without consultation fees.

What Are Xeriscape Design Templates?

Key Features of a Good Xeriscape Landscape Design

Effective xeriscape templates incorporate specific elements that ensure long-term success in Denver’s challenging climate conditions.

  • Water zones and hydrozoning form the foundation of smart xeriscaping. Quality templates group plants with similar water needs, creating distinct irrigation zones that prevent overwatering drought-tolerant species or underwatering transitional plants.
  • Low-maintenance plant groupings reduce ongoing care requirements (pruning, deadheading,…) Professional templates select species that complement each other’s growth habits, bloom times, and mature sizes.
  • Soil-appropriate species selection addresses Denver clay soils and alkaline pH levels. Quality templates specify plants that thrive in these conditions rather than requiring extensive soil amendments.
  • Year-round structure and visual interest ensure landscapes remain attractive through all seasons. Templates incorporate evergreen shrubs, ornamental grasses, and plants with interesting bark or seed heads that provide winter appeal when herbaceous perennials enter dormancy.
  • Color and bloom succession planning creates continuous garden interest from spring through fall. Professional templates sequence flowering times to ensure something remains in bloom throughout the growing season.
  • Defined paths, borders, and hardscaping zones provide structure and functionality. Quality templates incorporate non-plant elements like mulched walkways, decorative rock areas, or small patio spaces that reduce planted area.
  • Pollinator and wildlife support reflects modern ecological awareness. Contemporary templates include native species that support local bee populations, birds, and beneficial insects, creating landscapes that contribute to regional ecosystem health.

[Free] 10 Xeriscape Design Templates For Your Yard

#1: Front Yard Pollinator Garden

This front yard template transforms traditional turf areas into thriving pollinator habitat and maintains curb appeal that satisfies neighborhood standards.

The design features carefully selected native perennials and ornamental grasses arranged in flowing drifts that mimic natural prairie patterns.

Best For: Full sun exposures, small to medium front yards (500-1,500 square feet), and HOA-compliant xeriscaping requirements. This template works particularly well for homeowners who want to support local wildlife while reducing maintenance demands.

Key plants include:

  • Purple Prairie Clover
  • Penstemon
  • Blue Grama grass

The design incorporates seasonal bloom succession from spring Pasque Flowers through fall-blooming asters, ensuring continuous color and pollinator resources.

Front Yard Pollinator Garden

#2: Low-Water Backyard Entertaining Zone 

This backyard template combines hardscape entertainment areas with placed ornamental beds, creating functional outdoor living space that requires minimal irrigation.

Best For: Medium to large backyards where entertainment and relaxation take priority over extensive planting. This template suits families who want outdoor gathering spaces without traditional high-maintenance lawns.

The plan includes defined patio zones using permeable pavers or flagstone, surrounded by drought-tolerant plantings that provide privacy screening and seasonal interest. Buffalo grass or blue grama alternatives replace traditional turf in smaller, functional areas.

Low-Water Backyard Entertaining Zone

#3: Shade-Friendly Woodland Edge

Urban properties often feature significant shade from mature trees or neighboring structures.

This specialized template addresses these challenging conditions with drought-tolerant plants that thrive in partial to full shade environments.

Best For: North-facing yards, tree-lined properties, or areas receiving less than 6 hours of direct sunlight daily. This design particularly benefits homeowners dealing with competition from established tree root systems.

Featured plants include Coral Bells, Creeping Mahonia, and Wild Ginger – species that provide color, texture, and seasonal interest while tolerating both shade and drought conditions.

Shade-Friendly Woodland Edge

#4: Parkway Strip Conversion Design

Narrow parkway strips between sidewalks and curbs present unique landscaping challenges, including road salt exposure, foot traffic, and restricted planting depth. This template addresses these constraints and creates attractive streetscape improvements.

Best For: Urban homeowners required to maintain parkway strips or those wanting to eliminate grass mowing in these difficult areas. The design works well for properties with HOA requirements for maintained frontage.

The template features low-growing, traffic-tolerant species like Yarrow, Blue Grama grass, and decorative mulch zones that provide visual appeal while withstanding urban stresses. Installation requires minimal soil depth and establishes quickly.

Parkway Strip Conversion Design

#5: Slope Stabilizer Design

Sloped properties face erosion challenges that intensify during Colorado’s intense but infrequent rainfall events.

Best For: Hillside properties, backyards with significant grade changes, or areas experiencing erosion problems. This design particularly benefits homeowners dealing with drainage issues or soil movement.

The plan emphasizes deep-rooted native grasses, spreading groundcovers, and low shrubs that bind soil while requiring minimal water inputs. Species selection focuses on rapid establishment and long-term soil stabilization performance.

Slope Stabilizer Design

#6: Xeric Corner Lot with Privacy Focus

Corner lot properties often lack natural privacy screening, facing increased visibility from multiple directions. This template creates attractive borders that provide seclusion without appearing fortress-like or unfriendly.

Best For: Corner lots, properties adjacent to busy streets, or yards requiring noise buffering. The design suits homeowners who want privacy without sacrificing aesthetic appeal or neighborhood integration.

Tall shrub selections include Serviceberry, Oakleaf Sumac, and native Currants arranged in layered plantings that create visual barriers. The design incorporates viewing windows and varies heights to avoid monotonous screening walls.

Xeric Corner Lot with Privacy Focus

#7: Native Grass + Boulder Front Yard Mix

Modern landscape aesthetics increasingly favor clean lines and minimalist plant palettes.

This template delivers contemporary appeal while celebrating Colorado’s natural grassland heritage through thoughtful design and material selection.

Best For: Homeowners preferring modern, low-maintenance landscapes with strong architectural elements. This design particularly suits contemporary home styles and owners who appreciate minimalist outdoor spaces.

The template combines ornamental boulders with native grass matrices, creating striking visual contrasts. Featured grasses include Little Bluestem, Buffalo Grass, and Blue Grama in geometric or flowing arrangements.

Native Grass + Boulder Front Yard Mix

#8: Mixed Wildflower + Grass Meadow Plan

Large properties offer opportunities to apply many xeriscaping ideas and create naturalistic landscapes that mimic Colorado’s native ecosystems while providing habitat and seasonal drama.

This template recreates prairie conditions using proven plant combinations.

Best For: Large lots, rural properties, or homeowners wanting naturalistic landscapes that support wildlife populations. The design suits those who appreciate informal, meadow-like aesthetics over manicured garden styles.

Plant selections include native wildflowers like Penstemon, Blanket Flower, and Indian Blanket combined with structural grasses such as Little Bluestem and Side-oats Grama. The design creates flowing color masses that change throughout the growing season.

Mixed Wildflower + Grass Meadow Plan

#9: Garden-In-A-Box Templates

These modular, pre-planned designs simplify xeriscaping for beginners by providing complete plant lists, spacing guides, and installation instructions. Each box covers 100-200 square feet with themed plant combinations.

Best For: First-time xeriscapers, renters wanting portable designs, or homeowners preferring step-by-step guidance. These templates work well for those who want professional results without extensive planning time.

Available themes include “Cool Season Color,” “Sunset Prairie,” and “Pollinator Paradise,” each featuring plant combinations that establish quickly and provide immediate impact.

Garden-In-A-Box Templates

#10: Small Urban Yard Xeriscape Plan

Urban lots often feature challenging conditions including limited space, soil contamination, and microclimatic extremes. This template maximizes visual impact while addressing common urban gardening constraints.

Best For: Townhomes, condominiums, or compact urban lots where every square foot matters. The design suits homeowners dealing with typical urban challenges like poor soil, limited sun, and small growing areas.

The plan emphasizes vertical layering, container integration, and multi-season plants that provide maximum visual return on limited space investment. Featured species perform well in urban microclimates while requiring minimal water and maintenance inputs.

Small Urban Yard Xeriscape Plan

How to Choose the Right Xeriscape Design for Your Yard

Selecting the appropriate template requires honest assessment of your property’s physical conditions and your personal landscape goals.

  1. Start by documenting sun exposure patterns throughout your yard during different seasons, noting areas that receive full sun, partial shade, or deep shade conditions.
  2. Evaluate slope and drainage patterns by observing water movement during rain events. Properties with steep grades require erosion-control focused designs, while flat areas offer more flexible template options.
  3. Identify your landscape objectives before committing to specific templates. For example, homeowners prioritizing entertainment should select designs incorporating hardscape areas and comfortable sight lines. Those dealing with privacy concerns need templates that incorporate screening elements without creating fortress-like appearances.
  4. Measure your available planting area before selecting templates. Many designs specify square footage requirements, and attempting to compress large-scale templates into small spaces often produces disappointing results.

If you want to create your xeriscape DIY, check out our free guide about how to xeriscape your yard here!

If you’re looking for professional help from xeriscape companies near Denver, Mile High Lifescape is your way to go. Our experienced team can recommend template modifications or custom design solutions that ensure your xeriscaping investment delivers lasting beauty and water savings.

Conclusion

Xeriscape design templates eliminate the uncertainty that prevents many homeowners from embracing water-wise landscaping. These developed plans provide the structure and plant selection guidance needed to create stunning landscapes in Colorado.

Start your xeriscaping journey today with confidence, knowing that your chosen template has been tested and refined by Colorado’s leading landscape professionals.

Frequently Asked Questions (FAQs)

Can I modify a template to fit my oddly shaped yard?

Most xeriscape templates can be adapted to accommodate irregular lot shapes or unique site conditions. Focus on maintaining the recommended plant groupings and spacing ratios while adjusting the overall layout to fit your space.

Are these designs HOA-friendly?

The majority of developed xeriscape templates comply with standard HOA landscape requirements, particularly those emphasizing front yard curb appeal and maintained appearances. However, review your specific HOA guidelines before installation, as some associations maintain restrictions on plant types, mulch materials, or overall landscape styles.

Do the templates include plant care instructions?

Most comprehensive templates provide basic establishment care guidelines, including initial watering schedules, mulching recommendations, and first-year maintenance requirements. However, detailed ongoing care instructions vary by source. Supplement template information with guides from Colorado State University Extension or consult with local gardening experts for maintenance schedules and care requirements.

4.8/5 - (1496 votes)

How to install landscape rock in Denver yards? The answer lies in knowing why rock landscaping matches our region’s demanding conditions.

These rocks thrive where traditional lawns struggle, offering water conservation that reduces utility costs while maintaining visual appeal year-round. Besides, the benefits extend beyond durability.

Rock installations eliminate weekly mowing, seasonal fertilizing, and constant watering that grass demands. They resist wind erosion common at our altitude while providing structural elements that enhance property value.

This guide provides step-by-step instruction for successful rock installation using professional techniques. You’ll discover material selection strategies, soil preparation methods, and installation processes specifically designed for Denver climate.

Tools and Materials You’ll Need for Installation

Successful rock installation requires the right equipment and materials. Gather these items before starting your project:

Essential Materials:

  • Landscape rock (river rock, decomposed granite, crushed stone, or lava rock)
  • Commercial-grade landscape fabric with UV resistance
  • Steel or concrete edging material
  • Landscape staples and utility knife
  • Sand or gravel for base preparation

Required Tools:

  • Shovel and bow rake for spreading
  • Hand tamper or plate compactor rental
  • Wheelbarrow or landscape cart
  • Measuring tape and marking spray
  • Garden hose for cleanup

Purchase 10% more rock than your calculated needs. This accounts for settling and allows for border adjustments. Calculate your rock needs by multiplying length times width times depth in feet, then divide by 27 for cubic yards.

Most installations use 2-3 inches of depth for decorative gravel and 3-4 inches for river rock applications.

Tools and Materials You'll Need for Installation
Tools and Materials You’ll Need for Installation

How to Install Landscape Rock: Step-by-Step Guide

Step 1: Plan and Measure Your Rock Area

Start by sketching your installation area and calculating square footage. Measure length and width carefully, noting any irregular shapes or slopes. Use marking spray to outline borders clearly.

Choose appropriate depth based on rock type and traffic patterns. Walkway areas need 2 inches maximum to prevent shifting. Decorative beds can handle 3-4 inches for better weed suppression.

Pro tip: Use online calculators to convert square footage into cubic yards needed. Most suppliers sell by the cubic yard or ton.

Step 2: Clear the Area and Remove Weeds

Remove all existing vegetation, including grass, weeds, and root systems. Use a sharp spade to cut clean edges. For large areas, rent a sod cutter to save time and reduce back strain.

Spray persistent weeds like bindweed with herbicide two weeks before installation. This prevents regrowth through your new rock bed.

Pro tip: Schedule clearing work for early spring or fall when soil moisture makes removal easier. Summer installations require pre-watering to soften compacted clay.

Step 3: Grade the Soil and Ensure Drainage

Create proper drainage by sloping away from structures at minimum 2% grade. This prevents water accumulation against foundations during snowmelt season.

Remove rocks, debris, and organic matter from the soil surface. Compact loose areas with a hand tamper. Add sand to low spots and rake smooth.

Pro tip: Rent a plate compactor for areas larger than 200 square feet. Proper compaction prevents settling and maintains rock depth consistency.

Step 4: Install Edging to Contain Rock

Install edging material along all borders to prevent rock migration. Steel edging provides the most durability, while concrete offers permanent definition. Plastic bender board works for curved areas.

Dig a narrow trench for edging placement. Position the top edge level with your planned rock surface. Secure with stakes every 2-3 feet.

Pro tip: Choose edging height that matches your rock depth. Visible edging creates clean lines and easier maintenance.

How to Install Landscape Rock: Step-by-Step Guide

Step 5: Lay Landscape Fabric

Install commercial-grade landscape fabric over the prepared soil. Cut fabric to fit your area, allowing 6-8 inches of overlap at seams. Avoid plastic sheeting, which blocks drainage and creates plant problems.

Secure fabric with landscape staples every 3 feet along edges and seams. Cut X-shaped openings only where plants will be installed.

Pro tip: Use fabric rated for commercial applications. Residential-grade materials degrade quickly under Denver’s intense UV exposure.

Step 6: Spread the Rock Evenly

Pour rock in manageable piles across the fabric surface. Use a bow rake to spread material evenly, working from one end to the other. Maintain consistent depth throughout.

Avoid walking on fabric during installation. Work from outside the bed or use temporary boards to distribute weight.

Pro tip: Rinse dusty rock materials before installation near patios or walkways. This prevents tracking and staining.

Step 7: Clean Up and Finish Edges

Remove installation debris and excess material. Rake edges smooth and check depth consistency. Rinse nearby hardscapes to remove rock dust.

Add accent boulders or drought-tolerant plants to complete your design. Water any planted areas thoroughly to establish roots.

Pro tip: Walk the perimeter and adjust rock levels for consistent appearance. Small adjustments make significant visual improvements.

DIY vs. Hiring a Professional in Denver: What to Consider

Consider these factors when deciding between DIY installation and professional services:

  • Cost Comparison: DIY projects cost $2-4 per square foot for materials only. Professional installation ranges $8-12 per square foot but includes labor, tools, and expertise.
  • Time Investment: DIY installations require 1-3 days per 500 square feet, depending on soil conditions and complexity. Professionals complete similar areas in 1-2 days total.
  • Skill Requirements: DIY projects demand physical labor, planning skills, and tool operation knowledge. Professional services provide turnkey solutions with guaranteed results.
  • Quality Considerations: DIY work quality varies with experience level. Professional installations include warranties and use proven techniques for long-term success.
  • Denver-Specific Factors: Local professionals understand clay soil challenges, drainage requirements, and material selection for Colorado conditions. They also handle permit requirements and HOA compliance.

For slopes steeper than 15%, complex drainage issues, or areas exceeding 1,000 square feet, professional installation often provides better value through expertise and efficiency.

Mile High Lifescape offers custom landscape rock installation with Denver soil expertise and drainage solutions tailored to Front Range conditions.

Common Mistakes to Avoid When Installing Landscape Rock

Avoid these installation errors that compromise long-term success:

  • Inadequate Weed Removal: Skipping thorough vegetation removal allows weeds to penetrate rock surfaces. Bindweed and other persistent species will find gaps and create maintenance problems.
  • Poor Fabric Installation: Improper overlap or inadequate securing leads to fabric movement and weed breakthrough. Use commercial-grade materials and follow manufacturer specifications.
  • Excessive Rock Depth: Installing rock deeper than 4 inches creates walking difficulties and wastes material. Most applications function best with 2-3 inches of coverage.
  • Drainage Neglect: Failing to plan for water movement causes pooling, erosion, and ice damage. Denver’s snowmelt patterns require careful grade consideration.
  • Wrong Rock Selection: Choosing inappropriate materials for traffic areas creates safety hazards. Small gravel shifts underfoot, while large river rock provides stable walking surfaces.
  • Edge Containment Issues: Skipping edging installation or using inadequate materials allows rock migration and reduces visual appeal. Proper containment maintains clean lines and prevents maintenance problems.

Common Mistakes to Avoid When Installing Landscape Rock

Conclusion

Landscape rock installation provides Denver homeowners with water-efficient, low-maintenance outdoor solutions that enhance property value and reduce long-term care requirements. Proper installation techniques ensure decades of performance with minimal upkeep needs.

Success depends on thorough preparation, quality materials, and attention to drainage details specific to Colorado’s climate conditions. Whether you choose DIY installation or professional services, following proven methods creates lasting results.

Start with smaller areas to gain experience, or partner with Mile High Lifescape to transform your entire yard efficiently. If you need landscape rocks near me in Denver, our team understands local soil conditions and climate challenges, delivering custom solutions that exceed expectations.

Frequently Asked Questions (FAQs)

What do you put down before rocks for landscaping?

Before placing rocks for landscaping, install landscape fabric or similar barrier material over prepared soil. This prevents weed growth and soil displacement while allowing proper drainage.

What’s the best time of year to install landscaping rock in Denver?

The best time to install landscaping rock in Denver is during spring or fall when weather conditions remain favorable for outdoor work. Spring installation allows summer establishment before winter, while fall timing takes advantage of cooler temperatures and reduced UV exposure. Avoid summer installation during peak heat periods and winter when ground freezing complicates soil preparation.

Can I mix mulch and rock in the same yard?

Yes, you can mix mulch and rocks in the same yard to create visually appealing and practical landscaping solutions. Use organic mulch around plants requiring moisture retention and nutrients, while placing rock in high-traffic areas and slopes where durability matters most.

How to make landscape rocks stay in place?

Keep landscape rocks in place using several proven techniques:

  • Install quality landscape fabric as a foundation layer.
  • Add steel or concrete edging along borders to prevent migration.
  • Choose appropriate rock sizes for the application – larger materials shift less than small gravel.
  • Create proper drainage to prevent water movement that displaces materials. Compact the base thoroughly before rock installation.

How deep to lay landscape rock?

For most decorative landscape rock applications, maintain a depth of 2-3 inches for optimal results. Walkway areas need 2 inches maximum to prevent shifting and tripping hazards. Decorative beds can handle 3-4 inches for better weed suppression.

4.8/5 - (1348 votes)

How to clean landscape rocks? To clean landscape rocks, start by removing loose debris like leaves and dirt with a broom or blower. Then, use a garden hose or pressure washer to rinse away dirt and grime.

Landscape rocks accumulate dirt, debris, and stains over time, diminishing your yard’s appeal and potentially harboring pests.  Dust particles settle deep into rock crevices, while spring pollen and organic matter accumulate throughout growing seasons.

That’s why understanding how to clean landscape rocks properly is important to restore their natural beauty while extending their lifespan. This comprehensive guide provides Denver homeowners with proven techniques to maintain pristine rock features year-round.

Identify Your Rock Type Before You Clean

Different rock types require specific cleaning methods to avoid damage and achieve optimal results. There are 4 common types of rock:

  1. River rock features smooth surfaces that rinse easily but develop algae buildup in shaded, moist areas. These rocks respond well to pressure washing and gentle scrubbing with mild detergents.
  2. Gravel and crushed stone create compact surfaces that trap debris between particles. These materials benefit from blowing and raking rather than heavy water applications that can displace smaller fragments.
  3. White marble chips stain from organic matter and require gentle cleaning methods to prevent discoloration. Harsh chemicals can permanently damage these decorative stones.
  4. Lava rock contains porous surfaces that trap dirt and organic material deep within the stone structure. This rock type needs brushing and thorough rinsing to remove embedded particles.

Identify Your Rock Type Before You Clean

What You’ll Need: Rock Cleaning Tools & Supplies

Gathering proper equipment before starting ensures efficient cleaning and prevents damage to surrounding plants and hardscaping features.

Essential tools include:

  • A garden hose with adjustable spray nozzle or low-pressure washer for rinsing operations
  • A leaf blower or rake removes surface debris without disturbing rock placement.
  • A stiff-bristled broom or scrub brush for manual cleaning of stubborn stains and embedded dirt.
  • A wheelbarrow for transporting rocks during deep cleaning procedures.
  • Protective gear such as gloves and safety goggles prevents injury from flying debris and chemical splash.

Cleaning solutions include: Mild dish soap or white vinegar mixed with water.

Environmental considerations require avoiding bleach or harsh degreasers that can contaminate soil and harm xeric plants. Denver’s water restrictions may limit cleaning times to early morning or evening hours when evaporation rates decrease.

How to Clean Landscape Rocks in Place: Step-by-Step Process

Cleaning rocks without removal works best for established beds, borders, and large installations where disruption would damage surrounding plants or hardscaping.

Step 1: Remove Surface Debris

Begin by clearing all visible leaves, twigs, and organic matter using a leaf blower or rake. Pull any weeds or seedlings growing between rocks by hand, ensuring complete root removal. Work systematically across the entire area to prevent debris from migrating to cleaned sections.

Timing this step during dry conditions makes debris removal more efficient and prevents muddy conditions. Denver’s frequent afternoon winds can redistribute debris, so complete this phase during calm morning hours.

Step 2: Initial Water Rinse

Apply water using a garden hose with trigger nozzle or pressure washer on low setting. Work in manageable sections to control runoff and prevent erosion of surrounding soil. Direct water flows away from building foundations and toward designated drainage areas.

Denver’s water conservation requirements suggest using minimal pressure settings and avoiding waste through controlled application. Morning or early evening watering reduces evaporation and allows thorough penetration into rock crevices.

How to Clean Landscape Rocks in Place

Step 3: Targeted Cleaning of Problem Areas

Mix mild soap or white vinegar with warm water in a 1:4 ratio for an effective cleaning solution. 

Apply this mixture to areas showing algae growth, pet stains, or persistent discoloration using a stiff brush or scrub pad.

Scrub in circular motions to dislodge embedded material without displacing rocks from their intended positions. Focus attention on high-traffic areas and locations with visible staining or organic buildup.

Rinse immediately after scrubbing to prevent soap residue accumulation that can attract additional dirt and debris. Avoid soaking areas near sensitive plant root zones to prevent oversaturation and potential root rot.

Step 4: Final Rinse and Restoration

Conduct a thorough final rinse to remove all cleaning solutions and loosened debris. Allow rocks to air dry completely before making any adjustments to placement or adding fresh material.

Rake rocks back to even levels and restore proper coverage over weed barrier fabric. Inspect for areas requiring additional rock material to maintain consistent depth and appearance.

Consider applying a thin layer of fresh rock material if existing coverage appears thin or weathered. This top-dressing restores visual appeal and provides continued weed suppression.

How to Clean Large Landscaping Rocks

Large decorative rocks and accent boulders require specialized cleaning approaches due to their size and permanent placement within landscape designs.

Step 1: Prepare the Cleaning Area

Cover surrounding vegetation with plastic sheeting or tarps to protect plants from cleaning solutions and high-pressure water. Position yourself safely around the boulder to access all surfaces without straining or losing balance.

Step 2: Apply Initial Water Pressure

Use a pressure washer on medium setting or garden hose with jet nozzle to remove loose dirt and debris. Maintain consistent distance from the rock surface to ensure even cleaning without creating damage or etching patterns.

Step 3: Scrub Textured Surfaces

Mix mild vinegar with water in a 1:3 ratio and apply using a long-handled brush for textured boulder surfaces. Work from top to bottom in systematic sections to prevent dirty water from re-contaminating cleaned areas.

Step 4: Target Problem Areas

Focus additional scrubbing attention on moss, mildew, or algae growth typically found in shaded crevices and north-facing surfaces. Use stiff brushes to dislodge biological growth without damaging natural rock texture.

Step 5: Final Rinse and Inspection

Conduct thorough rinsing to remove all cleaning residue and prevent white vinegar deposits that can alter natural rock coloration. Inspect all surfaces for remaining contamination and repeat cleaning as needed before allowing air to dry.

How to Clean Large Landscaping Rocks

How to Clean Rocks in Landscape Beds or Pathways

Rocks integrated within planted areas or forming pathways require careful cleaning methods that minimize disruption to surrounding features.

Step 1: Assess Plant Proximity

Identify sensitive plants near rock areas and plan a cleaning approach to avoid root zone flooding or chemical contact. Mark areas requiring extra caution during water application phases.

Step 2: Remove Debris Without Disturbance

Use leaf blowers on low settings or hand rakes to remove surface debris without disturbing rock placement or nearby plant roots. Work methodically to prevent debris migration to cleaned sections.

Step 3: Apply Targeted Water Cleaning

Rinse rocks using a garden hose with a trigger nozzle for precise water control. Focus on individual rock surfaces rather than flooding entire areas to prevent soil erosion and plant damage.

Step 4: Spot-Treat Visible Stains

Apply diluted cleaning solutions using spray bottles for precise application on stained areas. This targeted approach minimizes chemical exposure to surrounding plants while effectively addressing problem spots.

How to Clean Rocks in Landscape Beds or Pathways

Step 5: Pathway-Specific Maintenance

For walkway rocks, sweep regularly to prevent grinding action that embeds particles deeper into surfaces. Top-dress annually with fresh material and refresh polymeric sand between joints to maintain pathway integrity.

Step 6: Restore Edge

Use edging tools to re-establish clean borders between rock pathways and adjacent planted beds or paved surfaces. This prevents rock migration and maintains design integrity.

How to Clean White Landscape Rocks

White decorative rocks (Marble, Quartz Chips) present unique cleaning challenges due to their tendency to show stains and discoloration more readily than darker materials.

Step 1: Dry Debris Removal

Remove all surface dirt using leaf blowers before applying any water to prevent mud formation that can permanently stain light-colored surfaces. Work during dry conditions for optimal debris lifting.

Step 2: Test Cleaning Solutions

Test cleaning solutions on inconspicuous rock samples first to ensure no adverse reactions occur with specific stone types. Use 1:1 water and white vinegar mixture as a standard cleaning solution.

Step 3: Gentle Spot Cleaning

Apply cleaning solution to stained areas using soft brushes and gentle circular motions. Avoid aggressive scrubbing that can create surface scratches visible on light-colored materials.

Step 4: Immediate Rinse Protocol

Rinse cleaned areas immediately after scrubbing to prevent cleaning solution residue that can attract additional dirt or cause discoloration. Use clean water and thorough coverage.

Step 5: Deep Cleaning for Severe Stains

For heavily stained rocks, remove affected stones and clean on mesh screens or tarps away from landscape areas. This intensive approach allows thorough cleaning without contaminating surrounding features.

Step 6: Preventive Barrier Installation

Install light-colored weed barriers beneath white rocks to prevent dark soil from showing through thin coverage areas. This preventive measure maintains consistent appearance and reduces future cleaning requirements.

How to Clean White Landscape Rocks

Tips for Keeping Your Landscape Rock Clean Long-Term

Preventive maintenance reduces cleaning effort and extends rock life through proactive care strategies tailored to Denver’s climate conditions:

  • Apply pre-emergent weed treatments twice annually during early spring and late fall. These applications create barriers that reduce organic matter accumulation and simplify maintenance routines.
  • Monthly debris removal using rakes or leaf blowers prevents organic matter decomposition that creates staining and provides nutrients for unwanted plant growth.
  • Top-dress thin or sunken areas every one to two years with fresh rock material. This maintenance preserves consistent coverage depth, restores visual appeal and maintains effective weed suppression.
  • Install drip irrigation systems to minimize splash and mud buildup around rock features.
  • Add decorative boulders or anchor plants to reduce wind-blown debris accumulation in exposed areas.

Conclusion

Clean landscape rocks transform outdoor spaces into attractive, functional environments that require minimal ongoing maintenance. Regular attention using proper techniques ensures rock features remain beautiful and effective for years while supporting healthy plant growth and soil conditions.

Simple tools and seasonal maintenance routines keep rock landscapes looking their best without expensive replacement or renovation projects. Denver homeowners can achieve professional results through consistent care and appropriate cleaning methods.

For complex cleaning challenges, extensive renovations, or new rock installations, Mile High Lifescape provides landscape rocks Denver services throughout the Denver Metro area. Our experienced team understands local conditions and delivers lasting solutions for all landscape needs.

Contact us at (303) 877-9091 or [email protected] today!

Frequently Asked Questions (FAQs)

How do you clean dirt and leaves out of landscape rocks?

Use a leaf blower or rake to remove surface debris first, then rinse with a garden hose using controlled pressure to avoid displacing rocks. Work systematically across the area during dry conditions for best results.

How to make landscape rocks look wet permanently?

Apply rock sealers or stone enhancers designed for outdoor use. These products create glossy finishes that simulate wet appearance while providing protection against staining and weathering.

How do you refresh landscaping rocks?

Remove debris, clean thoroughly with appropriate methods for your rock type, then add fresh material to restore proper depth and coverage. Consider applying stone enhancers for renewed color and protection.

How often should I clean my rock landscape in Denver?

Clean rock landscapes twice per year – once in spring after winter debris accumulation and again in fall before winter weather. Monthly debris removal and spot cleaning maintain appearance between major cleanings.

Will vinegar harm my surrounding plants or soil?

No, when properly diluted and applied sparingly. White vinegar in 1:4 water ratios breaks down organic matter without harming plants. Rinse thoroughly after cleaning to prevent soil pH changes from concentrated applications.

4.8/5 - (1210 votes)

Scroll to Top